Saturday, October 31, 2020

What do you do when you buy a car from a private owner?

What do you do when you buy a car from a private owner

What do you do when you buy a car from a private owner? Different people will answer this question differently. Some will tell you to run the car’s number through the government’s database. Others may recommend taking it to your trusted mechanic for a thorough check-up.

Both these viewpoints are correct. Running the vehicle’s number through the government’s database will let you know whether it was involved in an accident or a criminal activity. Having it checked up by your trusted car specialist will help verify the owner’s claims about the vehicle.

Here are other essential tips that you need to keep in mind as well:

Before you buy a Car from a Private Owner

Here’s what you need to do:

1. Research the car’s market value

Researching the car’s market value will provide you with two benefits. It will let you know how much the vehicle is going to cost you. That in turn, will let you decide whether you could fund the purchase from your pocket or would need financing from a lender.

It will also save you from overpaying for a specific vehicle. You won’t have to worry about getting ripped off by the seller. That’s why we recommend that you consult online marketplaces that let private personnel buy and sell vehicles to research your potential car’s market value.

2. Scrutinize ads for used vehicles

Scrutinize ads for used vehicles

Here’s what you need to do when reading ads for closed vehicles. You must pay close attention to four important metrics: mileage, make, model and year of ownership. Also check out whether the seller is the first owner of the car, or does the vehicle has had other owners in the past.

The next thing you should look for in the description is the vehicle’s history. Was it involved in an accident in the past? Are there any parts that have been touched-up? Most sellers tend to disclose needed car repairs in the ad to attract serious buyers. 

3. Get the vehicle’s history report

Get the vehicle’s history report

Vehicle history reports are one of the best tools to learn about a given automobile’s condition. They let you know whether the description given in the car’s ad is accurate. Or whether the seller has deliberately withheld information that could negatively impact their car’s value.

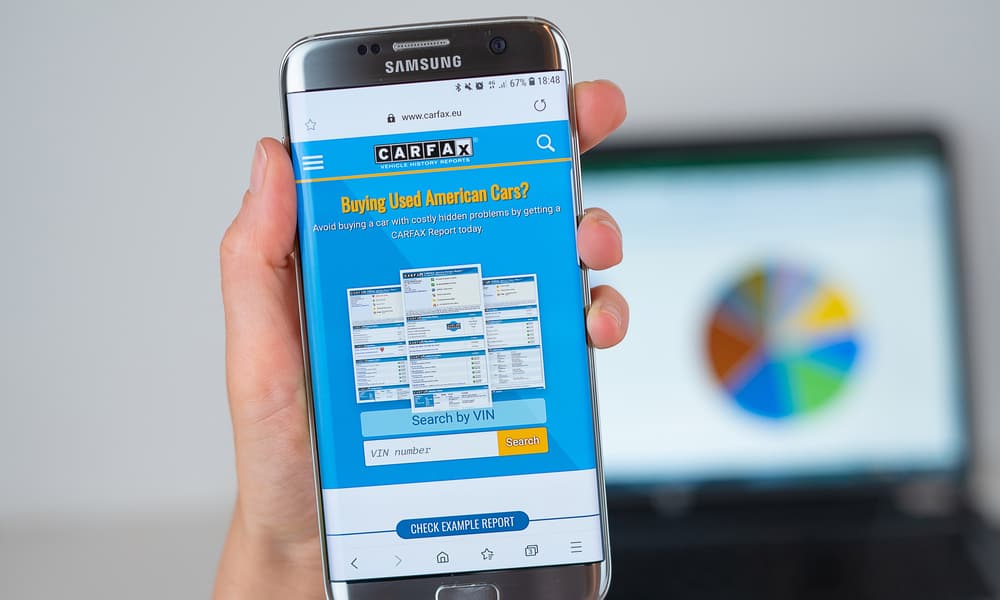
Carfax is our favorite website for generating vehicle history reports. It requires you to enter the Vehicle Identification Number (VIN) on its database and then check the vehicle for major accidents, ownership history, mileage, warranty, and other important factors.

4. Contact the seller

Contact the seller

Once you’ve made sure that the information given in the car’s ad is accurate, it’s time to contact the seller. You may begin your conversation by discussing the information in the ad. Also ask preliminary questions about any information that is missing in the car’s listing.

Provided you’re satisfied with the seller’s response, ask them to arrange a meeting. We recommend that you meet the seller in a public place, like the drive-through of a restaurant. Make sure that you have a friend with you when you’re going to meet the seller.

When buying a car from a private owner:

Here’s what you need to do:

5. Examine the vehicle’s exterior

Examine the vehicle’s exterior

Inspect the following when examining the vehicle’s exterior:

  • Signs of rust: Vehicle experts tell us to inspect three areas of the car for rust. They include inside the wheel wells, frame rails under the doors and along the exhaust system.
  • Tire tread depth: Use a penny to check the tire’s tread depth. Simply insert a penny into the tread groove with Lincoln’s head upside down. If you can see all of Lincoln’s head, the tire needs replacement.
  • Headlights and taillights: Park the vehicle with its front side facing away from the sun. Turn on the headlights and make sure they are working. Apply the brakes and observe brake lights. Pay attention to turn signals as well.
  • Shock absorbers: Push down on the car’s bonnet a few times to get the car to bounce. Stop applying force and see whether the car continues to bounce. Working shock absorbers stop the bouncing in an instant.
  • Car battery: Open the hood and check the battery’s water level (if it’s a wet battery). Inspect the battery’s terminals for signs of rust. Ask the owner about its installation date.
  • Vehicle body: Inspect the bumper for dents and cracks. Carefully look at the windshield for nicks and cracks as well. Move your hand over the body as repainted parts tend to give a different feel than company-painted ones.

6. Examine the vehicle’s interior

Examine the vehicle’s interior

Inspect the following when examining the vehicle’s interior:

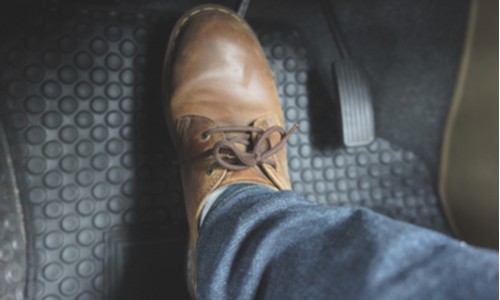
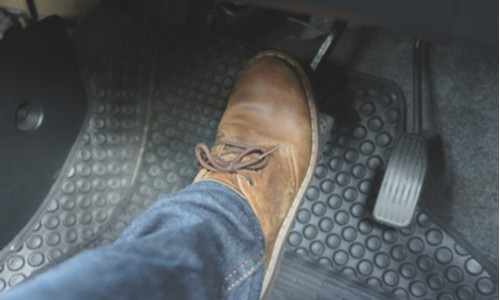
  • Pedal wear: How would you know that the previous owner braked and accelerated too aggressively? By checking out all of the car’s pedals for signs of wear and abuse.
  • Interior electronics: Turn on the car’s stereo and increase its volume to the maximum level. Do the same with the light on the roof as well as any other interior lights you may see in the vehicle.
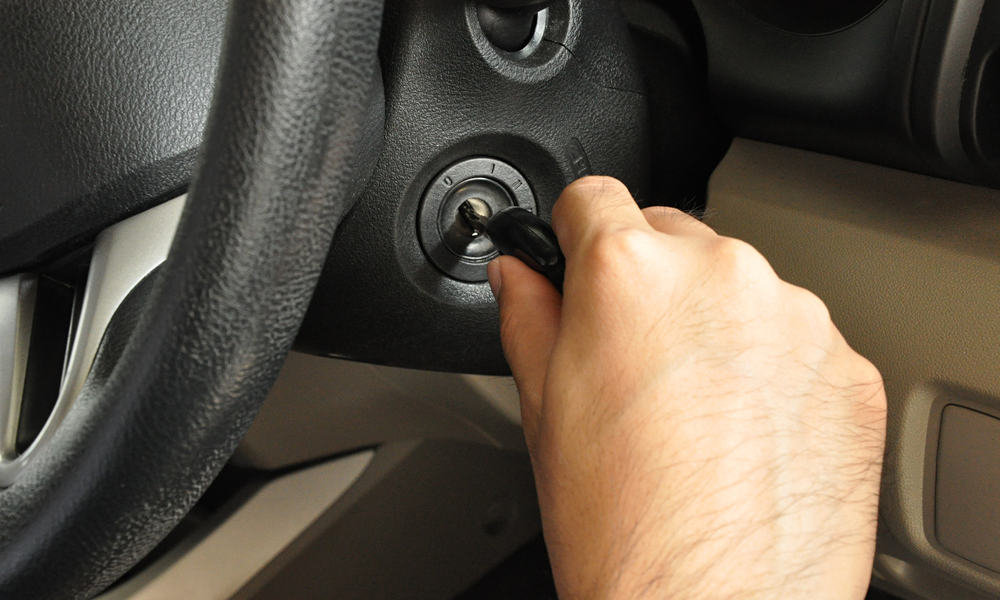
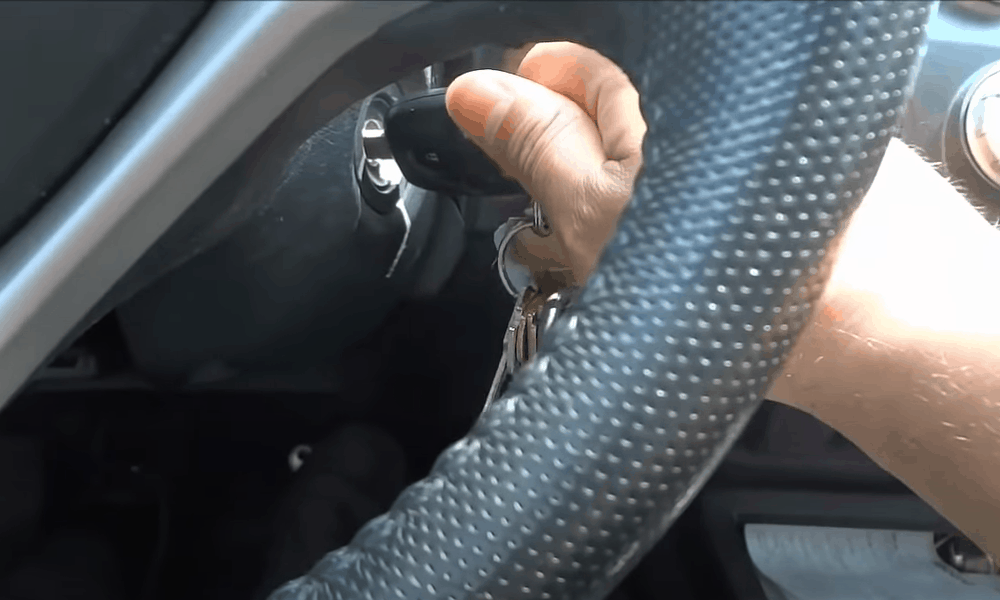
  • Car locks: Make sure that the doors remain locked without inserting a key. Also, don’t forget to test any keyless features if the vehicle you’re looking at has any of those.
  • Air conditioning: Turn on the air conditioner and let it run for a few minutes. Make sure it is cooling as intended. Do the same with the heater function to check that it’s performing without any complications.

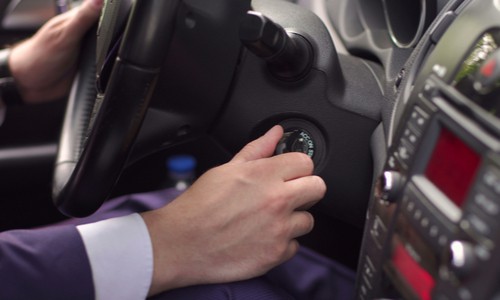
7. Take the car on a test drive

Take the car on a test drive

Spend at least half an hour on the test drive. Take the car to the local street, the highway and other roads to check that it’s performing as intended. Make sure that you don’t have to constantly adjust the steering wheel to keep the car going straight – as it’s a sign of misaligned tires.

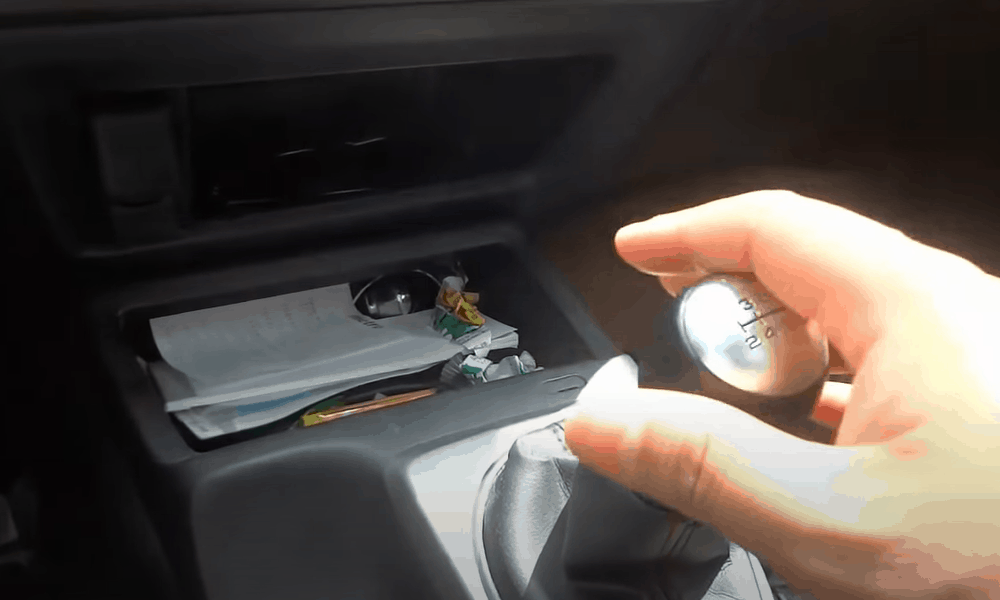
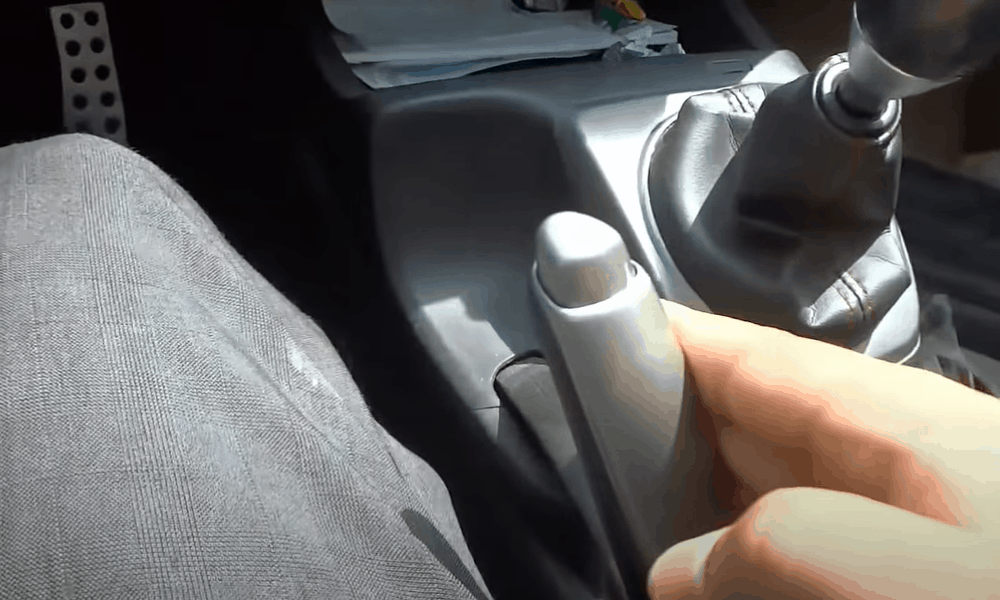
Pay close attention to the sound of the engine. It shouldn’t be too loud when you’re shifting gears. Cars with a transmission issue have engines that emit abnormal noises during shifting. Then take your car to your trusted mechanic to get a more thorough inspection of things like brakes and seals.

Conclusion

You’re now aware of what do you do when you buy a car from a private owner. Start with researching the market value of your potential car by looking at vehicle listings. Narrow down your research to 2 to 3 cars and get in contact with their sellers.

Once you have done that and reached the site where the seller has invited you to inspect their car, follow the instructions given above to examine the car’s interior, exterior, and engine. If everything goes well, make an offer and close the sale.

The post What do you do when you buy a car from a private owner? appeared first on Smart Motorist.


source https://www.smartmotorist.com/what-do-you-do-when-you-buy-a-car-from-a-private-owner

Friday, October 30, 2020

How to Start a Car? (Manual & Automatic)

How to Start a Car (Manual & Automatic)

Most people know how to start a car. These are veteran drivers who have spent most of their adult lives on the road. They know everything about their vehicle like the back of their hand. That is to say they have full knowledge of everything that is going on under the hood.

Your presence here indicates that you aren’t one of them. It also tells us that you could do with some help in getting your vehicle up and running. Don’t worry as the process isn’t that difficult as some people make of it. It will become your second nature once you have done it a few times.

Before you start your car

Here are some steps you need to take:

Identify the clutch

Every manual transmission car comes with a clutch. You can pinpoint it by its location – it is the pedal on the extreme left side underneath the steering. It needs to be depressed every time you shift gears. You also need to press the clutch to stop the car without stalling the engine. Here’s how it works.

The clutch breaks the connection between the engine and the wheels every time you press it. This disengagement not only transfers the power to the vehicle’s transmission system from the engine. But it also lets you stop the car without killing off the engine.

Identify the brake

Here’s the first of the two pedals that are common between manual and automatic transmission vehicles. It can be found right under the middle of your steering wheel. Newbie drivers make a mistake of operating it with their left foot – even though it should always be engaged with the right.

Brakes work by activating the ‘master cylinder’ after you have pressed them. The cylinder then releases ‘brake fluid’ which uses ‘brake lines’ to go to the caliper. This fluid then forces the brake ‘pads’ to get into contact with (and jam) the rotor that is moving the wheels, thereby slowing down your vehicle.

Identify the accelerator

The pedal on the right side of the brake is the accelerator. Its specific location makes it necessary for the driver to engage the accelerator with the right foot. This compulsion – of alternating the same foot to depress the brake and accelerator – is very important for your safety.

The accelerator is connected directly to your car’s engine. When you press the accelerator, it provides throttle to the engine and forces its crankshaft to go down and let in more air. The harder you press this pedal, the more air the crankshaft will suck in, and the speedier your car will move on the road. 

How to start a car?

Follow these steps to start your car:

Starting a manual car

Here’s how you can get a manual car up and running:

Step 1: Insert the key into the ignition

Insert the key into the ignition

The ignition is a multifunction switch located on the door facing side of the steering column. Its position remains the same regardless of whether your vehicle has a right-hand or left-hand drive.

Insert your key into the ignition but don’t do anything else just yet. As there are multiple steps you need to take first. Only then you’ll be able to start your car.

Step 2: Ensure the car is in neutral

Ensure the car is in neutral

Here’s how you can make sure that that your car is in neutral. Vehicles in neutral have a loose-to-the-touch gear, which means it can move effortlessly from side to side.

Provided the gear won’t easily budge from its position, press down on the clutch until it’s hitting the floor. Then move the gear into the neutral (central) position.

Step 3: Ensure the handbrake is on

Ensure the handbrake is on

The handbrake will be located right behind the gear on the passenger side of the driver’s seat. It needs to be at a 45-degree angle before you turn on the ignition and start your vehicle.

If you’re unsure whether the handbrake is engaged or not, look at your dashboard. It will be giving a red exclamation mark “I” if the handbrake is on.

Final Step: Start the ignition

Start the ignition

Once you have made sure that the car is in neutral, start the ignition. This will start your vehicle. Wait for a few seconds to let the engine get up to speed before driving away.


Starting an automatic car

Here’s how you can get an automatic transmission car up and running:

Step 1: Insert the key into the ignition

Insert the key into the ignition

After you have inserted the key into the switch, turn it on to the third (on) position. Don’t do anything else before you have acted on instructions given in the upcoming steps.

Step 2: Press the brake pedal

Press the brake pedal

Unlike manual transmission vehicles that have three pedals, automatic vehicles only have two. They have no clutch, so you only have the brake (center) and the accelerator (right). Press the former.

Step 3: Switch the gear to ‘D’

Switch the gear to ‘D’

Automatic transmission vehicles come with several variants of D including D, D1, D2, and D3. You should switch the gear to the first (D) position to let your car rolling.

Step 4: Lift your foot from the brake

Lift your foot from the brake

Newbie drivers would do well to lift the foot pressing the brake as slowly as possible. Otherwise, your car would take off with a jerk that nobody likes to experience.

Step 5: Press the accelerator

Press the accelerator

Once the wheels have started rolling and you’re confident of taking over from there, press the accelerator to take the car to a safe speed – which is 30km/hour for new drivers.

Conclusion

Learning how to start a car with manual transmission is a little complicated than the one with automatic transmission. As manual transmission vehicles require you to perform several checks – loose gear, handbrakes on – that you don’t have to carry out with their automatic counterparts.

However, it will only be in the first few attempts that you’ll find these steps hard to remember. Repeating them on a regular basis would make them a part of your routine and you’d be able to perform them without any prompts.

The post How to Start a Car? (Manual & Automatic) appeared first on Smart Motorist.


source https://www.smartmotorist.com/how-to-start-a-car

Thursday, October 29, 2020

How long does a car inspection take?

How long does a car inspection take? Several factors influence the answer to this question. The first of them is the state you live in. Some states have stricter inspection routine than others. The thoroughness of the inspection procedure plays a part too.

How long does a car inspection take

Then comes the condition of your vehicle. Newer cars that are yet to hit the road go through a detailed inspection that could go on for hours. Used vehicles mostly spend less time on the dock as long as their condition isn’t excessively bad. Read on to know about the duration of car inspection.

How Long Does Car Inspection Take?

How Long Does Car Inspection Take

Car inspection could take anywhere between 20 minutes and several hours. Though most state agents clear cars in less than an hour. The waiting time varies because it’s dependent on the state in which you bought your vehicle.

Take the example of Virginia. The state’s inspection procedure has 24 points that examine your car’s condition from bumper to bumper. Yet the process itself is quite speedy and won’t take more than 20 to 30 minutes out of your day.

Residents of New York aren’t as lucky. Despite having fewer registered vehicles on the road (4.87 million) than their fellow Americans in Virginia (7.5 million), New Yorkers have to spend twice as much time at the car inspection points as Virginians.

Types of Car Inspections

Following are the types of car inspections:

1. Periodic Safety Inspections

Periodic Safety Inspections

These check-ups are mandatory for car owners in 17 states, the District of Columbia, and the territories in control of the United States’ Government.

However, as each state has individual authority over vehicle inspections, all of them have drawn up specific laws that determine how frequently your car must be inspected.

2. Safety inspection before selling a car

Safety inspection before selling a car

Alabama and Maryland are the only US states that require you to have your vehicle inspected by a safety inspector before transferring its ownership or selling it.

That isn’t the case with other US states. Most only require you to take your vehicle to the inspector after a specific time has passed between the previous and the upcoming inspection.

3. Safety inspection when bringing a vehicle from another jurisdiction

Safety inspection when bringing a vehicle from another jurisdiction

This safety inspection takes place in states that don’t pay much weightage to the vehicle safety protocols being followed in other jurisdictions. Nebraska is an example.

The Cornhusker State requires every vehicle owner – who bought their vehicle in other jurisdictions – to have their car inspected in Nebraska before driving it on its roads.

4. Periodic emissions inspections

Periodic emissions inspections

The idea of periodic emissions inspections first began in California in 1966 which introduced it to combat smog. Currently, 32 states have made emissions testing mandatory.

There are two types of emissions inspections: OBD emissions inspection and Exhaust gas analysis. Both are quite thorough and may take up to 20 minutes.

Importance of Car Inspection

Following are the reasons why having your car inspected is in your best interest:

Saves You Money

What happens if you get your car checked regularly? It would achieve greater fuel economy as vehicles that pass inspection tests give more fuel mileage. That means that you’d have to undertake fewer trips to the gas station for refueling.

Enhances the car’s lifespan

According to a report, an average American owns their car for a record 79.3 months. That’s nearly seven years in which they don’t have to splurge their hard-earned money on a newer model. There are no prizes for guessing that it’s the testing regimen that keeps cars going for such a long time.

Assures your peace of mind

Investing money and time into a car inspection gives you peace of mind that your car is in satisfactory working condition. It assures you that it won’t break down on the way to baseball practice. That your daily routine won’t be interrupted by your vehicle’s trouble.

Cuts down the maintenance costs

What happens if your car is inspected on a regular basis? You’d be able to identify parts that need repair and maintenance. That, in turn, would allow you to repair those parts and make sure that they don’t get damaged to the point where you’d have no choice but to replace them.

How to prepare for a car inspection?

How to prepare for a car inspection

Here’s how you can prepare for a car inspection:

  • Set aside a few hours: Nobody knows how long you’d have to wait at the inspection point. The waiting time could be as little as 20 minutes. Or it could stretch to as much as a few hours. That’s why you need to choose a day on which you’d have a few free hours at your disposal.
  • Carry payment: Car inspection isn’t free. Ask your motor dealer how much you’d have to pay for the check. Then make sure you’d have that amount at hand as you drive your vehicle into the inspection point.
  • Prepare car insurance documentation: Some inspection attendants will let you through on seeing the insurance card alone. Others may ask for proof of paid insurance. Ensure that you’ve both in your car’s dash.
  • Carry proof of identity: You must have two identity cards on you. They may be your driver’s license, ID, or passport. Anything that would help you prove that you’re the person you’re claiming to be would do.

Conclusion

Periodic car inspections are necessary for your vehicle’s safety, its passengers, and other people on the road. They also save you money in the short & long term and give you peace of mind that there’s no trouble brewing in your car’s system that you aren’t aware of.

To cut down on the time you’d have to wait as your car is being inspected, we recommend that you visit the designated inspection point in the first 10 days of the month. Doing that will help you steer well clear of queues that mostly form at month’s end.

The post How long does a car inspection take? appeared first on Smart Motorist.


source https://www.smartmotorist.com/how-long-does-a-car-inspection-take

What Your Car Says About You?

What Your Car Says About You

Does your car give subtle clues about your personality? Of course it does. We can cite various studies to back up this claim. Your choice of a vehicle gives clues about your brought up, the status you enjoy in society, and your driving style. That’s not everything what your car says about you.

Forbes tells us that it also gives hints about your political leanings and marital status. The data it collected from 10 prominent auto brands has more exciting findings. It shows how people who buy the same vehicle have the same age, gender, and even income level. Read on to know more.

What Your Car Says About You?

Here’s what different aspects of your car say about you:

What does your car’s brand say about you?

Do you drive a Bentley or Honda? Here’s why that matters:

Bentley

Bentley

Given that the cheapest Bentley costs north of $160,000, it shouldn’t come as a surprise that its owners are uber-wealthy people. Such persons enjoy high social status with millions in their bank account.

Bentley users tend to be understated about their wealth. They aren’t as brash as other millionaires and tend to keep a lid on everything they have achieved in life – which isn’t easy given that they have achieved a lot.

Chevrolet

Chevrolet

Some Chevrolet owners complain that the reputation they have of being ‘stubborn’ and ‘unmoving’ isn’t accurate. That they move with the times like anybody else. One 2009 study negates their viewpoint.

Carried out by Strategic Vision, it states that 13% of Chevy owners have never browsed the internet. The study also found out that only about 1/3rd (35%) of Chevy owners boast a college degree or higher.

Ford

Ford

The study cited above showed Ford users faring poorly in demographic trends. About 12% of them didn’t use the worldwide web by 2009 and less than half (45%) had a college degree by then.

Ford has made attempts to combat this image. It has equipped its vehicles with multiple high-end features like Ford Sync, Ford Pass, Semi-Auto Parallel Park Assist, among others over the past decade.

Honda

Honda

Owners of this Japanese car tend to be well-educated – more than 70% claim to have earned a college degree or higher. They are also less flashy and don’t care much about the image their vehicle projects about them.

Honda owners are also incredibly tech-savvy – more than 97% have used the internet at least once in their life. They care more about the functionality of their vehicle than anything else. 

BMW

BMW

Men’s Health has an interesting theory about BMW owners. It states that most of them are under 30, consider themselves well-read, and work in either architecture or accounting.

The world’s largest male magazine brand further claims that BMW owners are in awe of foreign-made cars. The findings it got after poring over tons of reports also revealed that BMW enthusiasts work out more than other people. 

Volkswagen

Volkswagen

Multiple YouGov polls indicate that Volkswagen drivers like to think of themselves as imaginative. They aren’t as infatuated with their vehicle as owners of other brands and prefer a bus or train over a car.

They also have eclectic tastes. Most of them like visiting art galleries, reading, and devouring enchiladas. These people also shop for organic food and are massive music enthusiasts.

Toyota

Toyota

According to Canada’s largest auto loan company, Toyota owners never cross the red signal. They like to play things safe and are generally those people who have started driving only recently.

Toyota owners don’t badmouth other brands as well. They like to have reliable things – a no-brainer given that the Japanese automaker churns out some of the most trustworthy cars on the planet.

What does your car’s color say about you?

Flexed.co.uk has revealed what your car’s color says about your personality:

  • Black color: Preferred by drivers who have a rebellious temperament and like to denote power. It shouldn’t surprise anybody then that black colored cars are the likeliest to be involved in an accident.
  • White color: Go-to choice of drivers who take an interest in modern and stylish things in life. White color cars are also the likeliest to be used as a family vehicle.
  • Silver color: Preferred choice of drivers who always drive below the speed limit. Most mature people select silver color when buying a new vehicle and they get the best fuel mileage out of it.
  • Red color: Go-to choice of persons who drive at or above the speed limit most of the time they’re on the asphalt. Its drivers think they are invisible behind the wheel.
  • Brown color: People who drive brown color cars are extremely likely to be at the receiving end of a road accident. That’s even though their driving style is dull.
  • Green color: Drivers of green color cars don’t lose sleep thinking what others make of them. They tend to be unfashionable and like to project themselves as rebellious.
  • Cream color: Preferred by drivers who are more likely to be controlled and contained. They like doing everything by the book and will rarely if ever, cross a red signal.
  • Yellow color: Drivers of yellow color vehicles tend to be idealistic. They’re similar to their counterparts who drive green cars in the sense that they disagree with society’s view of what is normal.

Conclusion

You might have concluded by now that your car says more about your personality than you care to admit. It gives not-so-subtle indicators about your social status, your temperament and how you view things. But it doesn’t stop at that.

Where the color of your car tells others whether you may be a loner or an extrovert, its brand gives clues as to whether you’re an idealistic or a person that is contained and controlled. All of this is to say that your car can send some serious messages about yourself.  

The post What Your Car Says About You? appeared first on Smart Motorist.


source https://www.smartmotorist.com/what-your-car-says-about-you

Friday, September 11, 2020

How Low is Too Low for Tire Pressure?

How low is too low for tire pressure? Different mechanics will answer this question differently. Some will tell you to consult your vehicle’s owner manual. Others will try to offer an answer based on their personal experience. The frustrating thing for you would be that both their answers won’t match.

That is because there’s no single answer to this question. Optimal pressure for any tire depends on many factors, including the temperature in your area, your driving style, and the condition of the roads on which you frequently drive. All these factors determine how much air you should pump inside your tire.

Tire Pressure

Does the difficulty involved in determining the correct tire pressure mean you shouldn’t give a great deal of thought to it? Doing that will be costly and dangerous. Under-inflation can shorten the life of your vehicle’s tires, harm your vehicle’s performance, and could even lead to a tire blowout.

Hence why you shouldn’t let your tire pressure get too low.

How low is too low for tire pressure?

Follow these steps to check if your tire’s pressure is too low:

1. Go through your car’s instructions manual

Go through your car’s instructions manual

Specifically, check out the tire-pressure recommendations provided by your vehicle’s manufacturer. You can find the instructions manual in the owner’s manual or on the driver’s side doorjamb.

Consult your carmaker’s website if you seem to have misplaced your manual. Almost all automakers allow their users to get car manuals online by entering the make and model of their vehicle.

2. Calculate 25% of your car’s recommended pressure:

After checking out the automaker’s recommended tire pressure, get 25% of that figure. For instance, if your car’s manual states that its optimal tire pressure is 30ppsi, then 25% of that figure is 7.5PSI.

Once you have calculated that figure, subtract it from your tire’s recommended air pressure. In our case that would turn out to be (30psi – 7.5psi = 22.5psi). Note down this number as you’re going to need it in the following step.

3. Consult your vehicle’s TPMS:

Consult your vehicle’s TPMS

US Federal law states that every vehicle made in 2008 or after must have a tire pressure monitoring system (TPMS). This system states that if a tire’s air pressure is 25% below the automaker’s recommended pressure, then it’s too low.

Compare the 25% figure you calculated in the previous step (22.5psi) with your tire’s recommended air pressure to tell whether your tire pressure is too low or not. Immediately inflate your tires if that’s indeed the case.

Dangers of low tire pressure

Here’s why you shouldn’t let your tire pressure get too low:

Low tire pressure can lead to a blowout

Low tire pressure can lead to a blowout

Drivers who have experienced a tire blowout can tell how traumatic and nerve-wracking the whole experience can be. It can also be fatal if you don’t know what to do in the first few seconds after a tire blowout – that is to hold the steering straight and not apply brakes.

When the air pressure inside the tire gets too low, it experiences heat build-up, which, if persistent, would separate a section of tire’s rubber from its carcass – which is that part of the tire on which it is built-on. If all of this happens suddenly and you’re driving at high speed, a tire blowout might follow.

Low tire pressure harms fuel economy

Low tire pressure harms fuel economy

Have you ever heard your fellow drivers complaining about the fuel economy of their vehicle? Then you might want to tell them to check their tire pressure. That is because low tire pressure does tend to place a bottom pressure on a vehicle’s fuel economy. Here’s how.

Under-inflated tires require more power from the engine to keep rolling. This causes the engine to burn more fuel. EPA corroborates this statement by claiming that properly inflated tires can boost a vehicle’s fuel economy by as much as 3 percent in certain cases.

Low tire pressure affects the vehicle’s handling

Low tire pressure affects the vehicle’s handling

Has your vehicle become challenging to handle off late? Is it despite the fact that both its wheels as well as the suspension are in good working condition? Then you might want to drive it to your nearest tire shop to have its tire pressure checked. Here’s why we’re saying that.

Underinflated tires force their sidewall to flex more than usual. This causes the tire’s tread to squirm and makes the whole tire lose its traction and become unstable. That, in turn, slows down your tires’ response to steering and increases their braking distance.

Low tire pressure reduces the tire’s life

Low tire pressure reduces the tire’s life

Experts tell us that underinflated tires are less likely to maintain their shape vis-à-vis their properly inflated counterparts. That is because these tires develop a tendency to become flat as the wheels roller, thereby increasing the tire’s wear.

Such a scenario often leads to the tire experiencing uneven wear on both its inner and outer shoulders. The resulting damage negatively affects the tire’s footprint by taking a toll from its tread, which in turn forces you to replace this costly car component prematurely.

FAQs and Answers

Q: How often should you inflate your tires?

A: According to a rule of thumb, you should inflate your car’s tires every time you fill up gas. That will keep the tires adequately inflated and enhance their road life. 

Q: Why do my car’s tires keep on losing air?

A: Tires that aren’t mounted properly and those that have a broken valve stem are prone to leaking air far too often.

Conclusion

You might have deduced by now the dangers of driving on under-inflated tires. Apart from putting the personal safety of the driver and other passengers in the vehicle at risk, poorly inflated tires also cost more in terms of fuel consumption and quick replacement. Hence why we recommend that you should inflate your tires at least once every 30 days.

The post How Low is Too Low for Tire Pressure? appeared first on Smart Motorist.


source https://www.smartmotorist.com/how-low-is-too-low-for-tire-pressure

Thursday, September 10, 2020

5 Steps to Break a Tire Bead

Most 4×4 enthusiasts and overland travelers know how to break a tire bead. These are drivers whose frequent off-road trips expose their tires to roadside debris. This rubbish then makes its way inside the tire and onto the wheel if left unattended. Hence the need for the breaking of the bead.

As long as the bead stays intact, it doesn’t allow any gap to form between the tire’s outer edge and the rim. That makes it impossible for anyone to carry out repairs on the tire’s inside. But that is far from being the only reason why you may want to break your tire’s seal.

Removing the bead also allows you to get the tire off the rim quickly. You won’t have to take your vehicle to a normal shop setting to have its tire replaced. The application of minimal effort from your side will allow you to do the job on your own.  

Before you break your tire’s bead

Here’s what you need to know:

Types of bead breakers

Types of bead breakers

Following are the three major types of bead breaker designs:

Shoe and Lever Mechanism

Such bead breakers perform admirably on new passenger vehicle tires, motorcycle tires, and trailers’ tires. They have a shoe-shaped tool that applies pressure on the tire’s sidewall. This sidewall is located next to the bead, and pushing it will force the bead to break its connection with the rim.

On the flip side, such bead breakers don’t work well with difficult to change tires and old tires. It is because the mechanism is quite large and too bulky. You can only use such bead breakers with tires that are easy to replace and new tires.

Pros
  • Low cost
  • Easy to follow
  • Works well with passenger vehicles’ tires
Cons
  • Won’t give the desired results with difficult-to-change tires


Plier Type Mechanism

This mechanism counts on a plier-type tool to apply force between the lip of the rim and the bead. The tool has a spike that directly imposes a separating force on the bead as well as on the tire’s sidewall, weakening and ultimately breaking the connection between both.

It has its downsides as well. The spike on the tool makes it extremely likely to leave scratches on the wheels and mar their surface. Also, since the tool is very large, you’d have to apply your full body weight to get the desired results.

Pros
  • Extremely effective
  • Gets the job done quickly
Cons
  • Might leave scratches on the wheel


Clamp and Ram Mechanism

Here is the most effective and quick way to break beads on ATVs and other difficult-to-replace tires. The ‘Clamp and Ram’ mechanism relies on a tool with a pointed foot that exploits the space between the lip of the rim and the tire bead.

It also has a padded clamp that goes all the way inside the sidewall with little push from a wrench. The entire mechanism is actuated by another bolt that requires little human input. Also, since the tool is clamped, there is little danger of it damaging the sidewall.

Pros
  • Works well on deteriorated tires
  • Requires minimal user effort
  • Won’t damage the sidewall
Cons
  • Tool is pricey


How to Break a Tire Bead

Follow these steps to break your tire’s bead:

What you’ll need?

  • Breaker bar
  • Hammer

Step-by-Step Guide

Step 1: Remove the valve core

Remove the valve core

Doing this is necessary as letting the air pressure out will help you in easily and quickly take the wheel off the rim. Make sure that you only remove the wheel from its rim when it has lost its entire air pressure. You can make sure of that by pressing your hands against the tire.


Step 2: Place tire on a flat surface

Place tire on a flat surface

The surface on which you’re going to place the tire should be solid. It should also be capable of handling the pressure you’re going to apply on the tire in the upcoming steps.


Step 3: Slide breaker bar between the rim and the tire

Slide breaker bar between the rim and the tire

Make sure that the pointed/tapered edge of the breaker bar is pointed away from the rim. This edge is extremely sharp and exposing it to the rim might allow it to leave scratches. It is, therefore, necessary that you point it toward the tire.


Step 4: Hit the breaker’s top using a hammer

Hit the breaker’s top using a hammer

After steadying the breaker between the tire and the rim, hit its top using a hammer. This will drive in the breaker in the opening between the rim and the tire. Continue hitting the top of the breaker until there’s a sound of the expulsion of air or small pop.

This noise will tell you that you’ve partially broken the bead. Follow it up by pushing your breaker bar toward the ground. Apply your full body weight to thrust the breaker in. Few seconds of effort will let you completely break the bead.


Final Step: Rotate the breaker around the inside of the tire

Rotate the breaker around the inside of the tire

As you’re rotating the breaker around the inside of the tire, continue hammering it from above. This will ensure the complete break-up of the bead along the circumference of the tire.

Continue rotating around the breaker until the tire is completely off the rim. Then turn around and apply this process on the tire’s opposite side.


Conclusion

Breaking the tire’s bead is important for two reasons. It helps expose the inner surface of the tire for clean-up of dirt and debris. Breaking the bead also allows you to remove the tire from its rim on your own, thereby saving you the money that you’d otherwise have to pay to a tire repairman.

There’s another reason why you may want to break the tire’s bead on your own. The entire process is incredibly easy. You just have to follow the abovementioned instructions and you’ll be removing the tire off its rim in less than thirty minutes.

The post 5 Steps to Break a Tire Bead appeared first on Smart Motorist.


source https://www.smartmotorist.com/how-to-break-a-tire-bead

6 Easy Steps to Balance a Tire Yourself

Tires go out of balance for various reasons. The most common is uneven wear. It causes one part of the tire to become heavier than others and makes the whole tire unbalanced. Another cause is under-inflation. As tires that have less-than-optimal air pressure for too long can go out of balance.

All of this is to say that you should never drive on out of balance tires. It is risky and akin to putting the safety of your vehicle’s passengers at risk. That is because such tires are in poor health and are at a greater risk of experiencing blowout at high speeds.

As if that wasn’t worrying enough, out of balance tires reduce your car’s fuel economy as well. They also place added stress on your vehicle’s shock absorbers and wheel bearings. That, in turn, leads to a noisier and bumpier driving experience. Hence why you should know how to balance a tire.

Before you balance your tire

Here’s what you need to know:

Types of tire balancing

Types of tire balancing

Following are the three major types of tire balancing:

Static Balancing

Static balancing involves the addition of weights across one line of the tire. That line is usually called a ‘plane’ and the addition of weights is carried out as if the tire was a disc. It is an old-school method and helps rectify minor imbalancing problems.

Mechanics that perform static balancing place the tire on a vertical supporter with the help of a bubble balancer or a spindle tool. That is followed by the heavier side automatically leaning lower to the ground, after which the mechanic places the weight on the lighter side.

Dynamic Balancing

Dynamic balancing involves the addition of weight across the entire tire (up-and-down, side-to-side) in a dual plane. Mechanics who perform this type of balancing use modern spinning computer balancers for the whole procedure. Here’s how they do it.

The technician mounts the out-of-balance tire on the machine and then spins it. The sensors attached to the machine measure all weight imperfections as the tire is spinning. They then guide the technician on how much weight they should add at which location to rectify the weight imbalance.

Road Force Balancing

Here is the latest technique to rectify the tire imbalancing problem. It involves a sophisticated roller machine that puts its entire weight on the dismounted tire. The weight applied by the machine is similar to the one the tire experiences from the vehicle.

The machine has sensors which detect irregularities in the tire’s imbalance as it’s withholding the machine’s weight. Aside from telling the exact spot where tire imbalance has occurred, the sensors also tell whether it is the tire or the wheel that is the root of the problem.

How to balance a tire

There are two methods using which you can balance a tire:

Method 1. How to balance a tire with a Wheel Balancer

Here’s how you can balance the tire with a wheel balancer:

What you’ll need?

  • Two Jacks
  • Flat-end screwdriver
  • Lug wrench

Step-by-Step Guide

Step 1: Lift the car

Lift the car

Find the jack point. You can find it in front of the back wheels and behind both the front wheels. Once you’ve seen it, slide your jack underneath that point. Then raise the jack by slipping the included rod tool through its hole and turning it to pull the jack’s sides inward.


Step 2: Remove wheels from the vehicle

Remove wheels from the vehicle

Use the lug wrench to remove wheels from the vehicle. Make sure that there aren’t any weights on the wheel that you’re going to remove. Otherwise, the rebalancing process may end up giving unsatisfactory results.


Step 3: Clean the wheels

Clean the wheels

Wash the wheels to remove all the dirt from the tread area, the rim, and the rest of the tires. Then give the wheels enough time to dry.


Step 4: Put the wheel’s assembly on the balancer

Put the wheel’s assembly on the balancer

Follow the machine’s manual to spin the wheels. If you’re using dynamic balancing, the balancer will tell you where the imbalance lies as the machine is spinning. If you’re using static balancing, you’ll have to wait for the machine to stop spinning before it could identify the faulty spot.


Step 5: Mark the spots where the addition of weight is required

Mark the spots where the addition of weight is required

Use chalk to mark the spots. Then put on the recommended weights and re-mount the wheel on the machine to recheck its balance. Continue to adjust the weight until the tire stay in a perfect line (in the case of static balancing) or move smoothly (in the case of dynamic balancing).


Step 6: Mount the wheels back on the vehicle

Mount the wheels back on the vehicle

Self-explanatory. Don’t forget tightening the lug nuts and lowering the jack once you’re done putting the wheels back on the vehicle.


Method 2. How to balance a tire Without a wheel balancer

Here’s how you can balance a tire without a wheel balancer:

What you’ll need?

  • Two Jacks
  • Lug wrench

Step-by-Step Guide

Step 1: Lift the car, remove wheels and clean them

Lift the car, remove wheels and clean them

Follow the instructions given in the first three steps of the previous method. Lift the vehicle using a jack, remove the wheels after removing all the additional weights, and clean them with water. Give the wheels enough time to dry completely.


Step 2: Reinstall the wheel

Reinstall the wheel

Once you have done that, add weight on the wheel’s 12 o’clock position. Start your car and start driving it on the road (at a speed of 10 – 20mph). If you still notice vibrations, take off the weight from the 12 o’clock position and install it at 45* from the initial position.


Step 3: Drive the vehicle

Drive the vehicle

After the addition of the weight, once again rev your vehicle. If the vibration persists, add more weight to the spot where you’ve already added weight. Rev your vehicle again. If the vibration still hasn’t gone away, take off both weights and install them at 45* from the second position.


Final Step: Continue with the same procedure

Continue with the same procedure

Continue with the foregoing procedure as long as the vibrations persist. You’ll eventually find the spot where, after adding more weights, the balancing will be complete.


Conclusion

Experts recommend that you shouldn’t wait for vibrations to rebalance your tires. You should get rebalancing done after every 5,000 miles or two years and every time you buy new tires. The presence of uneven tread wear on the tire is another sign that it needs rebalancing.

The post 6 Easy Steps to Balance a Tire Yourself appeared first on Smart Motorist.


source https://www.smartmotorist.com/how-to-balance-a-tire