Wednesday, September 9, 2020

6 Steps to lower spare tire without tool

If you want to know how to lower spare tire without tool, you’re at the right place. This guide contains everything you need to know to complete the task. The step by step instructions given below doesn’t leave any room for confusion or mistake.

They are also easy to follow and practical. You don’t have to be a mechanic to put them to practice. Anyone who has ever held a tool in their life can use them to get their vehicle back on the road in little to no time. That isn’t where the good news end.

Our experts prepared these directives with the assumption that anyone using them would be on their own. That there might not be anyone assisting them in lowering their spare tire. It’s a good thing if you ask us as it means you can complete the task without any help.

Before you lower spare tire without tool

Here’s what you need to do:

Make sure your vehicle does have a spare tire

Make sure your vehicle does have a spare tire

Before you go about reading our instructions, it’s important to make sure that you indeed have a spare tire in your vehicle. Most people assume this scenario without ever bothering to verify their assumption by looking at the spare tire. Such persons are often left with nothing at the end.

To verify the presence of the spare tire, discard the rectangular plastic cover under the passenger side of your vehicle’s license plate. If you can see an entrance for a key beneath the plastic cover, then you can be sure that your car does indeed has its spare tire.

Get the necessary supplies

Get the necessary supplies

That you’re going to lower the spare tire without ‘tool’ doesn’t mean you are going to go about the task with bare hands. Doing that would be counterproductive. You will still need some supplies to compensate for the lack of the key. Here’s what you’ll need.

Purchase a jack kit (without the jack). You can buy one from your local hardware store or Amazon. The next item on your ‘to-get’ list is an ignition key. Alongside the components of the Jack kit,  the ignition key will loosen the tire’s connection with the wheel.

Park the vehicle on a stable, flat surface

Park the vehicle on a stable, flat surface

Experts tell us that one should never change tires on a slope. The same advice is applicable when you’re lowering a spare tire. Vehicles parked on an incline are extremely likely to go backward, thereby putting the safety of the person under the vehicle at risk.

Once you’ve done that, apply the hand brake. Turn on the emergency lights if you’re on the roadside. Put your vehicle in gear (if manual) or in parking (if automatic). Make sure that no one is sitting inside the car and put chocks or similar heavy objects behind all the wheels.

How to lower spare tire without a tool

Follow these instructions to lower spare tire without a tool:

What you’ll need?

  • Ignition Key
  • Jack Kit

Step-by-Step Guide

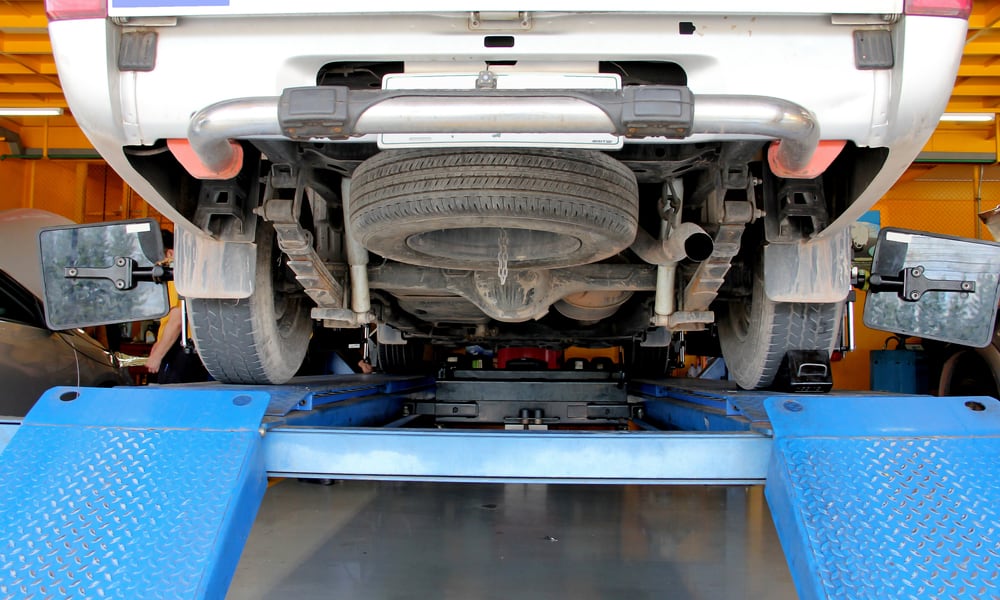
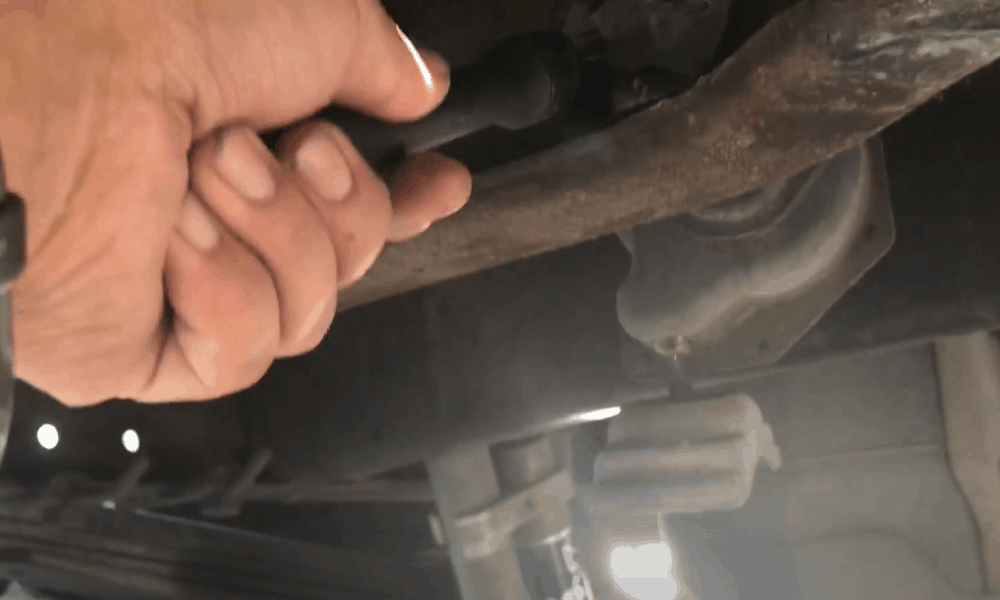
Step 1: Slide underneath the bumper

Slide underneath the bumper

Picture in your mind the exact location of the spare tire. Or you can just fall to your knees and look beneath the vehicle. Fixate your attention to the back of the vehicle. There you’ll see a bulge protruding downwards. That is the spare tire that you’re going to lower.

The exact location of the spare tire will be just behind the tow hitch bar and under the bumper. You can further verify that the bulge is a spare tire by pressing your hand against it. The tire’s trenches will let you know that it’s indeed what you’re looking for.


Step 2: Insert the ignition key

Insert the ignition key

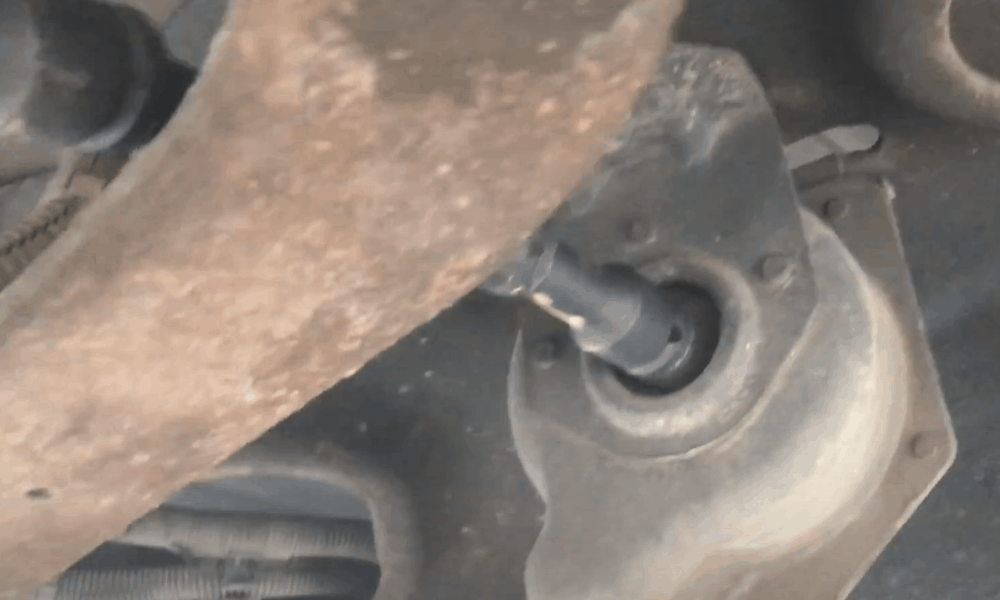
Insert the ignition key in the hole beneath the plastic cover you discarded earlier. Drag the key towards you and you’ll end up detaching it from the hole. Doing this is vital as it will allow you to fix the assembly at the rear of your vehicle.


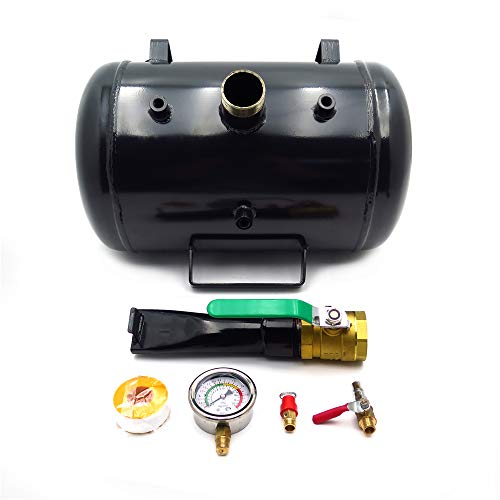
Step 3: Open the Jack kit

Open the Jack kit

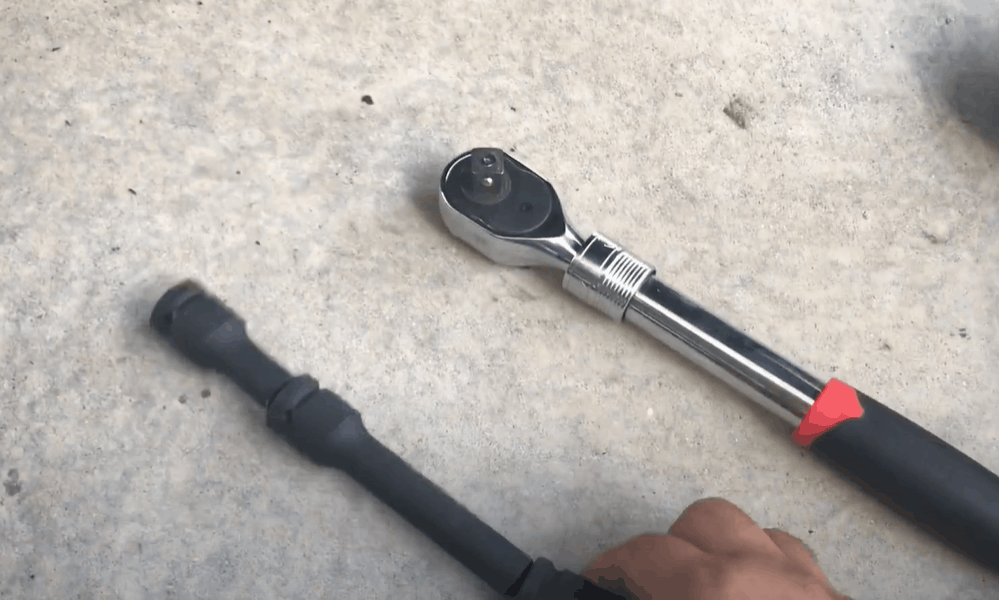
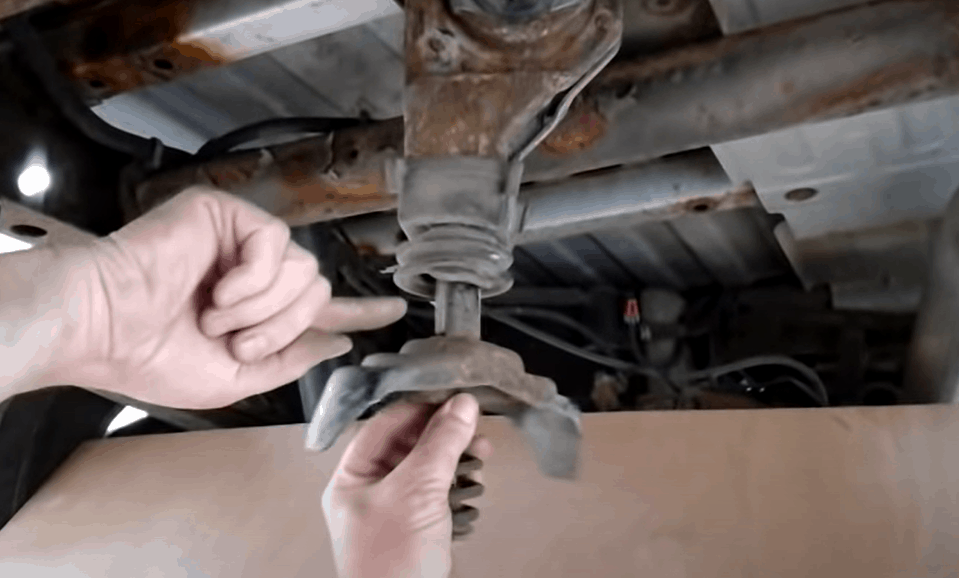
Get the crowbar and a couple of rods. One of the roads will have a wider end. Mechanics usually call this end the ‘female’ end. You’re going to insert this end of the rod into the hole that you disclosed in the previous step with the ignition key.


Step 4: Fit the 2nd rod to the female end rod

Fit the 2nd rod to the female end rod

Doing this will help you in two ways. It will provide you enough space to add the male end of the pulley to the female rod. You will also be left with enough space to remove the bumper.

Look closely to make sure that the fitment between the female end rod and the 2nd rod is perfect. Then put this end through the hole.


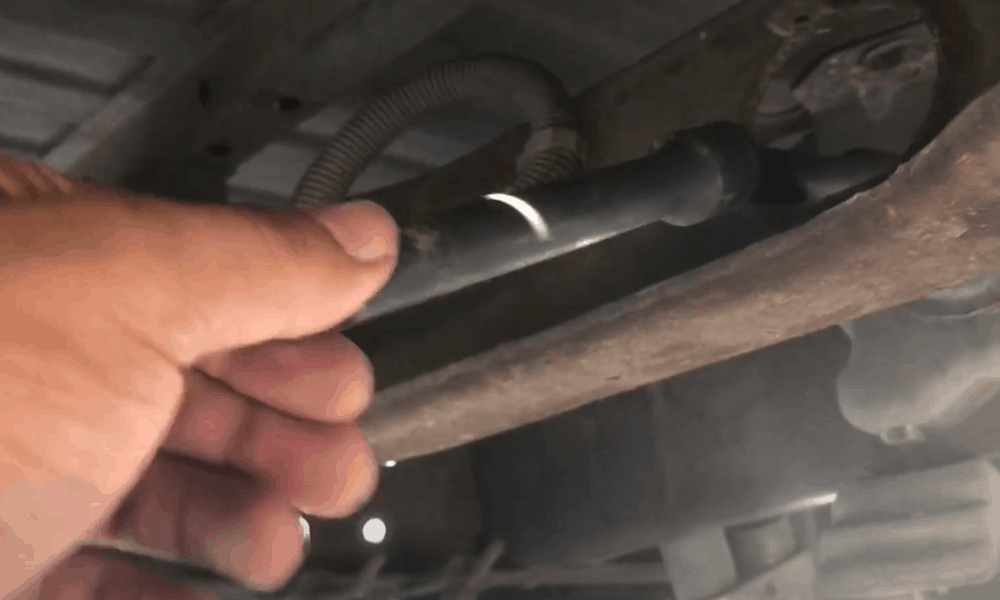
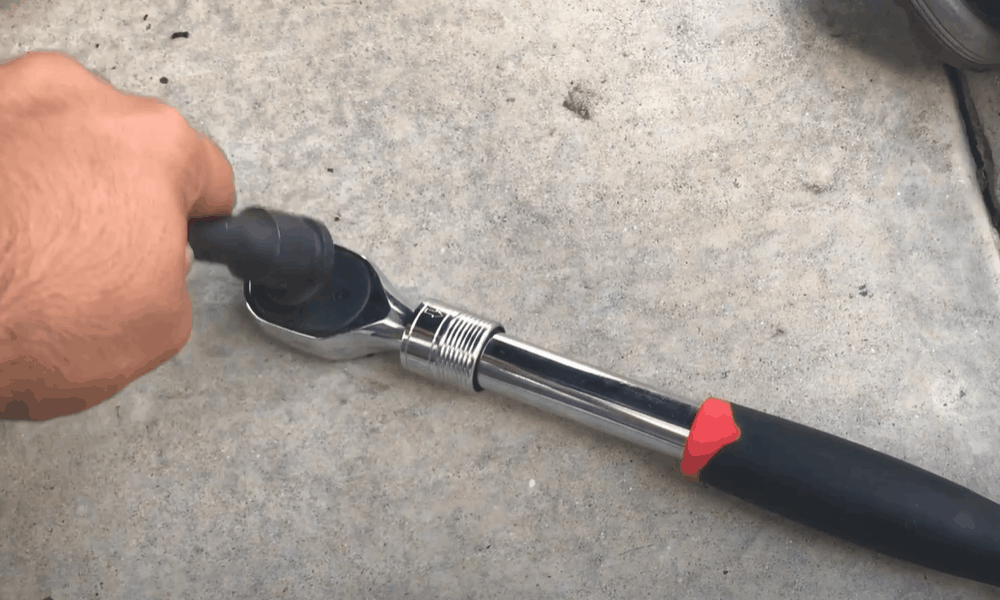
Step 5: Fit the crowbar to the other end

Fit the crowbar to the other end

You have by now one end of the rod into the hole. The other end, which is staying out of the bumper, should now be added to the crowbar. Follow that up by turning the crowbar in an anti-clockwise direction.

This will allow you to swivel the pulley and, by extension, the spare tire to the ground. Keep on rotating as long as the spare tire isn’t entirely on the floor.


Final Step: Distinguish the rim from the pulley carrier

Distinguish the rim from the pulley carrier

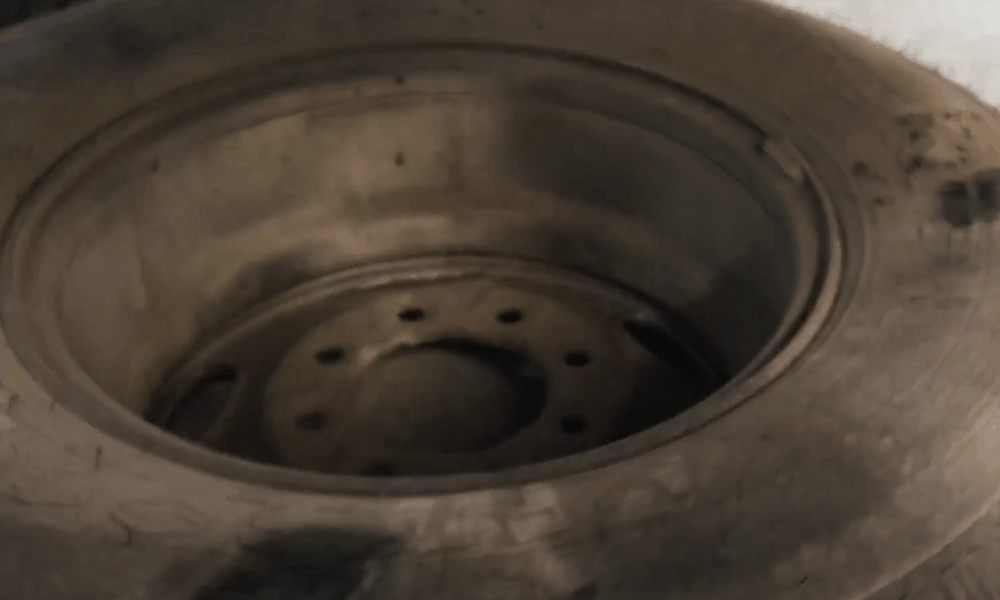
This will let you detach the tire from below the vehicle. Keep one hand on the tire and the other on the middle gap of the rim. Apply full force to pull both ends apart and off the peak.


Conclusion

Lowering a spare tire without a tool isn’t exactly straightforward. You have to apply a lot of effort and the whole process will take about an hour for an amateur. Yet it is better than the alternative, which is to wait for hours on the roadside for help. You should therefore be aware of how to accomplish this task.

The post 6 Steps to lower spare tire without tool appeared first on Smart Motorist.


source https://www.smartmotorist.com/how-to-lower-spare-tire-without-tool

Tuesday, September 8, 2020

What is a Radial Tire?

Why do most drivers prefer radial tires? Because non-radial tires are underwhelming in their performance. Such tires have a huge rolling resistance which contributes to added fuel consumption. Absence of flex in their sidewalls results in a bumpier, harder ride. That isn’t where the bad news end.

Non-radial tires also have a smaller footprint that prevents them from having a stable contact with the road surface. It reduces their tread life and exposes them to more ground compaction and damage. They generate more heat on the road and require replacement quicker as well.

Radial tires steer well clear of all these shortcomings. The combination of flexible sidewalls, low rolling resistance, and steel-belted construction allows them to boost a softer ride, reduced fuel consumption, and longer tread life. Little wonder, then, that they’re uber popular on the market.

Read on to know more about what is a radial tire.

What is a radial tire?

What is a radial tire

Radial tires are those tires in which the cord plies are arranged at a 90-degree angle to the center of the tire (or to the direction of travel). This design makes sure that as the tire flexes, plies don’t rub against each other.  But that’s not all that you may want to note about their construction.

Yet another notable element in their design is the presence of steel belts. These belts are located at a ‘spiral’ angle to the direction of travel and impart stiffness to the tire. Their presence helps the tire boast a more rigid overall construction. It also allows the tire’s tread to last longer.

Playing an equally important part in their sturdiness is their thick shoulder. It protects the tire’s interior from damage by absorbing the brunt of the impact. Together with the bead filler, whose functionality is evident by its name, the thick shoulder improves the radial tire’s durability.

The way these tires’ construction helps dissipate heat is noteworthy as well. They have a tire chafer that erects a heat-resistant layer in front of the ply cord – the part of the tire which is the most exposed to the heat created by bead rubbing. That’s why radial tires thrive effortlessly in summer conditions. 

Benefits of radial tires

Benefits of radial tires

Following are the benefits radial tires provide vis-à-vis traditional bias tires:

  • Less Fuel Consumption: The presence of rigid steel belts in their tread region takes the pressure off of these tires’ tread area. It therefore allows radial tires to roll with less resistance, thereby reducing your vehicle’s overall fuel consumption.
  • Better Driving Experience: Their peculiar design makes sure that radial tires have more flexible sidewalls than the traditional ones. This makes sure that as the tire contacts the road, it remains stable to provide a softer, bump-free driving experience.
  • Extreme Heat Resistance: We have already explained how the presence of the tire chafer in front of the ply cord helps these tires dissipate heat better. What we haven’t told you so far, however, is that their better heat-dissipating lengthens the life span of these tires as well.
  • High Load-Bearing Capacity: The flexible sidewalls of these tires don’t just ensure a smooth and seamless driving experience. Their elasticity also gives the vehicle the ability to withstand heavy loads by consistently distributing the bed pressure along the vehicle’s body.
  • Massive Speed Ratings: One specific feature of radial tires makes them a great contender for sports cars. They have a crown belt that prevents deformation and keeps the tire stable at high speeds. Hence why high-end radial tires can be driven safely at more than 150mph.

Shortcomings of radial tires

Shortcomings of radial tires

Following are some of the downsides of radial tires:

  • High Initial Asking Price: Given the fact that they provide a softer driving experience, dissipate heat better and last longer, it shouldn’t come as a surprise to anyone that radial tires cost more than a traditional bias-ply tire.
  • Vulnerable To Punctures: Radial tires don’t handle abuse well when they’re under-inflated or overloaded. Both these unnatural conditions might cause their sidewall to bulge, thereby potentially leading to puncture and damage.
  • Poor Transport Handling: While radial tires have more ‘radial’ stiffness than bias-ply tires, they have relatively low ‘lateral’ stiffness. This exposes them to sway as the speed of the tires, along with its weight, increases.

FAQs and Answers

Q: What is the difference between radial and non-radial tires?

A: The major difference between both these tires is how they allow their tread and sidewall to function. Radial tires allow both these components to function as independent features. That isn’t the case with non-radial tires whose sidewalls and crown are interdependent.

Q: How often should radial tires be rotated?

A: Experts recommend that you rotate your radial tires every 6,000 to 8,000 miles or six months. Make sure that during the rotation, each tire is removed from its position and installed at a different position. This will allow all tires to last longer by helping them wear evenly.

Q: What is the best way to rotate radial tires?

A: Tires’ maker Goodyear informs us of the best way to rotate radial tires. We should replace the front (driver-side) tire with the rear (driver-side) tire. In the same way, the front passenger-side tire should be installed in place of the rear passenger-side tire.

Conclusion

According to a survey by Consumer Reports, their superior construction has allowed radial tires to clinch a 100% market share in the United States. Their steel-belted construction, low rolling resistance, and flexible sidewalls are probably the reason why these models have replaced traditional tires.

Hence the reason why if you want to enjoy a softer riding experience, hoping to cut your trips to the gas filling station or own a sports car, radial tires are your best bet. They might cost more up-front but do well to justify their high initial asking price with the features mentioned above.

The post What is a Radial Tire? appeared first on Smart Motorist.


source https://www.smartmotorist.com/what-is-a-radial-tire

Sunday, September 6, 2020

4 Causes of Inner Tire Wear: How to fix?

Ignoring inner tire wear can be risky. Tires that have too little treading on the inside might not be able to brake quickly and effectively on wet roads. Worn and bald tires also provide poor traction on ice- and snow-laden roads and they experience more slippage too.

It isn’t only the health of the tire that suffers due to inner wear. Vehicles with low tread tires also see a reduction in their performance. They experience a fall in their fuel economy and steering because such tires lose air pressure on a regular basis. And that’s not where the bad news end.

Worn-out tires pose a safety hazard to the vehicle and its passengers as well. They don’t have the necessary level of tread that could allow the surrounding air to move between their grooves. That’s what makes them a sweet spot for heat build-up and, by extension, blowouts.

With this in mind, let’s look at how to fix inner tire wear:

Before you fix the inner tire wear

Here’s what you need to know:

Why Your Tires Are Wearing Down On The Inside?

Assuming you’ve already noticed signs of inner tire wear, there are a few different factors that can be responsible for this. Among those there are a few which are very common. We’re going to discuss them right now:

a). Camber Angle

Camber Angle

The difference between your wheels’ vertical alignment and the road surface is its camber angle. An ideal camber angle is one that allows the tire to sit flat on the road. That might not happen if your wheels are out of alignment, in which case the camber angle might be ‘positive’ or ‘negative’.

Positive camber angle forces the top of the tire to stick further than its bottom. This causes its outer edge to wear down. Negative camber angle, on the contrary, forces the top of the tire to angle inwards and the bottom of the tire to stick further than its top. This results in inner tire wear.

b). Toe Settings

There are two forces that your tire experiences at all times. The first are those that are always pulling the tire to its inside. Then there are those which are regularly pushing it towards the outside. The function of toe settings is to balance those forces and make sure that the tire is facing straight.

However, when the toe settings go out of alignment, they might cause your tire to point inward or outward. If the tire is pointing inward due to misaligned toe settings, it means that the forces pulling on the inside of the tire are dominating. Inner tire wear will soon follow suit.

c). Worn Ball Joints

Worn Ball Joints

Although they are not visible from the outside, ball joints play an important role in keeping the tires rolling in an optimum manner. They do the same by connecting the lower and upper control arms of the tire to the wheel hubs of your vehicle. But they aren’t damage-proof.

Ball joints start to wear down with excessive usage. This reduces their grip on the wheel and exposes the tire to inner wear. One of the most common symptoms of worn ball joints is your suspension giving weird sounds as the vehicle goes over speed breakers or potholes.

d). Damaged Springs

The springs in your vehicle are responsible for keeping your journeys seamless. They work in tandem with shock absorbers and take the life out of vibrations that hit your vehicle as it rolls over potholes on bumps on the road. Their optimal working is necessary for a vibration-free ride.

However, just like ball joints, springs also wear down over time. This reduces their ability to help your vehicle remain in constant contact with the road at all times. Tires suffer the greatest brunt of this scenario as they experience wear on the inside.

How to fix inner tire wear?

Follow these instructions to fix inner tire wear

1. Get your wheels aligned

If left unattended for a long period, improper wheel alignment might disturb camber angle, wear down ball joints and may damage springs as well.

All these three disturbances, as explained earlier, contribute to inner tire wear. That is why you should get your wheels aligned after every 5,000 miles or one year.

2. Keep tires properly inflated

Underinflated tires are at an added risk of experiencing inner tire wear. That’s because their sidewall will no longer be able to force the tire to come into contact with the road.

Hence the reason why we recommend that you check your tire pressures from time to time. Purchase a portable tire inflator if you don’t always have free time to go to the tire shop.

3. Regularly balance your tires

Most car owners only get their wheels balanced once they notice uneven tire wear. That is the wrong approach. It would be best if you had your tires balanced once every two years.

Experts also recommend having new tires balanced immediately after you have installed them underneath your vehicle. Doing that would protect them from experiencing inner wear.

4. Repair or replace damaged suspension components

If you notice that only one side of a particular tire is wearing down unevenly, it’s time to check its suspension. More often than not a bent suspension component will be to blame.

As long as the damage to the component isn’t extensive, you can have it repaired. However, if it is bent beyond repair, you may have no choice but to replace it altogether.

Conclusion

Inner tire wear can occur due to multiple reasons. Your wheels may be misaligned for a long time, their camber angle may not be right, ball bearings and joints can be worn down, or one of the suspension components can be broken.

Once you have identified the cause of inner tire wear, immediately tend to the solution. Don’t ignore the problem as it won’t go away. Adopting such a careless attitude won’t only hit you hard in the pocket, but it will also put the health of your vehicle and the safety of its passengers in safety.

The post 4 Causes of Inner Tire Wear: How to fix? appeared first on Smart Motorist.


source https://www.smartmotorist.com/how-to-fix-inner-tire-wear

Friday, September 4, 2020

How to Tell Which Tire is Out of Balance?

Driving with an out of balance tire can be dangerous. Such tires experience uneven tread wear and are at greater risk of a blowout at high speeds. They also produce excessive vibrations during driving and are more likely to undergo unexpected changes on the road.

Out of balance tires weigh heavily on your pocket as well. Their added weight forces the engine to produce more power to keep them rolling. This reduces your car’s fuel economy and increases the frequency of your trips to the gas filling station.

Unbalanced tires also stress your wheel bearings and shock absorbers. The deterioration of the wheel bearings increases the risk of your wheels getting worse in quick time. Shock absorbers which have experienced more stress, meanwhile, repay in the shape of bumpier driving experience.

With this in mind, let’s look at how to tell which tire is out of balance:

How to tell which tire is out of balance?

Out of balance tires put up the following signs:

1. Uneven and faster tread wear

Uneven and faster tread wear

You can manually check your tire’s treadwear through four methods.

  • Check Tread Depth

One of the oldest methods to check tread wear, it involves inserting a penny into its tread with the ‘heads’ side facing the road. If you can see the entirety of Lincoln’s head, your tread has worn down and it’s time to invest in a new tire. Or else you may keep on using it.

  • Inspect Sidewall Cracks

You can also inspect the sidewall cracks to tell whether or not the tire has worn down. Tire sidewalls are initially moist before the passage of miles dries them out. This causes the formation of cracks or cuts in their surface. Tiny cracks are common but large cracks are a telltale sign of uneven tread wear.

  • Check Tread Indicator Bars

Yet another way you can identify tread wear is via tread indicator bars. Most modern-day tires come with these flat rubber bars that you cannot see as long as the tread is optimal. However, as the tread wears down, tread bars gradually because easy to see.

  • Search for bulges and blisters

Worn out tire will develop both these weak spots on its surface. They might look benign but bulges and blisters do increase the likelihood of a sudden blowout. Both of them can also lead to skidding and hydroplaning of the tire over wet surfaces. That’s why you should never ignore them.

2. Out of balance sound

We consulted three experts to know what an out of balance tire sounds like. All were unanimous in their assertions that it emits loud noises while driving. These noises are coming out of the aforementioned tread wear and their sheer intensity makes them impossible to ignore.

3. Steering becomes difficult

Steering becomes difficult

Out of balance tires make the driver aware of their presence by making steering in a given direction (that of the unbalanced tire) more difficult. They also delay the steering wheel’s response time and increases the chances of avoidable accidents.

4. Bad shocks and bearings

Tires that are out of balance put the greatest stress on their shocks and bearings. This causes both these components, alongside the springs, to experience more wear and tear than necessary. That’s why, if you don’t fix the unbalanced tire in a timely fashion, you’d have to replace both these parts as well.

5. Repeated pressure imbalances

Repeated pressure imbalances

Is one of your tires constantly losing pressure? Does the problem resurface every few days after you have the tire inflated? Then there’s an excellent chance that the tire is out of balance. As tires, as long as they aren’t punctured, don’t lose air pressure too quickly.


FAQs

Q: When to get tire balancing done?

A: Here are some tips as to when you should get your tire balancing done:

  • After every 5,000 miles
  • After every 2 years
  • Every time you buy new tires
  • Every time you get a flat tire repaired
  • On noticing uneven tire wear

Q: What is the difference between tire balancing and alignment?

A: Both of them help in ensuring a seamless ride, but tire balancing and alignment cannot be more different. Tire balancing, as the name implies, ‘balances’ the weight on the tire and its wheel assembly. Alignment on the contrary corrects the tire’s angle.

Aside from how both of them are done, tire balancing and alignment differ in the benefit that they provide as well. While properly balanced tires experience less wear, put a reduced strain on the drivetrain, and contribute to a smoother ride, properly aligned tires have a better road life.

Q: How tire balancing is done?

A: Here’s how tires are rebalanced:

  1. Tire mechanics mount the tire (mounted on a wheel) on a balancing machine
  2. The wheel is spun and measurements given by the machine are recorded
  3. Measurements tell where the imbalance is and how much weight should be added to correct it
  4. Mechanic attaches the recommended weight to the tire and reinstalls the tire underneath the vehicle

Q: What are the dangers of driving with an unbalanced tire?

A: Aside from delivering bouncy and noise-ridden rides, unbalanced tires also place stress on their shock absorbers and bearings. This causes both these parts to wear down quickly. Out of balance tires also decrease the vehicle’s fuel economy and undergo tread wear faster.

Conclusion

The dangers of driving with an out of balance tire should have become clear by now. Such tires not only damage the health of your vehicle but also put the safety of its passengers at risk. They also place a bottom pressure on your car’s fuel economy.

All these reasons make it clear that you shouldn’t tolerate an out of balance tire. The moment you see any of the abovementioned signs, you should take your car to the tire repairman to have the tire rebalanced. Doing so will save you a lot of money in the long run.

The post How to Tell Which Tire is Out of Balance? appeared first on Smart Motorist.


source https://www.smartmotorist.com/how-to-tell-which-tire-is-out-of-balance

3 Ways to Mount a Tire

Every driver should learn how to mount a tire. It will save you the money that you’d otherwise have to fork out at a tire repair shop. You will also end up saving time. As driving the car to the mechanic and waiting for them to get free before they could tend to your tire is a laborious process.

You have three methods using which you can mount a tire. The first involves using a machine and is undoubtedly the easiest, especially if you have the machine at home. The second process, meanwhile, relies on a non-automatic tire changer.

Both these processes require the investment of capital. That’s why the average driver may shun them in favor of the third method. One that allows you to mount the new tire with nothing but a pry bar and your bare hands. It involves more effort than other methods but is achievable with a lot of effort.

Read on to know more about all three methods.

How to Mount a Tire

Follow these steps to mount a tire:

Method 1: Using a Tire Machine


Mounting a tire with the help of a machine is a quick and easy process. That’s why almost all tire repair shops and dealerships employ this method. Only a single person is needed to carry out this method with success. Here’s how:

What you’ll need?

  • Tire machine
  • Tire lubricant

Step-by-Step Guide

Step 1: Lubricate the tire bead

Lubricate the tire bead

Use a tire lubricant to moisten the tire’s rim edge and bead. Don’t use grease or soapy water for this purpose. The first will be extremely difficult to clean off, while the second won’t be slick enough. Both may cause the tire to de-bead during fast cornering.

Step 2: Put the tire on the rim

Put the tire on the rim

Swing the mount arm in the direction of the rim’s edge. Then place it at such an angle that the lower bead is pointing diagonally toward the mounting element. Getting the right angle is crucial for the success of the entire method. Pay extra attention.

Step 3: Rotate the turntable

Rotate the turntable

Gently press the pedal to turn the turntable. This will cause the tire’s lower bead to slowly slide onto the metal rim.  

Step 4: Mount the upper bead

Mount the upper bead

Place the tire on the rim in a diagonal way and press the pedal. Keep it pressed until the turntable’s rotation causes half of the bead to sit on the rim. Then, press the other half that hasn’t seated yet and again press the turntable.

Pro Tip: Use your knuckles to seat the tire on the rim. Make sure that the tire is fully seated before you rotate the turntable for the second time. Failure to do so may damage the bead.

Step 5: Release the arm and seat the bead

Release the arm and seat the bead

After releasing the arm and pushing it to its starting position, use the tire’s air pressure to seat the bead. The bead might not sit immediately. If that’s indeed the case, open the tire’s valve stem and put a hose onto it. Follow it up by pressing the pedal. Pop sounds will come out as the bead fits the rim’s edge.

Final Step: Release the jaws

Release the jaws

Once you have done that, re-install the valve stem core. Inflate the tire to its manufacturer’s recommended pressure using the pressure gauge on the machine.


Method 2: Using a Manual Tire Changer


Understanding how to mount a tire using a manual tire changer would be extremely easy if you are aware of the workings of this machine. Its working principle is similar to that of a tire machine, only you won’t be dealing with any pedals.

What you’ll need?

  • Manual tire changer
  • Tire lubricant

Step-by-Step Guide

Step 1: Lubricate the tire bead

Lubricate the tire bead

Use a tire lubricant to moisten the tire’s rim edge and bead. Don’t use grease or soapy water for this purpose. The reasons for that are already explained in the first step of the previous method.

Step 2: Put the tire on the rim

Put the tire on the rim

Once you have put the tire on the rim, keep on pushing it until the lower sidewall ends up resting on the rim. You may have to push the tire quite far to achieve this seating arrangement.

Step 3: Turn to the upper side

Turn to the upper side

Manual tire changers have a lever bar between the tire’s rim and its bead. As you lift it, you’ll see that a tiny section of the bead will start folding onto the metal edge. Continue to repeat this process (lift the rim, fold the bead over the metal edge) until the rim has the entire tire covering its surface.

Step 4: Install the valve stem core

Install the valve stem core

Only do that after you have taken the rim and the tire off the changer. Follow the installation of the valve stem core by covering the tire centerline with a ratchet strap. This is important as the strap will seat the bead after the mounting of tires.

Step 5: Apply pressure on the tire and fill it with air

Apply pressure on the tire and fill it with air

Doing this will serve two purposes. It will help the tire sit snugly on the rim and allow the beads to settle down. The sitting down of the tire on the rim will cause pops, so you may not want to keep your hands on the tire during this step.

Final Step: Remove the strap

Remove the strap

Follow it up by inflating the tire to the manufacturer’s recommended pressure. Make sure there aren’t any leaks afterward.


Method 3: Using your bare hands


Mounting a tire with your bare hands isn’t easy. You’d have to expend a lot of time and effort to see the job through. But if you cannot afford to invest in a tire mounting machine or a manual changer, this process is worth the effort.

What you’ll need?

  • Tire lubricant
  • Pry bar
  • Tire inflator

Step-by-Step Guide

Step 1: Lubricate the tire bead

Lubricate the tire bead

Follow the instructions given in step 1 of the previous two methods.

Step 2: Lay the rim on flat ground

Lay the rim on flat ground

Then place the tire on top of the rim. The surface should be stable, even, and flat. Place a piece of cardboard underneath the rim if the surface is concrete or blacktop.

Step 3: Press the bottom lip tire onto the rim

Press the bottom lip tire onto the rim

Stand on the tire and apply pressure with both feet to force the bottom of the tire onto the top of the rim. Lay your hand on a nearby wall for balance (if possible) or ask a friend or family member to lend a hand.

After you have seated the lower bead onto the rim, apply more lubricant to the tire. This will make it easy for the remaining rubber to slide over the metal.

Step 4: Press the upper lip of the tire onto the rim

Press the upper lip of the tire onto the rim

Divide this step into two mini-steps. In the first part, apply as much effort with your hands as possible to press the upper lip onto the rim. Once you can see that that the tire is no longer going down, use a pry bar to maneuver the lip over the remaining portion of the rim.

Keep on doing it until the tire’s lower and upper beads are past the lip of the rim.

Pro Tip: To prevent the pry bar from scratching the rim, press it into the lower side of the upper lip of the tire.

Final Step: Inflate the tire

Inflate the tire

Use a tire inflator to inflate the tire as per its manufacturer’s instructions.


Conclusion

You now have three methods at your disposal using which you can mount a tire. The first, which involves a machine, will allow you to get the job done quickly and conveniently. The second process which counts on a manual tire changer won’t require much time and effort as well. However, you’ll have to put in a lot of effort and time if you’re going to mount a tire with nothing but your bare hands.

The post 3 Ways to Mount a Tire appeared first on Smart Motorist.


source https://www.smartmotorist.com/how-to-mount-a-tire

Thursday, September 3, 2020

What Should You Do If You Have A Tire Blowout?

What should you do if you have a tire blowout? Different people will answer this question differently. Some will suggest calling the traffic police. Others might tell you to look around in search of a tire repair shop. Very few will give you tips using which you can rectify the problem on your own.

That is precisely what this article aims to do. It has some handy tips using which you can prepare yourself for dealing with a situation in which you’re in the middle of nowhere with nothing but your vehicle and its blown-out tire. But it doesn’t stop at that.

We have also come up with a comprehensive step-by-step guide on dealing with a tire blowout. One that contains everything you need to remove the blown-out tire from its wheel and replace it with the one lying in your car’s boot.

What Should You Do If You Have A Tire Blowout?


Follow these step-by-step instructions to survive a tire blowout:

Step 1: Do not panic

Do not panic

What is the best thing you can do in the immediate aftermath of a tire blowout? Absolutely nothing. Don’t slam on the brakes. Don’t turn the steering wheel to pull your vehicle off the road. Don’t take your foot off the accelerator.

All these actions might cause you to lose control over the vehicle. Your car might spin out if you end up doing any of these. That’s why, in the first few seconds after you have heard a blast, you should take deep breaths and try to stay as calm as possible.

Step 2: Keep the car going straight

Keep the car going straight

When facing a tire blow out, the first thing many people try to do is to turn the steering towards one side. That approach can be deadly. Your tire has already blown out and trying to turn the car in such a scenario might cause the wheels to overcorrect – increasing the chances of an accident.

Once the tire has blown out, the car will be pulling to one side. It will be crucial then that you stop the vehicle from having its way. You can do that by gripping the steering wheel with both hands. Have the left hand at 10 and the right hand at 2. This will steer the vehicle straight.

Step 3: Gently take your foot off the gas pedal

Gently take your foot off the gas pedal

Don’t yank your foot off the accelerator. You need your car to retain its forward momentum to regain control over it. Slightly decrease the pressure you’re applying on the accelerator without taking the whole pressure off it.

After you feel that the vehicle is back under control, take your foot off the accelerator. You may have noticed that we didn’t make any mention of brakes to slow down the car. That’s because applying the brakes while the tire has just blown out can be deadly.

Step 4: Let the car slow down naturally

Let the car slow down naturally

Once you have taken your foot off the accelerator, your vehicle’s speed will automatically decrease before coming down to zero within thirty seconds. At this point, you might want to turn on the emergency lights to inform the drivers who are coming behind you that you’re decelerating.

During this entire period, don’t take your hands off the steering wheel. Keep steering the vehicle straight and resist the temptation of applying the brakes too.

Final Step: Gently apply the brakes

Gently apply the brakes

When your car’s speed has come below 30 mph, gently apply the brakes. Give the indicator and turn the vehicle towards the road’s hard shoulder. After the car has stopped, take a deep breath and call traffic police or anyone you want for help.

How to avoid a tire blowout?

Here are some tips using which you can avoid a tire blowout:

  • Double-check tire pressure: One of the biggest causes of tire blowouts is under inflation. Tires that have less pressure than recommended flex more than properly inflated tires. This flex then generates heat which ultimately leads to a blowout.
  • Don’t drive worn-out tires: Old tires with a damaged tread are also prime candidates for a blowout. The thinness of the tread exposes the tire’s inner rubber to more heat, which in turn cracks and may cause the tire to blow out.
  • Avoid potholes while driving: Tires that repeatedly hit potholes are susceptible to losing their alignment and de-shape quickly than their peers whose drivers keep it safe while driving. That’s why you should keep your driving style in check.
  • Monitor tire’s sidewall: In extremely rare cases, tire blowout has nothing to do with the condition of its tread or your driving style. It may be that the sidewall of the tires has cuts, grooves, or tracks from excessive use – those that might expand and cause blowouts at high speed.
  • Rotate tires every 10,000kms: Uneven tread wear can also lead to tire blowouts. You can prevent it from happening by rotating your tires once every 10,000kms. Or you may go through your tire’s manual for more specific recommendations.
  • Drive slow when it’s hot out there: Most drivers associate tire blowouts with summer. They aren’t wrong. The combination of high temperatures and massive vehicle speed might create a cocktail whose climax may be a blown-out tire.

Conclusion

Nobody should take the problem of tire blowout lightly. An estimate by the National Highway Traffic Safety Administration puts the number of people who lose their lives due to tire blowouts at over 400. The same report claims that over 75,000 accidents take place due to the same problem.

Hence the reason why in addition to knowing what you should do in the first few seconds after a tire blowout, you should also be aware of steps taking, which you can minimize the chances of a tire blowout. Only then can you be sure of you and your loved ones’ safety.

The post What Should You Do If You Have A Tire Blowout? appeared first on Smart Motorist.


source https://www.smartmotorist.com/what-should-you-do-if-you-have-a-tire-blowout

Wednesday, September 2, 2020

What is a Tire Bead Seater?

Have you ever mounted a tire on a wheel? Then you might be aware of how difficult it is to manually seat the bead on the wheel rim. No matter how much effort you apply with your bare hands, there always remains some space between the tire bead and the sides of the wheel.

This crack might look innocuous but it is dangerous. Leaving it unattended will let the tire inflate beyond the safe limit, thereby putting your personal safety at risk. You should thus make sure that the tire sits perfectly on the wheel rim and that there is no gap between both.

Which is precisely what a tire bead seater does. It is equipped with unique configurations that make it easy for tire technicians to mount the tire safely and quickly. Tire bead seaters also allow you to inflate the tire to the recommended pressure through the tire valve.

Read on to know more about how a tire bead seater achieves that.

What is a tire bead seater?

Tire Bead Seater
Image: automotive acrecovery machine

Tire bead seaters are devices that help a tire, new or used, sit perfectly on the wheel. They have a built-in air trigger that emits a massive pressure of air to inflate the tire to seat it snugly on the wheel rim. This arrangement also makes sure that the tire is inflated to the recommended pressure.

Most bead seaters have a discharge valve that allows for easy airflow control. You can use one of your hands to hold the valve assembly and the other to balance the tire. Such an organization is critical for the safe and effective use of these devices.

High-end seaters also reduce ‘blowback recoil’ through their unique nozzle design. Their nozzle contains strategically positioned holes that help these seaters come handy with a wide range of tire sizes and wheel diameters. That means you can use them with both light- and heavy-duty tires.

Yet another benefit that tire bead seaters provide is inflating the tire to the optimum pressure. They have a built-in air tank that supplies compressed air to fill the tire. All these features combine to make tire bead seaters the best choice for on-the-road service.

How to Use a tire bead seater


Benefits of using a tire bead seater

  • Quick and easy inflation: Most drivers feel they have no choice but to drive their vehicle to the nearby tire shop the moment their tire is showing signs of under-inflation. Those with a bead seater, however, can quickly and easily inflate their tires in the comfort of their home.
  • Multi-purpose use: Unlike tire inflators that do nothing else besides increasing the air pressure in the tire, bead seaters also help in mounting the tubeless tires on the wheel. They do that despite costing less than most inflators.
  • Prevent damage to tire rims: What would happen if you don’t use a bead seater to mount the tire on the wheel? The rim will be left with scratches from the pry bar or any other sharp equipment that you may use to push the rubber on top of it.

How to choose a tire bead seater?

Look for the following features to get the best tire bead seater for your needs:

  • Hose assembly: Units that come with a built-in hose assembly use it to connect their nozzle and the valve. This allows the users to easily carry the seater from one place to another, as they no longer have to carry the weight of the air tank.
  • Easy-to-read gauge: Here is one feature that separates the best tire bead seaters from the riffraff. Almost all the top-rated models have an easy-to-read gauge to let you inflate the tire as per its manufacturer’s recommendations.
  • Safety valve: Bead seaters that come with a safety valve aren’t hazardous to use in closed environments. That’s because the valve automatically pops up and releases excess air once the pressure exceeds the safe limit.
  • Considerable tank capacity: Do you intend to buy a multi-purpose tire bead seater? One that would come handy for RVs, trucks, tractors, ATVs, as well as regular vehicles? Then make sure that its tank capacity isn’t less than 5 gallons.
  • Threaded barrel with lip: Nobody knows the angle at which they might have to insert air into their next tire. This lack of knowledge makes it necessary for you to invest in a bead seater that has a threaded barrel with lip, as such models provide multiple angles for optimum inflation.
  • Bottom feet and built-in carry handle: The former prevents the seater from rolling during use to provide enhanced ball valve protection. Carry handles, as you might guess, make maneuvering the seaters from one place to the other a cinch.

Best tire bead seaters on the Market

Here are the two best tire bead seaters that are currently available on the market:

1. Neiko 30007L Tooluxe Air Tire Bead Seater

Neiko 30007L Tooluxe Air Tire Bead Seater, 5-Gallon Capacity, 87-116 PSI Operating Pressure

>>>See On Amazon<<<

The Neiko 30007L is easily one of the best models on the market. It can inflate up to 24inches’ tire and is useful for all sorts of passenger and personal-use vehicles. This bead seater also has an easy to read gauge and provides pressure between 87 and 116psi.

Aside from that, its air tank boasts a 5-gallon capacity and the automatic safety valve of this model ensures safe operation. Also on offer is a specially designed lip that joins its forces with the metal barrel to provide long reach and quick inflation.

2. HTTMT- US-FF932-BK- New 5 Gallon Air Tire Bead Seater

HTTMT- US-FF932-BK- New 5 Gallon Air Tire Bead Seater Blaster Tool Seating Inflator Truck ATV 145PSI Black

>>>See On Amazon<<<

Here is another model that is making waves on the market. The HTTMT bead seater comes with a built-in of/off valve to ensure ease of usage. It also has an air gauge to tell you the air volume and is compatible with both light- and heavy-duty vehicles.

Similar to the Neiko 3000L, this unit is powder coated by its manufacturer to keep rust and corrosion at bay. Its air tank can hold up to 5 gallons of air at once and the long-reach nozzle of this model can deliver an operating pressure between 87 and 116psi. What more can you ask for!

Conclusion

Tire bead seaters are a godsend. Not only do they help you in mounting the tire on the rim but their usage continues afterward. These devices double as tire inflators to let you pump in air into your tubeless tires at will. Little wonder, then, that they are uber-popular among tire mechanics and repairmen.

The post What is a Tire Bead Seater? appeared first on Smart Motorist.


source https://www.smartmotorist.com/what-is-a-tire-bead-seater