Friday, August 28, 2020

4 Causes of tire Wear on the Outside Edge

What would cause a tire to wear on the outside? Most drivers ask this question when the damage has been done. They don’t notice any signs of damage until the performance of the tire has already gone south. Such negligence is not only dangerous but it can be costly too.

Start with the dangerous part. Too little tire tread can create unsafe driving conditions as the tires won’t be able to grip the road.  The inability of the tire to maintain optimum traction, especially on snowy and wet roads, will make it prone to slippage.

Then there’s the costly scenario. Tires that wear down quickly don’t only put your safety in jeopardy. They also end up making a big hole in your pocket. That is because tire wear, once it has reached an extreme level, is irreparable and requires you to replace the tire altogether.   

Read on to prevent both these scenarios:


Causes of tire wear on the outside edge

Here are the reasons that cause a tire to wear on the outside:

1. Wheel Misalignment

Wheel Misalignment

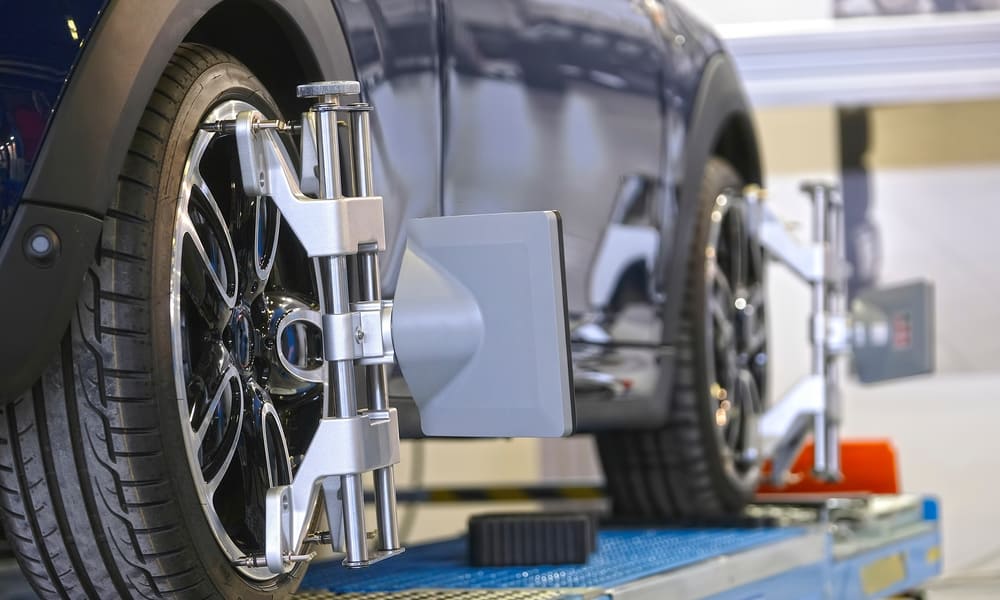
Was your vehicle involved in a major accident of late? Do you remember one of its tires hitting a large pothole while you were driving? Did one of its tires mistakenly climbed over the road’s hard shoulder? These are some of the reasons that cause the wheel to go out of alignment.

In the aftermath of all these scenarios, the wheel tilts on the outside and starts putting more pressure on the road-facing shoulder of the tire. This issue appears benign at first. But over time it causes the rubber on the tire’s outer edge to scrub faster than the one on its inner edge.

If you ignore this problem for a long time, the rubber scrubbing will lead to the tire developing uneven wear on its outer edge. This will happen because of the tire’s outer edge scrapping itself off on the asphalt and wearing down its road-facing edge.

Solution:

Check the alignment of your tires every 6,000 to 7,000 miles. Decrease the time between successive alignment checkups once the suspension and wheels get older.


2. Bent Spindles or Struts

Bent Spindles or Struts

Struts or spindles form an essential structural component of most vehicles’ suspension. They join the dampening impact of the shock absorber with the upper ball joint and hold the wheel and tire assembly in place. Their optimum performance is also necessary to maintain ride comfort.

Most of the time, the top of the strut is rotated to get optimal camber and correct wheel alignment. When that specific part is bent, the entire setting misaligns. This causes the wheel to misalign and the front tires to start wearing on its outside edge.

The magnitude of the tire wear will be dependent on how much (or how little) the spindle has bent. That is to say that if you notice the bend in the spindle in the early stages, the damage to both it as well as the tire wear may be reversible (and less costly to repair).

Solution:

If the spindle has bent beyond repair, you have no option but to replace it. This might cost you between $480 and $600, including labor and the part cost. However, if the damage to the spindle isn’t too severe, you can take it to a tire shop and have it straightened for a fraction of the price mentioned before.


3. Sagging Springs

Sagging Springs

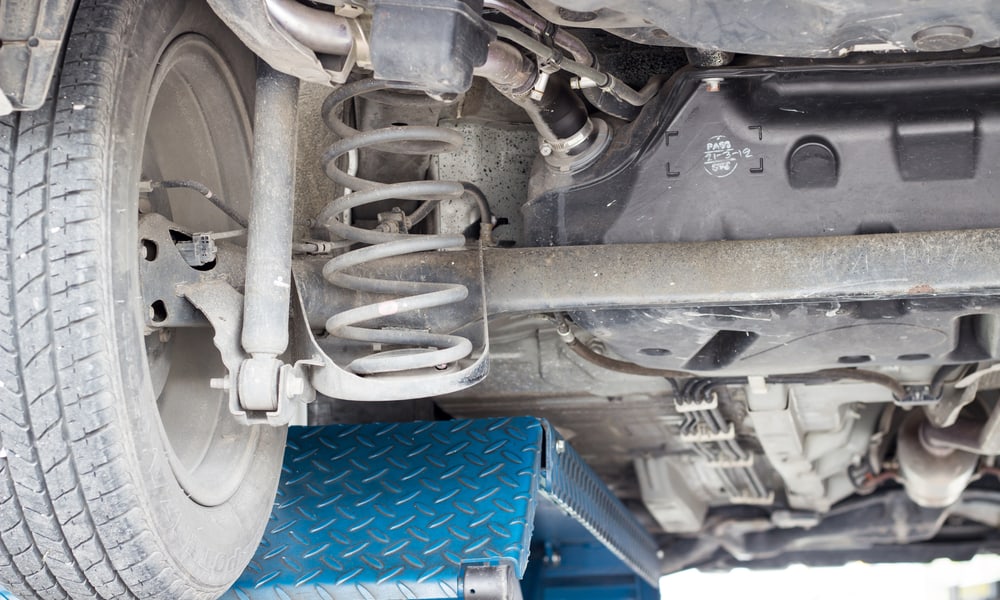
Most of you will already be aware of the importance of your vehicle’s springs. They support the car’s entire weight and absorb excess energy that emanates from road shocks. Their anti-sway bar is responsible for shifting the movement of the wheels and, in turn, stabilizing the car.

Application of constant load on the springs weakens their flexibility. It results in either the leaf spring losing arch or the coil spring losing height. Front tires that wear on the outside do so because of the latter scenario – their coil springs have lost height due to aging.

Once the coil springs start losing their height, your vehicle follows suit. This causes a misalignment in the entire suspension of the vehicle. Such a scenario will force the tire to handle more weight and might cause its outside edge to wear.

Solution:

Replace the springs that may have sagged. You can either replace them in your garage (if you have experience of doing mechanical work), or you can take your vehicle to a workshop. Either way you must be prepared to fork out up to $450 on replacement parts.
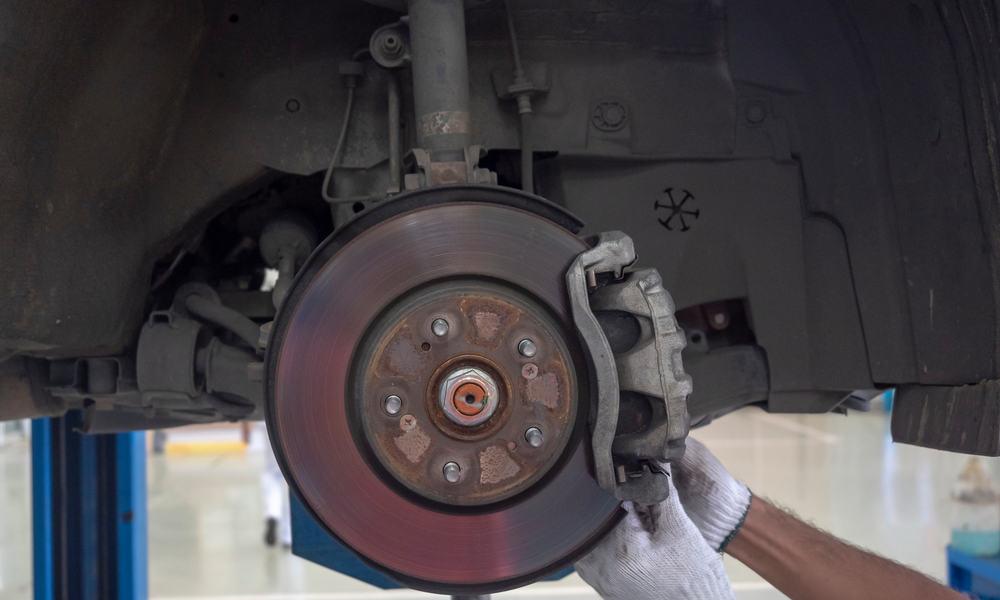
 

4. Worn Ball Joints

Worn Ball Joints

Ball joints are a crucial component of your car’s front suspension. Their work involves maintaining the tire’s optimum contact with the road throughout the motion of the suspension. They also control arms to provide a vibration-free ride and give you full control over your vehicle.

Similar to other parts in your vehicle, ball joints are also prone to wear and tear. As they start to show signs of damage, your car’s wheels start pointing slightly outward. Mechanics refer to this condition as the ‘toe’ of the wheel going out of alignment.

Tire wear caused by worn-out ball joints is hard to notice but it is no less dangerous than one caused by wheel misalignment. Both end up placing more pressure on the outer edge of the tire and may lead to the tire wearing on the outside.

Solution:

Replace the worn-out ball joints and have the front wheels re-aligned. If the problem still persists, you may also have to change the control arm. All these replacements might set you back $1500 to $2000.


Conclusion

Multiple reasons might cause your tire to wear on the outside. Its wheel might have misaligned, the strut or spindle might have broken, the ball joints in the suspension might have worn out, or the springs underneath your vehicle may have sagged. The good news is that all these issues can be treated.

The bad news, however, is that the cost of treatment depends on the extent of the damage. Identifying and rectifying the problem in early stages is, therefore, crucial if you don’t want to fork out hundreds of dollars on replacement parts’ and labor costs.

The post 4 Causes of tire Wear on the Outside Edge appeared first on Smart Motorist.


source https://www.smartmotorist.com/what-would-cause-a-tire-to-wear-on-the-outside

Thursday, August 27, 2020

Michelin Defender Vs Premier Tire: Which Is Better?

Most drivers think that not much separates Michelin Defender and Michelin Premier tires. Such thinking isn’t entirely wrong. Both these tires are built for coupes, crossovers, family sedans, and minivans. The duo also works equally well as an all-season option to keep you safe on the asphalt.

Apart from symbolizing the high-quality that Michelin tires are famous for, these tires are relatively quiet as well. You won’t be bothered by road noise after installing either of them underneath your vehicle. But quite a few differences do emerge on comparing Michelin Defender Vs Premier Tire.

Start with the speed rating. The Michelin Premier, alongside its variants, has a higher speed rating. It provides a better grip during hard cornering in dry conditions. In contrast, the Michelin Defender sacrifices speed at the altar of practicality. This tire offers a bigger tread life and more ride comfort.

Read on to know more about their differences.

Michelin Defender Vs Premier Tire

Here’s how both these all-season tires compare:

Types

Types

Both these tires are available in two different types:

Michelin Defender

Michelin Defender is available in two types: Defender LTX M/S and Defender T+H. The Defender LTX M/S has three latest technologies (Comfort Control, Intellisipe and MaxTouch), three safety features (high silica content, zigzag sipes, and circumferential grooves) and is available in T and H speed ratings.

The Defender LTX M/S, meanwhile, is an all-season tire that comes with a 70,000 miles warranty. It lacks Comfort Control Technology and replaces it with an EverTread compound. Yet another way this model differentiates itself from the T+H is by offering on extra speed rating.

Michelin Premier

Michelin reminds us that its Premier Tire is available in two variants: Premier A/S and Premier LTX. The Premier AS model is equipped with our favorite EverGrip Technology that imparts it better road grip in dry conditions. It also boasts Comfort Control Technology to minimize road noise.

The Premier LTX model lacks the latter technology but more than makes up for this shortcoming with its wet weather performance. This tire has silica in its tread compound that is capable of expanding when the temperature goes down. You can, therefore, drive it in wet conditions with confidence.

Tread compound

Tread compound

Here’s how both these tires compare on this count:

Michelin Defender

Both the Defender T+H and LTX MS have different tread compounds. The former’s tread area features a high content of silica that helps it maintain its traction on wet roads. Silica does that by expanding on slippery surfaces to aid the tire in maintaining its grip.

The Defender LTX MS doesn’t have silica in its tread compound but it still does admirably well in wet conditions. That is mainly because of this model’s 3D active sipes which help it in ensuring the safety of its vehicle’s passengers on water-logged roads.

Michelin Premier

The Michelin Premier AS uses a mixture of sunflower oil and silica to create its tread. Sunflower oil helps the tire provide optimum traction in wet conditions by imparting it with flexibility. Silica, meanwhile, stops the flexibility from going too far by improving the tire’s strength.

Both these compounds are also used in creating the tread of Premier LTX. But this tire differentiates its tread area from that of its peer’s by using steel belts. Reinforced with polyamide cord and encapsulated in a polyester casing, these steel belts help provide a comfortable ride.

Dry Road Performance

Dry Road Performance

Here’s how both these tires fare on dry roads:

Michelin Defender

We prepared a multi-point checklist to gauge the performances of both these tires on dry asphalt. The headings on the list included grip, stability on high-speeds, braking distance, cornering and road noise. We’re happy to report that both variants of the Defender tire ticked all these boxes with aplomb. 

The Defender LTX MS specifically behaved excellently on dry roads as its MaxTouch technology helped this tire evenly distribute the forces of acceleration and braking on high speeds. The Defender T+H wasn’t far behind in terms of performance even when the odometer touched its speed limit.

Michelin Premier

Start with the Premier AS. This tire has hidden grooves that replace the ones that are initially visible when the tire wears down. They therefore help the tire in its quest to provide short braking distances, tight and precise cornering on dry roads and overall seamless driving experience.

The Premier LTX performs even better. Perhaps it does the same because of its softer-than-usual tread and a relatively robust sidewall. While the former increases provides more grip on high speeds (a key component of dry road performance), the latter enhances the tread life.

Wet Road Performance

Wet Road Performance

Here’s how both these tires fared in wet conditions

Michelin Defender

Michelin’s decision to impart the Defender T+H with its IntelliSipe technology has done wonders to this tire’s wet performance. This technology has equipped the model with zigzag sipes that optimize the tire’s road contact by interlocking on the road. You can drive it in wet conditions with confidence.

The IntelliSipe Technology is on offer with the Defender LTX MS as well. But this model’s wet weather performance is even better due to its circumferential and lateral grooves – as both of them channel the water out of the tread area to prevent any chances of hydroplaning. 

Michelin Premier

Two features of the Premier AS are responsible for its above-par wet weather performance. The first are its hidden and expanding grooves whose geometric shape and strategic placement allow them to evacuate water. The second is its high-grip rubber compound which does what its name implies.

The Premier LTX might not have both these features but it has something else: a tread made of the mixture of sunflower oil and silica. Both these compounds work in tandem to increase the tire’s flexibility in cold weather while also maintaining its strength on difficult terrains.

Conclusion

To summarize everything that we have said until now, the Michelin Defender tire is the epitome of practicality. It may not have the biggest speed rating on the market but more than makes up for this shortcoming with its 90,000-mile tread warranty and long tread life.

The Michelin Premier, meanwhile, has a softer tread compound and higher speed rating. Both these features should leave no doubt in your mind that this tire is made for high-speed applications. In exchange, it has a lower tread warranty.

The post Michelin Defender Vs Premier Tire: Which Is Better? appeared first on Smart Motorist.


source https://www.smartmotorist.com/michelin-defender-vs-premier-tire-which-is-better

How much does a Tire Weigh

If you want to know how much does a tire weigh, one place to start is Amazon. The e-commerce giant has listings of thousands of tires along with the weight and dimensions of each model. But there’s a very valid reason why you may not want to go there: time.

Going through Amazon’s tire listings is a laborious process. There are hundreds of them for almost every vehicle on the road. You’ll have to jump from one browser tab to another to compare the weights of different tires. Getting a clear picture would still be next to impossible. Here’s why.

Tires vary in type, size and other parameters. Such variables include the tire’s tread compound, its inner belt, the vehicle it was made for, and more. That’s why two tires from the same manufacturer, which were made for the same vehicle, regularly weigh differently.

How much do tires weigh?

Read on to find out:

Passenger car tires

Passenger car tires

Common sense tells us that there’s no one-size-fits-all category when it comes to passenger tires. The market is incredibly diverse and the number of vehicles on the road is huge. Small city cars use 13-inch tires whereas SUVs and sports car count on bigger 20-inch models.

That is to say that one cannot categorize the weight of a passenger car tire based on the vehicle it was made for. Multiplicity of options make it impossible. A much better way to categorize tires’ weights is to use the numbers marked on the tire’s sidewall.

Unknown to the majority of vehicle owners, these numbers aren’t merely for showoff. Tire sidewall markings, as they are called in technical jargon, convey information about the brand, size, and model of your tire. They also tell us about the weight of the individual tire.

Here are different sidewall markings along with the weight of the tire:

  • 155/70 R13: Tire normally weighs 6.5kg
  • 185/70 R13: Tire weighs more than 7kg
  • 175/65 R14: Tire weighs b/w 6.5kg and 7.2kg
  • 195/65 R15: Tire weighs between 8.2 and 9kg

Truck tires

Truck tires

It goes without saying that truck tires weigh heavier than passenger car tires. These models cannot afford to be lightweight as they have to carry more load, need to withstand more abuse and must have the ability to roll on more challenging terrains than their peers used underneath passenger cars.

Hence the reason why an average passenger car tire weighs less than an average truck tire. While the former typically a reading of between 20 and 22 pounds on the weight scale, most truck tires weigh north of 30 kg. Some of them weigh as much as 80kg.

This diversity in weights is mainly due to different sizes of truck tires. Those with 24-inch wheels are usually the heaviest and weigh close to 80kgs. Medium size truck tires, i.e., those with a 22.5-inch size, generally weigh 60kg. Small truck tires, like those used underneath pickups, weigh approximately 35kg.

To summarize what we have just said:

  • 17-inch truck tires: Weigh close to 35 kg
  • 5-inch truck tires: Weigh approximately 60 kg
  • 24-inch truck tires: Weigh close to 80 kg

Miscellaneous tires

Miscellaneous tires

The majority of tires that roll off from the factory floor are meant to be driven on the road. Apart from passenger vehicle and truck tires, such models include motorcycle tires, farm and tractor tires, RV/motorhome tires, ATV tires, trailer tires and commercial van tires.

A tiny minority of tire manufacturers come up with models that aren’t made for the asphalt. Such tires do their best in household and in-house applications. Examples include lawn mower tires, pulley tires and those used underneath a golf cart.

Walmart tells us that both these types of tires – the ones that are designed to be driven on the road and others which aren’t – weigh differently. Usually those tires that have road applications weigh more than their at-home counterparts.

Here are both types of tires alongside their average weights:

  • Lawn Mower Tires: 2.5 kg
  • Golf Cart Tires: 4.5 kg
  • Trailer Tires: Between 90 and 115 kg
  • ATV Tires: Between 16 and 32 kg
  • Motorcycle Tires: 14 kg
  • Tractor and Farm Tires: Between 90 and 181 kg

FAQs and Answers

Q: Why do tires weigh so much?

A: Multiple components that combine to form a tire also have an impressionable impact on its weight. All these parts come together to improve the tire’s handling, traction, and wear. They also help the tire achieve cornering and traction capabilities.

These components include:

  • Tire Casing: Also known as the body of the tire, the tire casing includes multiple components including sidewall (that gives the tire weather resistance), bead (which secure the tire to the wheel), body ply (that enhances the strength of the tire rubber) and the inner liner (that acts as an air seal inside the tire’s tube).
  • Belt System: Located on top of the tire casing, the belt system imparts stability to the tread area of the tire. It also contributes to the tire’s traction, handling and wear. Most manufacturers use steel to create the belt system, as steel enhances the strength of the tread area without imparting it a lot of weight.
  • The Tread: It is the uppermost slab of the tire and contains two compounds. One of them is the tread base whereas the other is the tread cap. The tread base is responsible for imparting durability to the tire’s plies. Tread cap, meanwhile, is an abrasion-resistant compound that is partially responsible for providing mileage and traction.

Q: How much do monster truck tires weigh?

A: Such tires are the heaviest of the lot and typically weigh between 362 and 408kgs. Their heavy weight is mainly due to the sheer size of these tires. As most of them are 66 inches high and 43 inches wide. That means a tire that measures 6’ tall and 4’ wide.

Conclusion

Depending on their size, the vehicle they were made for and their inner components, different tires weigh differently. Passenger tires are the lightest of the lot and usually don’t exceed the 10kg range. Monster truck tires lie on the other extreme as they weigh as much as above 400kgs.

The post How much does a Tire Weigh appeared first on Smart Motorist.


source https://www.smartmotorist.com/how-much-does-a-tire-weigh

Wednesday, August 26, 2020

6 Steps to make a Tire Swing

Most parents don’t know how to make a tire swing. Yet they continue to complain that they cannot drag their kids away from devices. They don’t realize that having a tire swing in their backyard would keep their kid away from her gadgets by convincing the little one to spend more time outdoors.

Shielding the kids’ eyes from screens isn’t the only benefit tire swing offers. Experts tell us that swinging also improves one’s balance, coordination, and motor planning. It also increases the kids’ body awareness, has a positive impact on their focus and attention spans, and gives their mood a shot in the arm.

With these benefits in mind, let’s look at how to make a tire swing:

Before you make a tire swing

Here’s what you need to do:

Find a large used tire

Find a large used tire

There are many places where you can find a large used tire. The most obvious is your home and within it your garage. You may have thrown a spent tire there, or, if you live in the same house as your parents, you can find in it one of the tires used by your parents in their time.

If you can’t find a used tire in your home, visit your local tire store. Ask its owner whether they have any tire which they don’t have any use of. Most of the time they’d be able to offer you something in return for a small payment. The amount will be a pittance so you shouldn’t have any qualms paying it.

Clean the tire

Years of staying put might have exposed the tire to layers of dirt and debris. It may also have the grease that you lubricated it with back in the day. All these irritants need to be washed away as your kids are going to sit in and hold onto the tire.

Use a mixture of soap and water to wash and clean the inside and outside of the tire. To get rid of residual grease use WD40. It will cut through the layers of the sticky substance and make it easier for you to rub away the grease with a ragged cloth piece.

Find a suitable branch

Find a suitable branch

The branch should be sturdy enough to withstand the weight of your children and that of the tire swing. It should also be flexible. The back and forth movement of the swing will otherwise break an inflexible branch from its twig.

Yet another thing you need to closely monitor is the height of the branch. It should stand at least ten feet above the ground. This will make sure that your kids could easily enjoy the back-and-forth ride without their feet touching the ground.

Purchase the rope or chain

You can use multiple ropes to hand your tire swing to a tree branch before suspending it in air. The ones used by most people include heavy-duty climbing ropes or utility ropes. Both are made of quality materials that keep them from breaking or fraying when weight is applied to them.

You can also use a chain if you aren’t a huge fan of ropes. Galvanized chain works best with tire swings as apart from the qualities mentioned above, it can also resist rust and corrosion. But we still recommend using a rope because it will be easy to hold on to for the kids and won’t do any damage to the branch.

Pro Tip: You can prevent your rope by fraying by lubricating its length with a tube. Especially coat those areas of the rope with a tube where it will come into contact with the hands, the tire, and the tree.

How to make a tire swing

Follow these instructions to make a tire swing:


What you’ll need?

  • Used tire
  • High-quality rope
  • Ladder
  • Power drill
  • Anti-fray tubing
  • Bowline or fisherman’s bend

Step-by-Step Guide on tire swing DIY

Step 1: Drill holes into the tire

Drill holes into the tire

Since you’re going to leave it out in the open, rainwater will accumulate in the tire. Drilling holes is therefore necessary to prevent the accumulation of water. Make sure that you’re drilling the holes in what is going to become the tire’s base. As it will make it easy for the water to dissipate.


Step 2: Position the ladder against the tree

Position the ladder against the tree

Experts tell us that ladder should always be placed at a 75-degree angle from the ground. Its feet should be placed such that the horizontal distance between the top of the ladder and its feet is one-quarter of the ladder’s working length.


Step 3: Place rope over the branch

Place rope over the branch

After making sure that the leader is steady, use it to get to the top of the branch. Position the rope on that area of the branch that doesn’t have any imperfections or knots. Apply anti-fray tubing at all those areas of the rope that are going to come into contact with the branch.


Step 4: Tie the upper end of the rope to the branch using a fisherman’s bend or a bowline

Tie the upper end of the rope to the branch using a fisherman’s bend or a bowline

Never use a square know to secure the rope to the tree branch. These knots are extremely unstable and will fall apart if you pull backward on their loose end. Also, if you have never made a knot before in life, take the help of someone who has.


Step 5: Tie the lower end of the rope to the top part of the tire

Tie the lower end of the rope to the top part of the tire

Position the tire in such a way that its drainage holes are at the bottom. Decide how far above the ground you want the tire to be. It should be high enough to prevent the legs of your child from dragging on the ground. Then use a square knot to tie the lower end of the rope to the top part of the tire.

Follow it up by trimming off any excess rope. This will prevent it from accidentally coming in the way and getting undone.


Final Step: Test the swing

Test the swing

Apply little weight to the swing to check if it’s holding weight well. If it is, let your kids start swinging.


Conclusion

There are multiple ways you can tone down the screen time of your kids. None is as cost-effective and as foolproof as having a tire swing in your backyard. It will continue to come handy throughout the year and allow your kids to experience some outdoors’ time in front of your eyes. What more do you want!

The post 6 Steps to make a Tire Swing appeared first on Smart Motorist.


source https://www.smartmotorist.com/diy-tire-swings

Monday, August 24, 2020

6 Easy Steps to Put on Tire Chains

Driving on snowy and icy roads isn’t everyone’s cup of tea. The reduction in road friction, which is necessary for the tires to brake, steer and accelerate, makes it difficult for the drivers to maneuver their vehicles as they’d like. Loss of limb and life mostly follows this scenario.

That isn’t to say that you have no choice but to slip and slide when driving in winter conditions. There are a few tips and tricks out there that could help improve your tires’ grip. One of them involves putting on chains on the tires to provide them with extra traction.

People who visit mountainous areas often are aware of this. They know how crucial the tire chains could be in ensuring the safety of their vehicle and its passengers. That’s why they make it a point to roll them around their tires before the road gets slippery. Here’s how to put on tire chains:

Before you put on tire chains

Here’s what you need to do:

Find out the size of your tire

Find out the size of your tire

Doing this is necessary as it would help you select chains that match the tire size. Look along the road-facing side of the tire for a long string of numbers and letters. Note down all the numbers or take a picture of them. You’ll need the information they provide when shopping for chains.

The first number in the string is an indicator of the tire width, the second of the height ratio, and the third reveals the diameter of the wheel. You don’t have to remember these numbers. Merely showing them to a store employee would help them recommend a chain of the same size.

Identify the tires where you’ll be putting the chains

Most drivers don’t realize that putting on tire chains isn’t just a matter of purchasing them from the market before wrapping them around all four wheels. You need to first determine whether your vehicle is a front-wheel, rear-wheel, or all-wheel drive. Here’s why.

Vehicles that offer front-wheel drive require the chains to go on the front. Those that offer a rear-wheel-drive require chains on their back tires. All-wheel drive vehicles, however, depend on the instructions of their manufacturer as to where you should put the chains.

Park your car at a safe location

Park your car at a safe location

As long as you aren’t living close to the Equator, it’s likely that you would be putting on tire chains just before the road gets slippery. In such a situation, you might not have the luxury of a garage where you could park your vehicle. You may have to put on the chains on the road.

That’s why we recommend that you park your vehicle on the road’s hard shoulder before putting on the road chains. Turn on its emergency lights so that the vehicles coming towards you can notice your presence from afar. All these precautions are necessary for your and your vehicle’s safety.

Practice before you go

Try to put on your tire chains before you go out. Practice in your garage. Don’t tell yourself you can do it right at the first time of asking. The bad weather and heavy winds that might be waiting for you on the road could make it difficult for you to put on tire chains if you’re installing them for the first time.  

There are plenty of YouTube videos to help you. Each set of chains also comes with installation instructions. You can also drive to your favorite tire shop to get a demo. Or you can just use the below-mentioned instructions. Whatever your choice of learning, practice putting tire chains before you go.


How to put on tire chains

Follow these instructions to put on tire chains:

What you’ll need?

  • Chains that match your tire size
  • Safety gloves

Step-by-Step Guide on how to install snow chain

Step 1: Take out the chains from their packaging

Take out the chains from their packaging

There will be twists in the metal holding the chain in a U-shape inside its package. Untangle these links with your bare hands. The process can take ten minutes or more. It might take even longer if you haven’t done it before. That’s why we have recommended that you put your chains on before you need them.


Step 2: Lay the chains on the ground

Lay the chains on the ground

If you have a front-wheel-drive vehicle, put the chains next to the front wheels. Put them next to the rear wheels if your vehicle is a rear-wheel drive. Lay the chains next to all the four wheels if your vehicle is an all-wheel or 4-wheel drive.


Step 3: Cover the tire with the chains

Cover the tire with the chains

After stopping your vehicle in ‘parking’ mode and turning on the emergency lights, start covering the tires with the chains. Make sure that the chain covers 3/4th of the tire. All the chains, including one that runs from side-to-side, should be straight.

Once you have covered the tire with chains, tuck their loose ends between the ground and the bottom of the tire. Then drive your vehicle forward to expose the unchained portion of the tire. Put chains on that area as well.


Step 4: Rotate the steering to turn the wheel inside

Rotate the steering to turn the wheel inside

This will give you better access to the chain links and make it easier for you to secure the chains to the tires. If you’re putting the chains on the right tire, turn the steering left to point the tire inwards. If you’re putting them on the left tire, turn the steering right.


Step 5: Connect the chains together

Connect the chains together

Tire chains come with hooked edges that you can connect to fit them snugly around the tire. Tighten the connection as snug as possible to get a secure fit. Make sure that the right and the left connections are aligned and equally tight. Otherwise the chain might get down from the side where the connection is loose.


Final Step: Drive 30m and retighten the chains

Drive 30m and retighten the chains

Once you have put your vehicle in motion, the chains might get loose. That’s why you must retighten the chains after a short drive. This will help them stay in place for the rest of your journey.

Conclusion

Tire chains are crucial for maintaining the vehicle’s grip on snow- and ice-laden roads. They provide the tires with friction which is the wet road no longer offers. In doing so, the tire chains help ensure the safety of your vehicle and its passengers.

What is more, installing the chains might look complicated on paper but it is effortless to execute. All you have to do is to put the chains over the tires, connect their links, drive the vehicle a few meters and re-tighten the chains. You’d be able to do all this in less than an hour in good weather.

The post 6 Easy Steps to Put on Tire Chains appeared first on Smart Motorist.


source https://www.smartmotorist.com/how-to-put-on-tire-chains

Monday, August 17, 2020

7 Easy Steps to Clean a Car Carburetor

The carburetor is called the lifeblood of a car or any vehicle. Its job is to provide a mix of fuel and air to make the heart of the car run smoothly. But from time to time, this carburetor gets dirty, and your job is to clean it regularly.

If this maintenance isn’t done, then your carburetor will not work properly. And in the end, your car itself won’t be able to run smoothly as it should.

Knowing how to clean a car carburetor isn’t a big deal since the techniques and steps are pretty easy, and it merely takes about half an hour. We’ll teach you those steps and techniques to clean your carburetor in an understandable way.


How To Clean A Car Carburetor 

Cleaning a car carburetor is not difficult at all, especially if you are dealing with 350 Chevy Carburetor. According to Torquewrenchcenter blog, You need to clean both the internal areas and the external body of the carburetor. For this, you will need to collect some items that you will clean with. After you have collected everything, then you can begin cleaning. Below we have detailed the steps so that you can understand what you need to do:

Step 1: Collect Items You Need

The items you will need to begin this procedure of cleaning your car carburetor are some old rags, a lubricant spray meant for cleaning, a wire brush that is small to brush the outer body in case there is sludge on it, a choke cleaner or a carburetor cleaner.

Some of these things you will already have in your garage or storage room. The rags and wire brush are general stuff you will have lying around. But the lubricant and carburetor cleaner is something you will need to buy at a store. These are available in auto supply or auto parts stores.

Step 2: Safety First!

You always need to take safety measures to protect your hands, eyes, and nose if not anything else. This is necessary when you are doing heavy work or cleaning duty. Any kind of accident may happen if you are dealing with chemicals or sharp objects.

That is why you need to make sure you have gloves, safety goggles, and a face mask before you begin your work. After you wear this, you can arrange your work station and start cleaning.

Step 3: Reach The Car’s Carburetor

After you have taken safety measures to keep yourself safe, and after you collected the necessary items for cleaning, you can move on to dealing with the carburetor.

Firstly, you need to turn the engine of your car off and let it cool down a bit before you can touch it. You then have to remove the air filter and housing. This is done so that you can reach the carburetor inside.

Take all your rags and bunch them up together. Find out where the throttle control is attached to the carburetor. This lets you run the engine manually in a much faster way while you are still cleaning.

Step 4: Carburetor Internal Areas

Take the rags that you have bound together in your hand and spray the cleaning solvents on them. They must then be placed around the carburetor’s base. You must be careful when you place the wet rags there because the chemicals could touch any other painted surfaces or areas and ruin the paint job or damage the surface completely. The rags will also stop runoffs.

Step 5: Carburetor External Areas

Now to get to the external body of the carburetor. You need to spray the lubricant spray or your choke cleaner on the outside body of the carburetor. Make sure you are spraying on the connection or attached moving parts. An example of these attachments would be the throttle area linkage. These sorts of places need to be sprayed with the cleaning solvents.

After you are done spraying everything that needs to be sprayed, you need to let it sit for a while. Once enough time has passed, you can wipe off the liquid. In the case of heavy sludge and oil with debris being piled up, you will need the small wire brush to clean right after the solvent is sprayed. You need to do this task fast, or else the spray will set for too long and dry up.

Step 6: Finish Up And Start The Engine Again

After everything has been brushed and wiped clean, you need to spray a little bit more of the carburetor cleaner on the carburetor. At this point, the lubricant spray isn’t needed anymore.

You can now remove those rags. Take all your tools and items away from the car. Once the area is clear, you need to start the engine of your car. Use the throttle control so that you can run the motor with high revolutions per minute (RPM).

While you are doing this, you need to spray on the carburetor cleaner again but in little amounts with intervals. When you do this, this will push the cleaning solvent through, and it won’t stall out the engine.

This step must be done continuously because you will need to spray little by little and also run the engine’s speed up and down while spraying. After a while, you can let the engine run at a normal speed for a few minutes.

Step 7: Reinstall All The Parts

You can now turn off your car’s engine and put the air filter and housing back in place. Drive the car around for about 10 minutes or so until it is hot enough and lets the carburetor cleaner run all throughout the system.

Final Words

Inside car engines, carburetors often create problems more than any other part inside. It is the part that controls the flow of air and fuel, after all. All the fuel and air are meant to be burnt in that part.

Whenever you are about to add new fuel to your tank or replace it, always make sure to clean the carburetor because it will cause combustion problems or make it hard for your car to run smoothly.

The post 7 Easy Steps to Clean a Car Carburetor appeared first on Smart Motorist.


source https://www.smartmotorist.com/how-to-clean-a-car-carburetor