Monday, July 20, 2020

5 Main Causes for Tire Cupping (Tips to Prevent)

Uneven tire wear is a very disappointing thing, especially if you just installed new tires on your car. And, uneven wear not only prematurely ends the life of your tires, but it can also be unsafe to drive on such tires.

One of the most dangerous types of uneven tire wear is called tire cupping, also known as “scalloped tires.” This is a term that most people don’t recognize right away, which is why I decided to take action and write something about it.

Let’s learn everything there is to know about tire cupping and how to prevent it.

What is Tire Cupping and How it Occurs?


Tire cupping is a type of uneven tire wear. On the outside, it looks like parts of the tread of the tire are missing. It usually repeats across the tread of the tire and never happens in one place.

The issue is mainly represented in tires for trailers and caravans. When these vehicles are unloaded, they usually typically don’t have good contact with the surface, especially on bumpy roads. Or, if you like it in lay man’s words, trailers jump on uneven surfaces.

As a result of that jumping, the tire doesn’t wear evenly along with the tread pattern. The areas that have contact with the road wear much faster than areas that constantly touch the surface.

These things can also happen in regular passenger cars. Scalloped tires don’t occur very often in these vehicles, though, and they largely happen due to bad components or improper maintenance.

Nonetheless, once tire cupping starts to take place, the tire won’t be able to provide you with the same performance. Traction will be limited, especially on wet surfaces, and the same is true for cornering grip.

Ultimately, scalloped tires can become very noisy at higher speeds, which dramatically worsens the experience for the passengers. Suffice to say; you need to take extra care to avoid tire cupping.

Main Causes for Tire Cupping

Tire cupping doesn’t appear as a result of one particular thing. Sometimes, it’s a combination of many things linked to the tires and wheels, the underbody of the car, and suspension components. Let’s get into more detail and revisit the most common culprits for tire cupping.

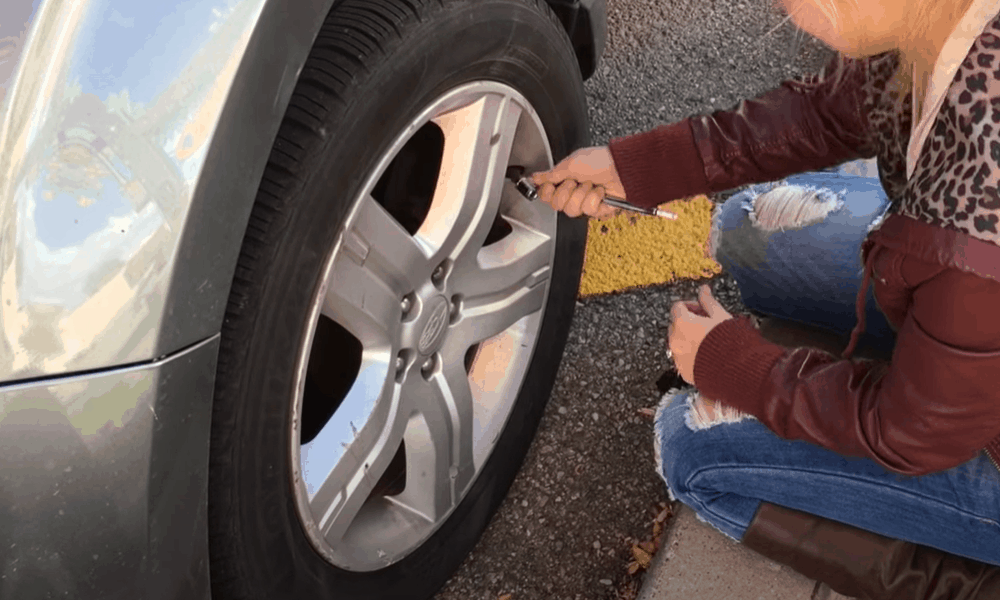
1. Improperly Balanced Tires

Improperly Balanced Tires

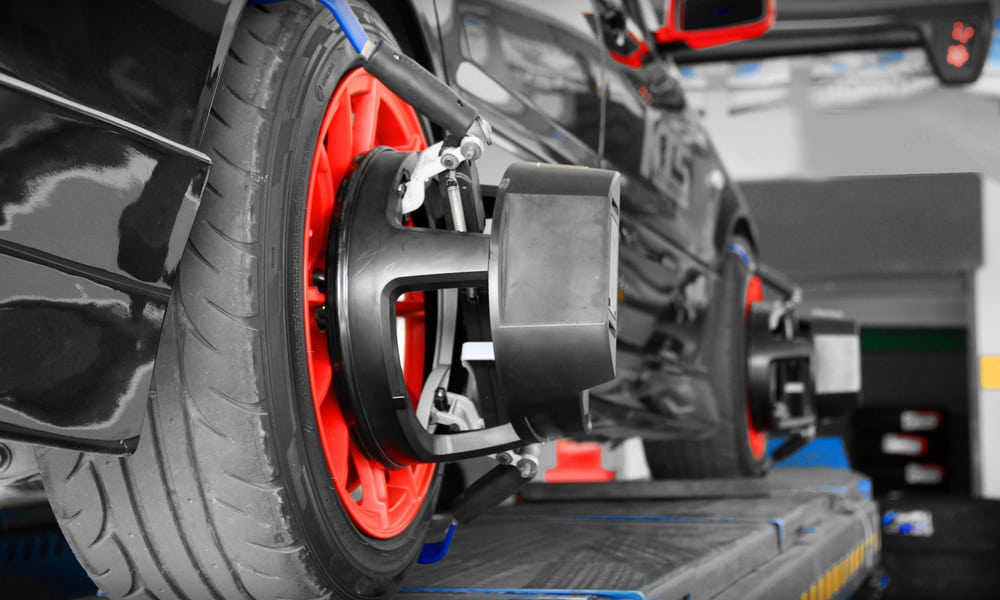
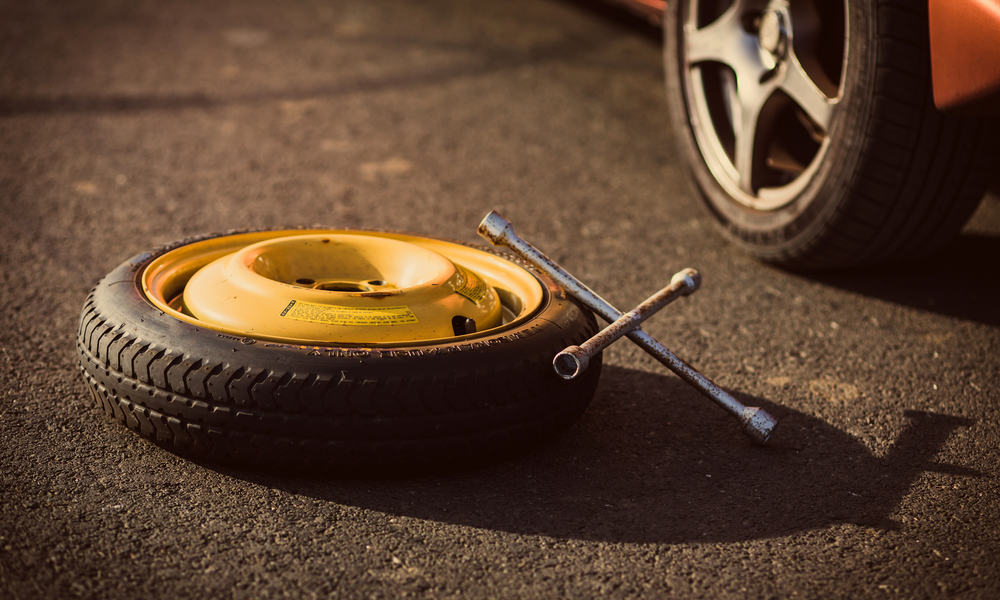
Every time you put new tires on your car, ask the tire technician to balance them appropriately. Do that each time you replace your summer tires with winter tires as well.

Tires that aren’t balanced well will vibrate at higher velocities, which might wear down suspension components very soon. Moreover, the vibrations can lead to cupping appearing on the tread of the tire.

2. Bent or Damaged Rims

Bent or Damaged Rims

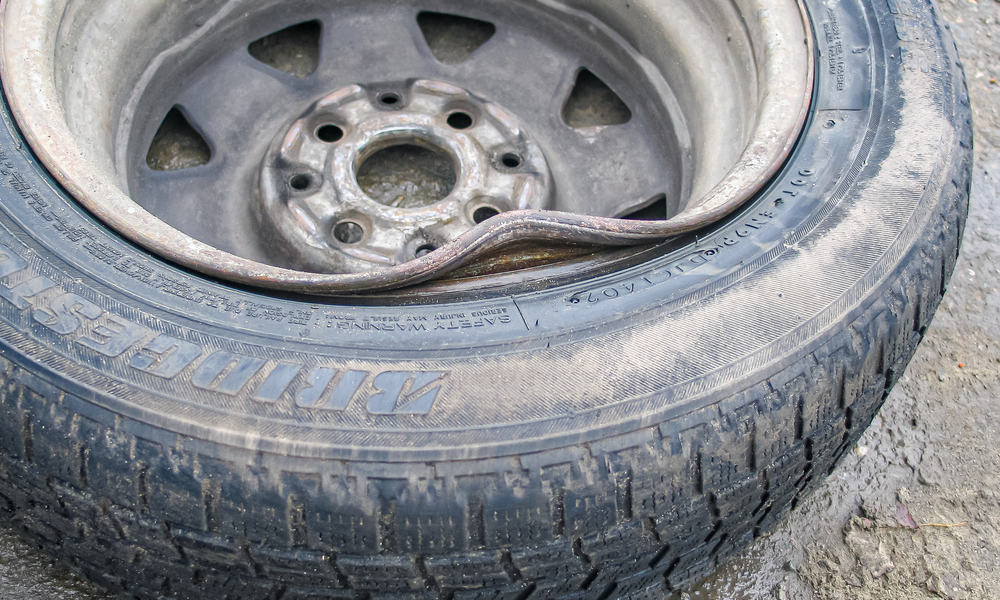
A bent rim can also lead to excessive vibrations while you drive. These vibrations can then lead to tire cupping appearing on the tread of the tire. Moreover, a damaged rim can spoil the balance of the wheel.

Fortunately, you can easily mitigate this issue by repairing the bent rims. This is a much cheaper solution than replacing the tire, and you should do it the first moment you noticed that your rim is bent.

3. Worn Suspension Components

Worn Suspension Components

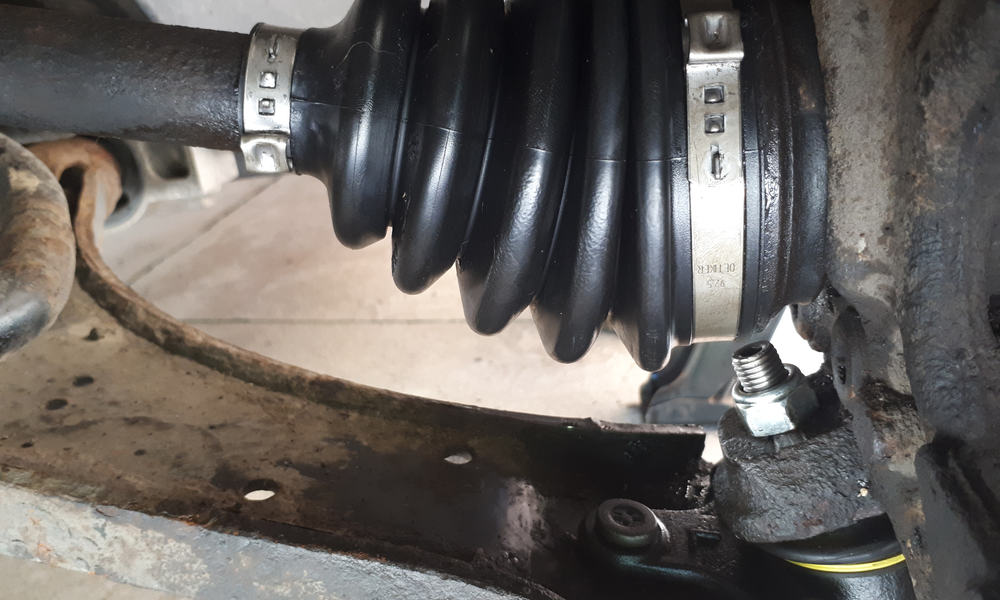
Tire cupping can also occur if you have worn suspension components. That’s mostly true for the shock absorbers, but struts and bushings can also lead to scalloped tires.

When one of these components is worn out, the tire won’t have reliable contact with the surface. In other words, it will bounce on uneven surfaces.

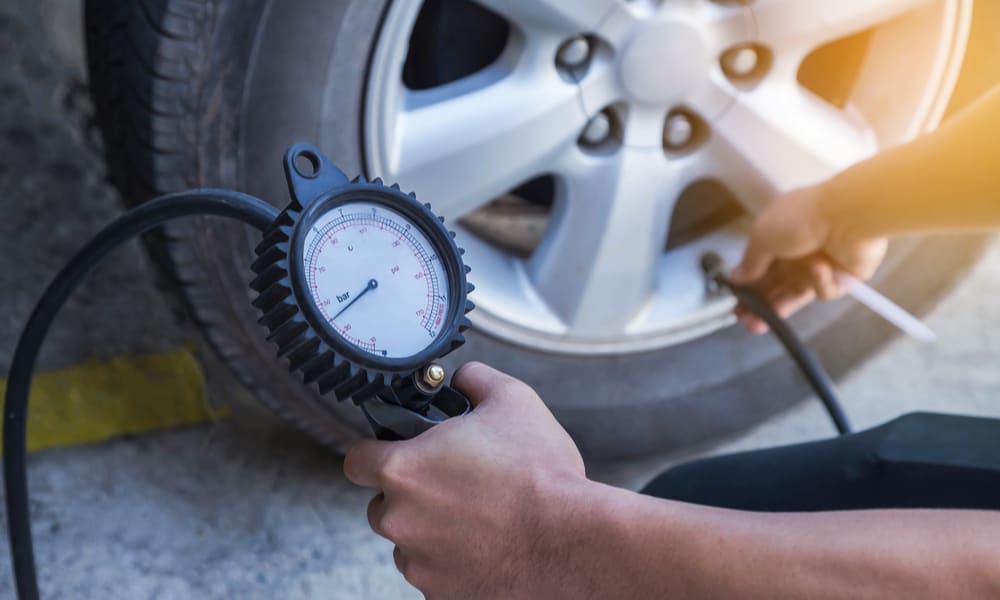
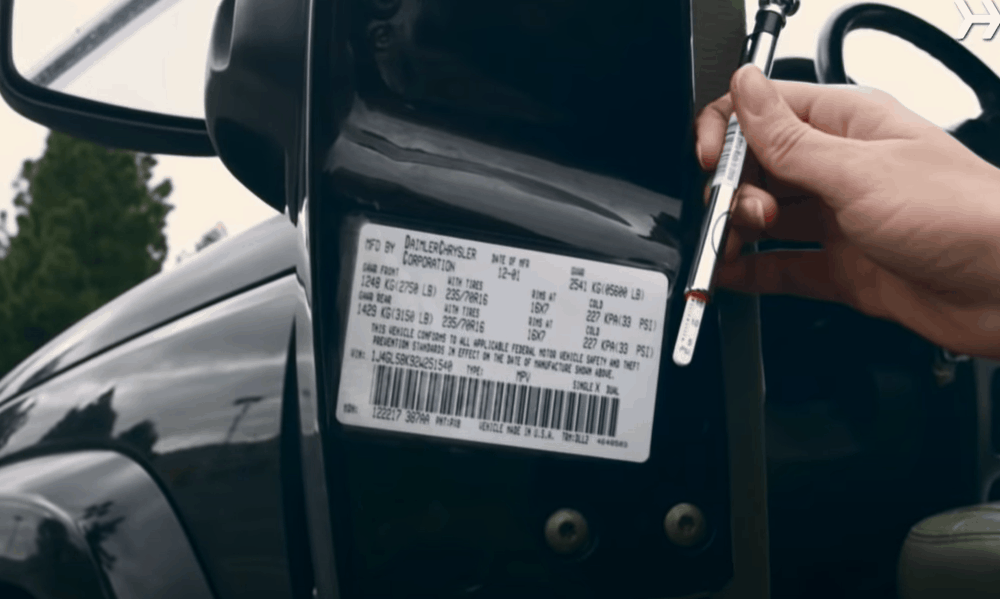
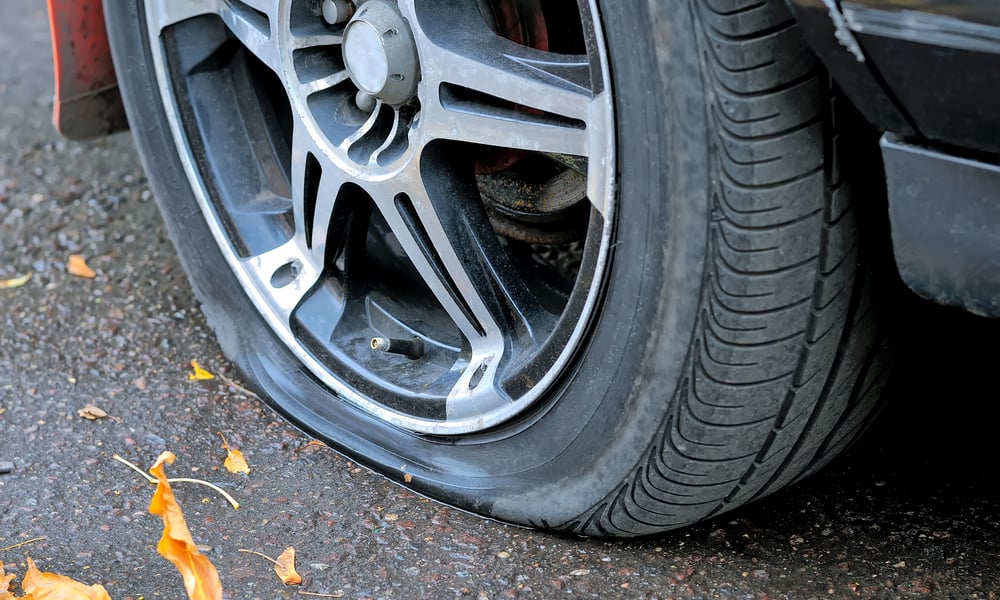
4. Underinflated Tires

Underinflated Tires

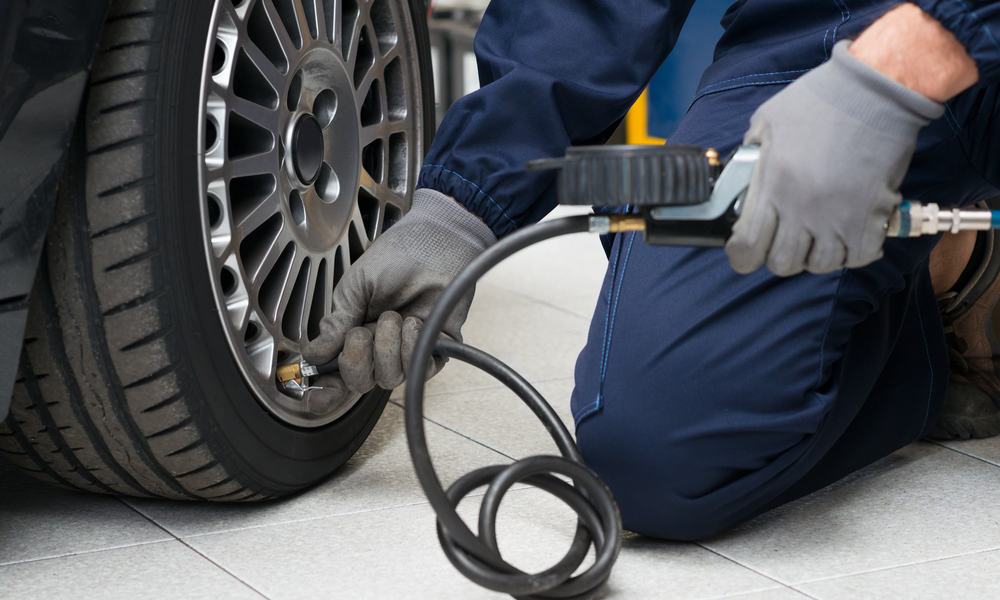
Severely underinflated tires are a safety hazard, which is the primary reason why you should keep them properly inflated each time you hit the road.

However, tires without enough pressure will also bounce from the ground, which will lead to tire cupping. That’s especially true if you drive for prolonged periods, so be sure to check the pressure inside your tires at least monthly.

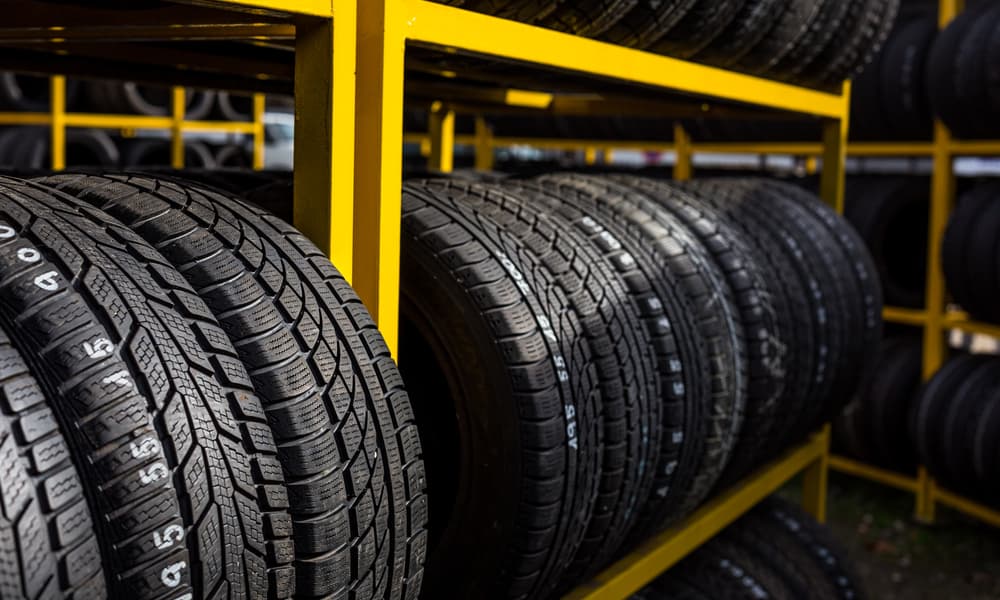
5. Using Very Cheap Tires

Using Very Cheap Tires

I can’t stress this enough, but very cheap tires from manufacturers that you haven’t seen before aren’t worth it. These products usually don’t go through the strict test procedures of premium tires. Moreover, these companies lack R&D experience, which generally leads to low-quality products.

These tires not only lack reliable traction for a safe driving experience, but they also tend to wear unevenly. I’ve seen many examples of very cheap tires where cupping occurs, even though the suspension components of the vehicle are okay.

How to Recognize Tire Cupping?

Fortunately, you can easily recognize tire cupping once it occurs. The main sign of cupping is increased vibrations coming from the wheels. Now, vibrations can also happen if the tires aren’t properly balanced, so be sure to inspect your tires visually before jumping to conclusions.

Furthermore, your car will not be stable when tire cupping occurs. The vehicle may veer from one side to another when driving in a straight line, or behave erratically during cornering. Again, confirm your suspicion with a visual inspection of the tires.

Finally, tire cupping can lead to noisy operation, especially at higher speeds. For that reason, if you feel one of the tires becomes noisy, make sure to make a visual inspection to confirm that tire cupping occurred.

How to Prevent It?

Preventing tire cupping is very straightforward, and it includes proper maintenance of your tires and your vehicle.

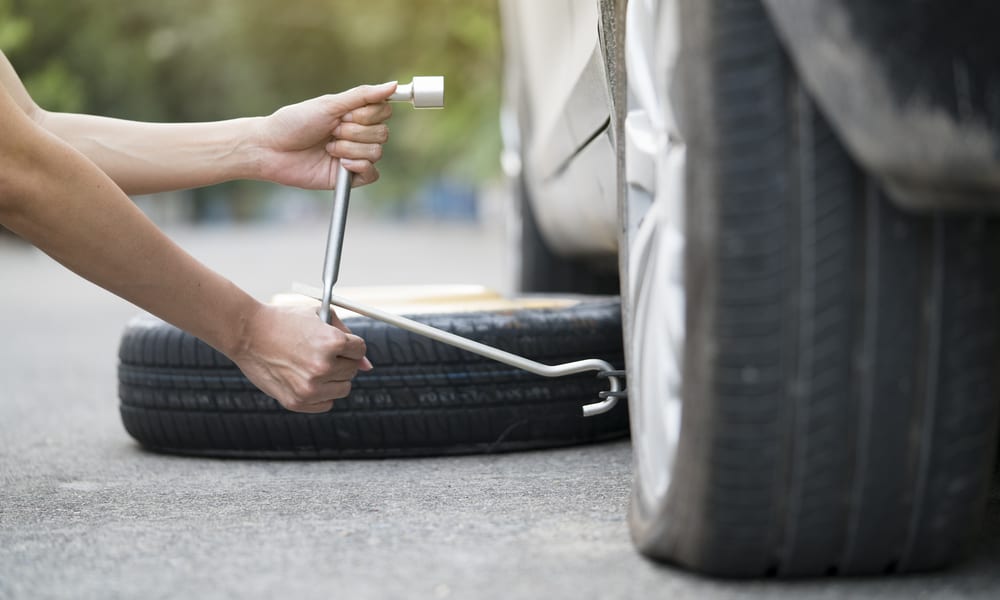
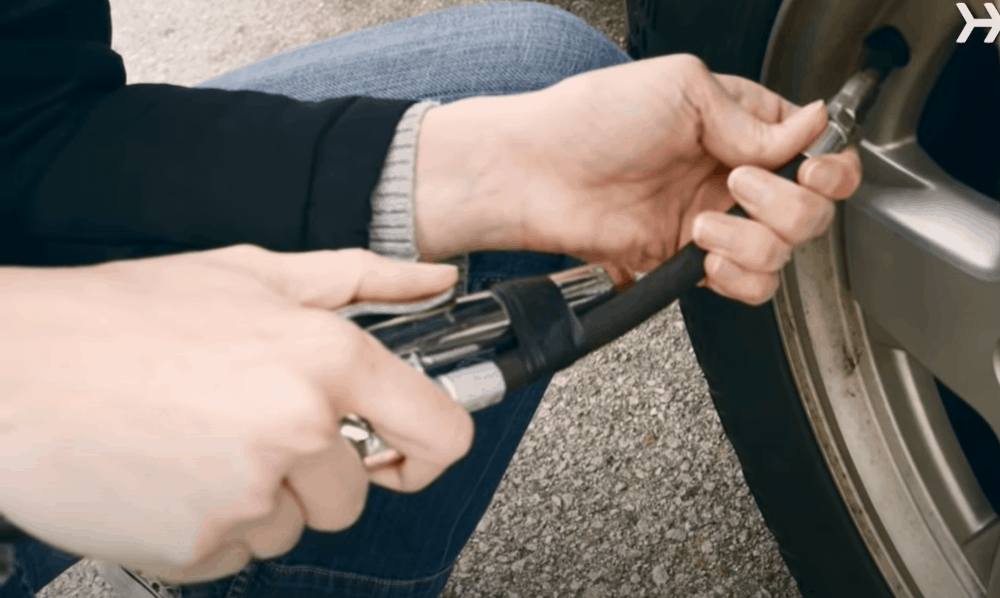
For the tires, you must take care to keep them properly inflated at all times, especially if you go on a long road trip. Also, make sure that you rotate and balance the tires regularly, or every 5,000 to 8,000 miles. Doing this at your regular service interval will save you a few bucks.

Meanwhile, make sure that your wheels are always aligned correctly. Also, make sure that the suspension components behave normally – look for thumping noises coming from the underbody of the car.

Conclusion

Tire cupping can happen to everyone, even on some newer vehicles. Nonetheless, you can significantly mitigate the issue if you deal with it on time. Make sure to check your tires right after your car behaves erratically. The more you wait, the worse it becomes.

But what do you think about tire cupping? If you have some questions or suggestions, please do not hesitate to comment down below. Also, if this article helped you learn something new, share it with the world – it will help us produce even better articles in the future!

The post 5 Main Causes for Tire Cupping (Tips to Prevent) appeared first on Smart Motorist.


source https://www.smartmotorist.com/what-causes-tire-cupping

Sunday, July 19, 2020

What Causes Tire Debris? Tips to Protect Your Tires

You are probably familiar with the term “road gators,” even if you never saw it. Well, road gators don’t have anything to do with real alligators. They just look like one, especially from a distance. But that isn’t that important – the crucial thing about road gators is that they pose a severe safety hazard.

Road gators are tire debris, usually from larger trucks, left on the road. And, any tire debris that gets left on the road can be dangerous, especially for other vehicles. Tire debris is the reason for over 50,000 police-reported crashes each year.

What Causes Tire Debris?

What Causes Tire Debris

Tire debris is a piece of rubber that falls from the tread of vehicle tires. But that’s only the obvious answer. In more detail, any tire loses a bit of rubber to the road, each time you hit the road. That’s normal – it means that the tire wears down due to abrasion from the tarmac.  

However, most of the debris car tires lose isn’t dangerous to other participants. Bad things mostly happen when larger pieces of rubber land on the road. These pieces can wreak havoc on other tires, suspension, or steering components.

The largest culprits of tire debris are large commercial trucks or big rigs. These vehicles have enormous tires, which can lose pretty significant parts of the tread to the road, especially in case of blowouts.

That’s often due to overweight trailers, but it can also happen due to retreading. In short, retreading is the process of replacing the tread of the tire with a new one, so that the tire lasts longer.

Almost every big rig tire supports retreading. Moreover, trucking companies decide on retreading instead of purchasing new tires because of the cost – it’s nearly three times as cheap.

In most circumstances, a retreaded tire will last as long as a new one. Nonetheless, if the job isn’t done right, the tread can detach from the casing while the truck is driving.

So, the combination of heavy-weight trailers and improperly retreaded tires most often results in tire debris or road gators.

Why is Road Gators Dangerous?


The first thing that probably came to your mind is – why are larger parts of rubber dangerous for other drivers? Well, let me remind you that commercial-truck tires have large steel belts inside the tread, which give them a better load-carrying capacity.

And, it’s these steel belts that can wreak havoc on your car. That’s not only true for large tires – steel belts from passenger-car radial tires are also dangerous.

When you hit a road gator, the sharp edges of the torn steel belts can cut through your tire very quickly. Moreover, the belts can wrap around your tires, steering rack, suspension components, or driving axles.

All of those things can significantly damage the stability of your vehicle. Even worse, in some situations, you won’t be able to steer the car safely or even brake.   

How to Minimize Tire Debris?

How to Minimize Tire Debris

Obviously, taking care of your tires can significantly reduce the chances of tire debris. That usually starts with the brand – premium tires have a more durable casing, and can also be retreaded more easily.

Furthermore, the tires should always be inflated to the manufacturer’s specifications. Underinflated tires can lose the tread more easily.

Meanwhile, the driver should always take care not to overload the truck. Each tire has a carrying capacity, and it should never be exceeded. If not, there is a risk of large tire debris falling off the tire, and even a blowout.

In the end, if you own a commercial truck, always retread the tires at certified tire technicians. The price in these places isn’t that higher, yet they can do a much better job. Moreover, most of them will give you a treadwear warranty.

How to React if You Encounter One

Despite the effort truck companies make to minimize road gators, you can still encounter one on your next road trip. This usually happens on the highway, where commercial trucks travel at higher speeds.

But how do you react if you confront one on your next road trip? Here are some ways you can avoid tire debris altogether, or at least stop and steer safely.

1. Keep Your Distance

Keep Your Distance

One of the most important tips a professional driver would tell you is to keep your distance. This is not only connected to road gators – it relates to many other types of road accidents.

This is especially true if you drive behind a big rig. In this case, it’s always best to keep a distance of more than 200 feet. Otherwise, if one of the tires on the truck blows out, you won’t be able to react on time.

Moreover, when you overtake a more massive truck, make sure that you don’t spend too much time next to the truck. If a tire blows out just next to you can also affect some parts of your car.  

Ultimately, always keep your eyes glued to the road. Keep your distractions while driving on a minimum, especially when driving at higher speeds.

Also, while on the highway, look at a minimum of 350 feet in front of you. That way, you’ll be able to react to road gators much sooner and readjust your speed correctly.

2. Reduce Your Speed

Reduce Your Speed

Once you notice a tire gator on the road, reduce your speed immediately. Panic braking might not be the best choice, though, especially if you have other vehicles behind you. For that reason, lift off the gas pedal and gently press on the brake pedal. Then, steer your car into safe space.

3. Don’t Panic

Prepare yourself for mild and cool reactions. Drivers usually make mistakes when they panic, so make sure that you stay calm. The best advice I can give you for staying composed is to anticipate, rather than react. That’s the virtue of great drivers.

Conclusion

Tire debris is something that has become a regular sight on public roads. Nevertheless, I hope that this article helped you learn more about the issue and how to tackle it better yourself. Moreover, I believe that you learned to take proper care of your tires and minimize the debris you leave on the road.

And, even if you have other questions on the matter, feel free to post them in the comment section down below. I’ll be more than happy to help!

The post What Causes Tire Debris? Tips to Protect Your Tires appeared first on Smart Motorist.


source https://www.smartmotorist.com/tire-debris

Touring Tire: Everything You Need to Know

Most drivers know the division between summer, all-season, and winter tires. However, that’s not the only classification of tires. Manufacturers also want to divide tires into “performance categories.”

These categories signify what types of vehicles the tire is most appropriate for, because not every car needs the same kind of tires. That said, touring tires are by far the most popular type for most drivers.

These tires are designed to cover a large variety of vehicle types, but also the needs of the regular driver in North America. Let’s dig into more detail and see why touring tires are so popular.

Main Attributes of Touring Tires

As their name suggests, touring tires are made for covering long distances. And, they excel at that. For that reason, touring tires are installed on most new vehicles today.

Moreover, touring tires are available in the most popular tire sizes, ranging from 15-inch wheel diameter and up to 20-inch wheel diameter on some models.

And, while there is a difference between brands and makes, all touring tires share a similar quality – to offer a delicate balance between performance, comfort, durability, and price.

Compared to other tire types, touring (and grand-touring) tires sit between regular all-season tires and high-performance tires.

Advantages of Touring Tires

Advantages of Touring Tires

For most drivers out there, touring tires provide everything needed for safe, comfortable, and reliable traveling experience.

That said, the most-known quality of touring tires is the durability. These tires have outstandingly long treadlife, and the manufacturers cover it with extremely extended treadwear warranties.

Some premium touring tires come with up to a 90,000-mile treadwear warranty, which means that you can use the tires for five years between replacements.

Furthermore, touring tires are also extremely comfortable. These tires have sturdy, but not overly stiff sidewalls, which results in plush ride quality on most surfaces.

Moreover, tire engineers utilize tread patterns designed to minimize noise. As a result of that, touring tires will provide the passengers with the quietest driving experience around.

But what about handling, stability, and braking? Well, for most drivers, touring and grand-touring tires provide a safe driving experience in urban scenarios, on the highway, and a twisty road.

There is a difference between tire models, sure, but all share good levels of traction on dry and wet surfaces, reliable cornering grip, and secure braking.

Depending on the tread compound used, some premium touring tires also provide good traction and braking on snowy surfaces.

So, to sum things up, touring tires have everything needed for a safe and comfortable driving experience. They are an excellent choice for long road trips, and for people that cover a lot of miles annually.

That said, touring tires also have some disadvantages – let’s see which are they down below.

Disadvantages of Touring Tires

Disadvantages of Touring Tires

As you probably noticed in the “advantages” section, I never mentioned performance driving. That’s because touring tires aren’t designed for powerful performance cars, fast driving through the corners, and very high speeds. Simply put, if you are an enthusiast driver, these tires won’t cut the mustard.

First of all, touring tires lack responsiveness and don’t provide an excellent steering feel. Manufacturers consciously make these tires softer for better ride quality, which makes the whole driving experience a bit bland. At least for enthusiast drivers, that is.

Moreover, touring and grand-touring tires don’t have a very high cornering grip. Push them too hard in the corners, and they will quickly lose grip. Also, traction for acceleration on more powerful vehicles might not be sufficient. Also, driving on the track is a no go.

Now, this doesn’t mean that touring tires aren’t safe. Premium touring tires have become extremely good at putting the power down. However, for the best handling and responsiveness, I recommend going for high-performance or ultra-high-performance tires.

Touring vs. Grand-Touring Tires – What’s the Difference?

You probably noticed that in several places, I mentioned grand-touring tires. So, what’s the difference between touring and grand-touring tires, and is there one? Well, of course, there is, but it’s not very big.

These tires share the same qualities. They are very comfortable, provide safe traction and grip, and last for a very long time. However, touring tires gear more toward a comfortable ride, while grand-touring tires spice things up with better traction and grip.

For those reasons, grand-touring tires are usually offered in larger sizes with lower sidewalls and wider tread. Also, grand-touring tires come in higher speed ratings, which automatically makes them better for more powerful cars.

Weather Compounds Used in Touring Tires

Weather Compounds Used in Touring Tires

At the start of this article, I mentioned that tires are mainly divided into summer, all-season, and winter tires. Well, the same is valid for touring tires – they are available with each weather compound.

The choice of weather rubber compounds is critical. For example, a summer touring tire will have a stickier and harder tread compound, which improves responsiveness and cornering grip, even in wet conditions. Nonetheless, summer touring tires are also less durable.

Winter touring tires, on the other hand, have softer rubber. That’s important for freezing conditions, where the rubber must stay pliable to provide reliable traction on snow, slush, and ice. Due to the softer tread compound, winter touring tires are also less durable.

By far, the most popular tread rubber for touring tires in North America is the all-season compound. These tires have a sufficiently good grip and traction in warm conditions, but also good performance in cold conditions.

Some all-season tires work in light snow as well. However, they aren’t the best choice for severe wintry conditions, where winter tires are still the kings. On a more positive note, all-season touring tires have the longest treadlife on the market.

What Types of Vehicles are Touring Tires Appropriate for?

Touring and grand-touring tires come in a large variety of sizes and speed ratings. Generally, touring tires are best-suited for compact cars (Toyota Corolla and Honda Civic), minivans (Chrysler Pacifica and Honda Odyssey), and mid-size sedans (Toyota Camry and Honda Accord) with four-cylinder engines.

Crossover/SUV touring tires are best-suited for drivers of compact crossovers and SUVs (Toyota RAV4 and Honda CR-V), mid-size SUVs (Acura MDX and Ford Edge), and large SUVs (Chevy Tahoe and Ford Explorer).

Meanwhile, grand-touring tires are the best choice for more powerful versions of mid-size sedans and minivans with V6 engines, but also premium sports sedans, such as Lexus IS, Cadillac ATS, Audi A4, BMW 3 Series, and Mercedes C-Class.

Conclusion

I hope that this extensive article on touring tires helped you learn something you and made your next tire purchase easier.

However, keep in mind that only touring tires from well-renowned manufacturers offer reliable performance. Very cheap touring tires are not only unsafe, but they also don’t last nearly as long and might be more expensive in the long run.

With that said, if you have other questions regarding touring and grand-touring tires, please do not hesitate to comment down below – I’ll be more than happy to help!

The post Touring Tire: Everything You Need to Know appeared first on Smart Motorist.


source https://www.smartmotorist.com/what-is-a-touring-tire

Wednesday, July 15, 2020

Where Can I Buy Donut Spare Tire?

Donut tires, also known as space-saver or temporary tires, are the latest evolution of spare tires. Sure, they look funny, especially on modern cars with larger wheels, but if used properly, they can be a viable solution when you have a flat tire.

Today, most modern cars come with a donut spare tire in the trunk. However, you can also purchase a spare tire yourself and free precious space in the trunk. But how will you find the perfect donut tire for your car? Let’s dig into more detail and find the best solution for you.

What is a Donut Spare Tire?

What is a Donut Spare Tire

Donut tire is a designation used for the combination of narrow tire and smaller steel wheel. In North America, the term temporary tire also applies to the same product, while in Europe, you can find it as a space-saver tire.

These tires are designed to be used only as a spare tire, and only in case of emergencies. You shouldn’t use these tires for everyday driving, and especially if you drive on the highway. In other words, use them until you repair the damaged tire.

The Reason Car Manufacturers Employ Donut Tires

The Reason Car Manufacturers Employ Donut Tires

There are many reasons why car manufacturers utilize these tires, and it all starts with the cost. A full-size spare tire will cost much more than a donut spare tire, which can reflect on the vehicle’s sticker price. More accurately, cars with a donut spare tire will be more competitive thanks to the lower prices.

Furthermore, spare tires also free up cargo space. The difference is not significant, especially in larger cars. Nevertheless, car manufacturers can brag about a few more cubic inches of cargo space if they opt for a donut spare tire, which, again, makes them more competitive on the market.

Crucially, though, the temporary spare tire is much lighter than a regular tire and wheel combo. This means that the whole car will be lighter, which positively affects performance and fuel economy. Moreover, it lets car manufacturers keep exhaust emissions at check.

With that said, donut tires also have disadvantages. Primarily they are much worse in terms of performance and have limited traction and braking capabilities.

Why Would You Need a New Donut Tire?

Why Would You Need a New Donut Tire

Donut tires last for a long time, especially if you don’t experience flat tires that often. However, if you are among the unlucky people that experience that more often, you might need to replace your donut tire after a few driving stints.

Tire manufacturers recommend driving up to 70 miles before replacing the donut tire, so it’s best not to use that distance at once. I’ve seen some people use these tires for longer, but that’s not advisable because it’s not safe.

Meanwhile, some people opt for donut tires to save space inside the trunk, or when they don’t have a viable full-size spare tire. Also, in some countries that drive on CNG or LPG, the tank for these fuels is usually installed into the spare-tire well, and a narrower donut tire is the only option.

What to Look Out for When Purchasing Donut Tires

What to Look Out for When Purchasing Donut Tires

Like regular tires, the donut models are also not created equally. Many brands offer temporary tires at various price points, which makes the purchase decision harder. Here is what you need to look out for when purchasing donut spare tires.

Similar Diameter to Your Existing Tires

You should always purchase donut tires that have a similar diameter to your existing tires. And, by diameter, I mean the whole wheel – not just the rim. Otherwise, you risk damaging the stability of your car.

Fortunately, you can find many spare tire sizing charts, where you can compare the diameter of temporary spare tires with the diameter of your tire and wheel combo. Some websites will also show you only donut spare tires that fir your car, provided you enter the dimensions of your existing tires.

Or, you can also do the math on the diameter of your tires by following this detailed guide on Tire Rack.

Speed and Range Limitations

Due to the narrower tread, but also the lower-quality tread compounds, temporary spare tires shouldn’t be used like normal tires. Simply put, these tires lack enough traction for normal driving, and they also don’t last very long, especially if used at higher speeds.

Each donut spare tire should only be driven at speeds up to 50 mph. Also, it would help if you were more careful in the corners, especially when it rains. Moreover, space-saver spare tires don’t last very long – they can only be used up to 70 miles.

Cheap and Premium Donut Tires

Like with most things, there is a large price difference between various donut spare tires. Every large tire manufacturer produces temporary tires, including Bridgestone, Continental, and Pirelli. However, you can also find some budget alternatives from no-name brands.

Even though the premium and cheap donut spare tires adhere to the same limits (50mph and 70 miles), premium brands offer superior tires in terms of performance and durability. However, they are also much more expensive – temporary spare tires cost from $50 to $300. In the end, it’s your choice.

Online Retailers That Sell Donut Tires

You can find donut spare tires in every single place that sells normal tires, including your nearest tire shop, but also a well-equipped gas station.

For lower prices, though, I recommend purchasing these products online. Places like Tire Rack, Discount Tire, Auto Zone offer a wide range of donut spare tires, including products from respected tire manufacturers. You can also find low-cost options on Amazon and Walmart.

Conclusion

I hope that this article helped you find the right donut spare tire for your car. Regardless of the brand you choose, always adhere to the limits set by the manufacturer – 50 mph and 70 miles of range.

Also, if you found this article useful, share it with your friends – it might help them the next time they purchase donut spare tires. Or, if you still scratch your head about something, please do not hesitate to ask your question in the comment section below – we’ll be happy to help!

The post Where Can I Buy Donut Spare Tire? appeared first on Smart Motorist.


source https://www.smartmotorist.com/where-can-i-buy-donut-spare-tire

How Long Can You Drive on a Spare Tire?

On average, drivers have at least one puncture in five years. Moreover, up to 30% of roadside emergencies are related to punctured or flat tires. Fortunately, most modern vehicles have a spare tire of some kind, usually placed in a separate space under the trunk.

Which begs the question – how long can you drive on a spare tire? Well, to answer that question, I’ll revisit all spare tire types, and also tire repair kits. Not every solution is treated equally, though, so it’s best to check first. Let’s dig in!

Full-Size Spare Tires

Full-Size Spare Tires

In terms of functionality, safety, and ease of mind, there is no better option than having a full-size spare tire. Sadly, though, this solution is rarely used in modern vehicles, even though it was very popular before.

To put it simply, a full-size spare tire with a wheel weighs a lot, which hurts performance, efficiency, and exhaust emissions. For those reasons, most manufacturers today opt either for a space-saver “donut” tire, or a tire repair kit.

And, having a full-size spare tire certainly has its positives. First of all, it’s much safer to drive with a regular air-filled tire. In theory, you can hit highway speeds and not worry about safety, especially if the tire is in good shape.

Besides, you can use this tire for much longer than any other solution. If the spare tire is in good condition, you can probably use it for thousands of miles before you replace it with a new one.

That said, there are some things that you should know about. First of all, if the full-size spare tire isn’t the same as the tires you have on your car, there will be a difference in traction, which might result in unstable handling.

Moreover, you will need to find a solution for your damaged tire quickly. If not, you risk being left stranded if another tire is punctured, simply because you won’t have a spare one. So, even if your car is safe to drive down the road, it’s recommended that you repair it asap.

Space-Saver Spare Tires

Space-Saver Spare Tires

The first solution for making lighter and more fuel-efficient cars was putting space-saver or so-called donut tires. These tires are much smaller than the ones you have on your car, and especially the tread width is comically narrow.

The donut tires can be used up to velocities of 50 mph (80 km/h), and not more than 70 miles (110 km) traveled distance. These numbers might vary according to your car, so it’s best to check on the tire itself, or inside the owner’s manual.

That said, while donut tires have some advantages, like making your car lighter and your trunk larger, they also have some glaring disadvantages.

Above all, space-saver tires aren’t very safe, primarily due to the narrow tread width. Simply put, donuts don’t have enough traction and grip for carefree driving.

Moreover, donut tires don’t have a sufficient tread depth, which limits drivability on wet roads but also makes the rubber more prone to new punctures.

For all these reasons, you should always drive carefully when a donut tire is attached to your car. Also, you should immediately find a solution for your damaged tire and put it back on the road. Your space-saver tire should spend the majority of its lifetime in the trunk and not on the road.

Run-Flat Tires

Run-Flat Tires

Run-flat tires are the newest trick inside the manufacturers’ playbook for improving overall efficiency and performance, but also safety. These tires have much stiffer sidewalls, which can carry the weight of the car even when depleted of air.

Because of that, you can continue to drive even after the tire is punctured. Of course, you might need to check the tire for other cracks visually. Modern run-flat tires can be used for up to 50 miles (80 km), at speeds not higher than 50 mph (80 km/h).

Eventually, you will need to take care of that puncture – run-flat tires can’t carry the weight of your vehicle infinitely. Just be prepared for larger repair bills – run-flat tires aren’t that easy to patch.

Run-flat tires do have some positives, like being much safer in the case of a blowout. While a normal tire can make your vehicle completely unstable, if a larger puncture happens, you can steer your car safely if a blowout happens on run-flat tires.

Nonetheless, run-flat tires are heavier than normal tires, which increases the unsprung weight and makes the steering less responsive. Also, due to the stiffer sidewalls, run-flat tires have a worse ride quality than regular tires.

Tire Repair Kits

Some modern vehicles don’t have a spare tire at all. Instead, they have tire repair kits, which can be used to seal the puncture of the tire. The only problem? Tire repair kits can’t be used for larger punctures.

Now, tire repair kits make your vehicle even lighter, which can have a great effect on performance and fuel efficiency. Moreover, the volume of trunks in modern cars increased significantly as a result of the use of tire repair kits.

These kits can repair a puncture that’s up to 4 mm in diameter. However, similarly to donut tires and run-flat tires, the same rules apply here – you can drive at speeds no higher than 50 mph (80 km/h), and you need to seal the puncture asap properly.

Furthermore, it would be best if you replenished the sealant in your tire repair kit after each use. Otherwise, you won’t be able to seal the next puncture when it happens.


Conclusion

Regardless of the spare-tire solution, you have in your car, never use your spare tire for prolonged periods. Each solution has its advantages and disadvantages, but all of them have one thing in common – they should only be used in an emergency.

With that said, if you have other questions or suggestions regarding spare tires, share your thoughts in the comment section below. Also, if you found this article useful, share it with the world – it will help us create more amazing articles in the future.

The post How Long Can You Drive on a Spare Tire? appeared first on Smart Motorist.


source https://www.smartmotorist.com/how-long-can-you-drive-on-a-spare-tire

How Fast Can You Drive on a Spare Tire?

Spare tires and similar solutions are crucial for keeping us going forward, specifically because each of us encounters a puncture every five years. However, you can’t drive on a spare tire like you could on regular tires.

That’s especially true for driving fast. See, spare tires are only designed for emergency driving, and not for aggressive acceleration, cornering, or braking. For those reasons, you should drive much slower when you have a spare tire attached.

But how fast can you drive without worrying about safety? Let’s revisit all popular spare-tire solutions and answer that question.

Why You Need to Drive Slow on Spare Tires

Why You Need to Drive Slow on Spare Tires

Before I tell you the numbers, let’s see why spare tires aren’t suited for fast driving. Most spare tires have a narrower tread design, which significantly reduces grip and traction. This means that your car will have longer braking distances and less stable cornering.

Moreover, having one tire that doesn’t have good traction, together with three regular tires, will make the handling unpredictable, something that can surprise amateur drivers.

Now, even if you have a full-size spare tire, it probably won’t be inflated properly – tires lose pressure over time. Besides, most full-size spare tires are pretty old – no one pays for a new full-size spare tire. And, older tires also have worse traction, grip, and braking.

Ultimately, spare tires are more prone to smaller punctures, but also blowouts. And, having a blowout while driving at highway speeds might make things very difficult for the driver and result in a crash.

For all these reasons, you should be careful when driving on a spare tire, regardless of the type.

Full-Size Spare Tires

Full-Size Spare Tires

Overall, full-size spare tires are still the best solution in terms of safety and ease of mind. Provided the tire in your trunk is still usable, you can use it for driving at higher speeds, at least in theory.

However, no one can tell you how fast you can really go. Some people have some really good full-size spare tires in the trunk, others don’t. That’s why you should ask the technician for the state of your tire each time you visit the tire service.

As a general rule of thumb, I would say that you should lower the speed for around 20% at highway speeds and around 10% around town. That way, you will ensure that your car performs safely.

What you should definitely avoid is driving over the speed limit. This applies even when you drive on four normal tires, but it’s particularly true if you drive on a full-size spare tire. Otherwise, you risk your safety but also the safety of your passengers and other traffic participants.

Donut Tires

Donut Tires

Donut tires, also called space-saver spare tires, are much smaller and narrower than regular tires. Car manufacturers started employing these tires to reduce the weight of the cars, but also to free trunk space. And, interestingly, car buyers often don’t complain about this.

Nonetheless, due to the narrow tread width, donut tires perform much worse than normal tires. The traction is severely reduced, to the point of being almost non-existent at some speeds. Moreover, having one donut tire attached will result in unreliable handling.

For those reasons, car manufacturers put a large sticker on each donut tire, which says that you shouldn’t exceed 50 mph (80 km/h). And, there is a reason for the warning – donut tires are not safe to drive at highway speeds.

Moreover, these tires are prone to punctures and blowouts, which is another reason why you should avoid using them for high-speed driving. And, finally, the tread compound on these tires isn’t very durable – it won’t last long if you drive too fast.

Tire Repair Kits and Sealants

The latest “innovation” in modern cars is installing tire repair kits and sealants instead of spare tires. This solution works as advertised, but it also has many disadvantages. First of all, tire repair kits don’t work on punctures larger than 4 mm, so in case of a blowout, you are stuck.

Furthermore, these kits aren’t a long-term solution – you will still need to repair the puncture at the earliest opportunity properly. Crucially, though, driving on a tire repaired with sealant isn’t very safe, especially at higher speeds.

For those reasons, the tire repair kit in your car comes with warning stickers, which say that you can only drive up to 50 mph. You can even put the sticker on the A-pillar inside the cabin to remind you not to drive faster.

And, adhering to this limit is extremely important. Tires filled with a sealant don’t work well at higher speeds and adversely affect stability.  


Run-Flat Tires

Run-flat tires are an ingenious solution – they can be used even without any air inside. That’s because these tires have much stiffer sidewalls, which can carry the weight of the car easily.

However, that doesn’t mean that you can use these tires carelessly when improperly inflated. The stiffer sidewalls should only be utilized in case of an emergency. Otherwise, you risk damaging the sidewall and rendering the tire useless. And, the last time I checked, run-flat tires aren’t exactly cheap.

Moreover, despite the stiffer sidewalls, these tires aren’t safe for driving at higher speeds when punctured. Most modern run-flat tires can only be driven up to 50 mph (80 km/h), and no longer than 50 miles (80 km/h).

Accordingly, each time a run-flat tire loses the air inside, you should never drive above 50 mph – it’s simply not safe enough.

Conclusion

I hope that you learned a valuable lesson today. Driving on a spare tire is only safe when you drive slowly and carefully. Otherwise, you risk losing control of your car, and if that happens at higher speeds, it’s usually much harder to get it back in line.

But what are your thoughts and experiences on this matter? Tell us in the comments below – we’d really like to hear. Also, Also, if you found this article useful, share it with your friends – they might learn something valuable, too.

The post How Fast Can You Drive on a Spare Tire? appeared first on Smart Motorist.


source https://www.smartmotorist.com/how-fast-can-you-drive-on-a-spare-tire

Sunday, July 12, 2020

4 Easy Steps to Check Tire Pressure

For maximum safety, the tires on your car should always be inflated to the recommended pressure. Most people don’t know this, but more than 11,000 crashes in the USA each year are tire-related, and they contributed to 738 casualties in 2017, according to NTHSA.

And, most of the time, this happens due to incorrectly pressurized tires. Even if you have the best tires on your car, they won’t work well if they aren’t inflated properly. Fortunately, checking the tire pressure is very straightforward – here is how to do it!

Consequences of Underinflated and Overinflated Tires

The implications of incorrectly pressurized tires aren’t only anecdotal – they are a fact. Moreover, people lost their lives because Ford recommended low tire pressure on the Firestone tires of its 90s’ Explorer model.

As a result of that, the tires started disintegrating at highway speeds, which resulted in many accidents and 271 fatalities. This engineering fiasco taught us a critical life lesson – we should always drive on tires with correct tire pressure.

When the tires are underinflated, the structural rigidity of the rubber is much lower, or in layman’s words, the casing is softer. Because of that, the tire can’t carry the weight of the car and succumbs under pressure.

More accurately, the tires are much less stable in the corners and are very unresponsive. Moreover, degradation takes a much larger toll – expect premature wear. So, it’s not only dangerous to drive on underinflated tires – it’s much more expensive as well.

It’s almost the same story with overinflated tires. In this case, the tires will bounce from the surface on every bump, which can severely worsen the stability and stretch the braking distances. Furthermore, the tread of the tires will wear unevenly.

For all those reasons, you should check the tire pressure at least once a month if you drive mostly in urban environments. Additionally, each time you go on longer trips, you should check the tire pressure first.

When is the Best Time to Check the Tire Pressure?

When is the Best Time to Check the Tire Pressure

The pressure inside your tires changes with temperature – that’s how physics work. Typically, you should expect around 1 PSI (0.06 Bar) of pressure added with an increase of 10 °F (12 °C). Moreover, tires get warmer as you use them.

For those reasons, I strongly recommend checking the tire pressure on cold tires. To be more precise, you should check the pressure on cold tires, preferably in the morning. Don’t worry about the pressure increases while you drive – car and tire manufacturers take that into account.

If you check the pressure on warm tires, the reading will be accurate, yes. However, the pressure will fall below the threshold once the tires cool down. Hence, make sure that you check the pressure only on cold tires.

Also, you need to make sure that you measure the pressure when the vehicle is unloaded. As soon as you add weight to your car, the pressure will increase.

Where to Find the Correct Pressure for Your Car?

Where to Find the Correct Pressure for Your Car

Car manufacturers usually put a sticker with the correct tire pressure on either the driver’s or passenger’s door sill. If you can’t find it there, you can check in the user’s manual.

Now, when you check the readings, you’ll see a minimum and maximum tire pressure. The minimum tire pressure is reading for an unloaded car (e.g., without passengers or cargo). The maximum tire pressure, on the other hand, is meant for reading with a loaded vehicle.

For most passenger vehicles, the correct pressure varies between 32 and 35 PSI (2.2 to 2.4 Bar).

What’s the Difference Between PSI, kPa, and Bar?

PSI is based on the imperial measuring system and means “pounds per square inch.” kPa (kilopascal) and Bar, on the other hand, are based on the metric system and the “Pascal” unit.

It would be best if you always made sure that the readings on your gauge are the same as those in your car. The PSI reading isn’t interchangeable with kPa and Bar – it merely uses a different measurement system.

The metric units are interchangeable, though – 1 Bar equates to 100 kPa (average atmospheric pressure). So, if the reading on your gauge shows 2.2 Bar, it equates to 220 kPa.

Items That You’ll Need

You will only need a pressure gauge to check your tire pressure. However, for correct measurement on all four tires, I recommend having a pen and paper on hand or use your smartphone.

How to Check the Pressure?

First, park your car on a level surface. Otherwise, you might not get the correct readings from each tire. Then, prepare your tools, and you’re good to go!

Step 1. Unscrew the Valve Stem Cap

Unscrew the Valve Stem Cap

The first thing that you need to do is to unscrew the plastic cap that sits on the valve stem. The cap won’t release any pressure, but it’s still an important piece that keeps the Schrader valve clean. Once you remove the cap, make sure that you place it in a safe place.

Step 2. Place the Pressure Gauge on the Valve Stem

Place the Pressure Gauge on the Valve Stem

Take the tire pressure gauge and place the hose on the valve stem. Press as hard as needed for the hissing sound to stop. Otherwise, the gauge won’t get the proper reading, and the tire will lose pressure.

An analog gauge should immediately show you the correct pressure inside the tire. However, if the indicator is digital, you might need to press a button for the reading to start. Either way, it should only take a few seconds.

Step 3. Write Down the Reading

Write Down the Reading

Once you checked the pressure on the tire, write down the reading. For straightforward comparison, you might first want to write down the recommended tire pressure, and next to it, the reading from the gauge. That’s especially true for cars that have different tire pressures on the front and rear tires.

Step 4. Repeat on Other Tires

Repeat on Other Tires

Repeat the same process on all tires, write down the readings, and compare them to the factory-recommended ones.

Conclusion

Checking the tire pressure on your car is very easy and quick, yet it will make your driving much safer. Also, don’t be that person that can check the correct pressure only by visual inspection of the tires. It’s impossible, trust me!

And, if something wasn’t straightforward enough, please do not hesitate to ask a question in the comments section – I’ll be happy to answer. Moreover, if you found this article useful, share it with your friends – it’s essential for the safety of all traffic participants.

The post 4 Easy Steps to Check Tire Pressure appeared first on Smart Motorist.


source https://www.smartmotorist.com/how-to-check-tire-pressure

9 Easy Steps to Replace Tire Pressure Sensor

The Tire Pressure Monitoring System (TPMS) in modern vehicles is a fantastic contraption – it can signal the driver when your tires are underinflated for a safer ride.

To do that, the TPMS utilizes sensors built into the tire, which read the correct tire pressure. The thing is, these sensors will fail eventually, and you’ll need to replace them.

Here is how to replace a tire pressure sensor most straightforwardly.

Disclaimer

I don’t recommend replacing the TPMS sensor yourself. Doing that may result in unbalanced tires, which will deteriorate the stability of your car.

The method I’ll show you below is generally considered safe in that regard, but you should still proceed with caution. You are doing this at your own risk!

Does Your Car Have a Direct or Indirect TPMS?

Does Your Car Have a Direct or Indirect TPMS

Two different TPMS systems are employed in vehicles – indirect tire pressure monitoring and direct pressure monitoring.

Indirect Pressure Monitoring System

The indirect pressure monitoring system uses data from the ABS (Antilock Braking System) speed sensors. This system doesn’t directly measure the pressure inside the tire. Instead, it measures the speed of any given wheel.

When a tire deflates, it gets smaller, and subsequently, it spins faster. The speed sensors can detect the slight discrepancy in speed and will report the data to the vehicle’s computer, which will then illuminate the TPMS light on the dashboard.

Indirect TPMS usually requires no maintenance. However, it is also not very precise in the measurements and can’t be utilized for accurate pressure measurements that are ubiquitous on some luxury vehicles.

Moreover, to rectify issues within the indirect system, you’ll need to connect your car to a laptop with an OBDII tool and reprogram or reset the TPMS. This is undoubtedly not something that you’ll want to do yourself.

Direct Pressure Monitoring System

The direct system, on the other hand, uses data from a sensor built into the tire. These sensors can measure the pressure much more precisely and, on some vehicles, they will show you the exact pressure within each tire.

However, there is no way to send power to the direct TPMS sensors since they are inside the tire. Instead, these sensors are powered by small batteries, which have a limited lifetime.

On average, TPMS sensor batteries last for around seven years, but they can deplete after five years, or after ten years. The bad thing about these sensors is that you can’t tell when the battery is going to die – there is no percentage reading anywhere on your dashboard.

Fortunately, you can replace the direct sensor. However, I strongly recommend rereading the disclaimer – this is not a straightforward job. If you still want to proceed, I listed the easiest and most trouble-free method down below.

What Tools do You Need to Replace Tire Pressure Sensor?

Since replacing a direct tire pressure sensor can be complicated, you’ll also need a proper toolset to finish the job. Start with making sure that you have everything you need to remove the wheel: a jack and a lug wrench.

Obviously, you’ll need a new TPMS sensor. You probably heard that you could replace the battery only, but they aren’t meant to be replaced. You might damage the sensor if you try, and even if you succeed, some pieces might end up inside your tire.

Then, make sure that you purchase the correct sensor for your car, or otherwise, it won’t work. The price of direct TPMS sensors varies between $30 and $100 depending on your vehicle, but also the quality.

Then, for removing the TPMS sensor, you’ll need a wrench and 6 mm and 11 mm sockets (though they can vary from one model to another), and pliers to remove the valve stem.

Then, in order to break the seal between the tire and rim and keep the tire opened, you’ll need a smaller and larger piece of wooden board.

Finally, you will also need a tire pressure gauge and an air pump to inflate the tire once you finish the job correctly.

How to Remove the Wheel from Your Car

Step 1. Loosen the Lug Nuts

Loosen the Lug Nuts

Ensure that you loosen the lug nuts using a lug wrench before jacking up the car – it’s much easier that way.

Step 2. Jack Up Your Vehicle

Jack Up Your Vehicle

Use the jack that came with your car – you should find it in the trunk. Then, make sure that you put the jack under the jacking points. If you aren’t sure about their position, check in the user’s manual.

Step 3. Remove the Wheel

Remove the Wheel

Unscrew the lug nuts completely and remove the wheel.

How to Break the Seal and Replace the Sensor

Breaking the seal on a passenger car tire isn’t an easy job if you don’t have the right tools. Professional tire technicians have large tools that require space and energy. However, you should be able to break the seal if you follow the next steps carefully.

Step 4. Remove the Valve Stem

Remove the Valve Stem

Step 5. Breaking the Seal Between the Tire and Rim

Breaking the Seal Between the Tire and Rim

To break the seal, you will need one long and a short piece of wooden board. Put the smaller piece over the tire vertically.

Then, put the larger board horizontally over, the smaller piece of wood, and under your car on the other hand. Essentially, you’ll be using the larger board as a lever.

Ensure that you only open the tire on the area where the valve stem sits because that’s where the TPMS sensor is. If you remove the whole tire, you will need to rebalance it later.

Step 6. Unscrew the Old Valve and TPMS Sensor

Unscrew the Old Valve and TPMS Sensor

Using the wrench, unscrew the nut that sits on the valve stem with an 11 mm socket. Then, remove the whole assembly from inside the tire – the sensor should come just right out.

Step 7. Screw-in the New Valve and TPMS Sensor

Screw-in the New Valve and TPMS Sensor

First, remove the nut and washer that sit on the new sensor and valve assembly. Then, put the new sensor inside the tire. The valve stem should protrude from the hole on the rim. Screw in the nut with an 11 mm socket, making sure that the sensor doesn’t move.

Then, using the 6 mm socket, screw in the bolt that connects the valve stem and sensor assembly. Make sure that they fit snugly together.

Step 8. Inflate the Tire

Inflate the Tire

Before inflating, put a bit of dish soap on the rim and the tire for lubrication. Then, use an air pump to inflate the casing – it should reattach to the wheel quickly. Finally, put the whole wheel back in your car, and you should be good to go.

Step 9. Ensure that No Vibrations are Coming from the Wheels

Ensure that No Vibrations are Coming from the Wheels

Once you finished the job, drive your car for a few miles. If you feel no vibrations up to 70 mph, then your tires are properly balanced. However, if you feel vibrations, take your tires for rebalancing at the nearest tire service.

Conclusion

Replacing a tire pressure sensor can be a DIY job, but you should be very careful with this one. If something in the article isn’t clear enough, watch the videos I provided for a visual representation. Or, you can also ask further questions in the comment section down below – I’ll be happy to answer!

The post 9 Easy Steps to Replace Tire Pressure Sensor appeared first on Smart Motorist.


source https://www.smartmotorist.com/tpms-sensor-replacement

5 Easy Steps to Fix Low Tire Pressure

Not many things are worse than driving with low tire pressure. Properly inflating your tires is crucial for safety, especially when you go on a long road trip or drive on the highway.

Fortunately, doing this requires only a few minutes of your time and little to no knowledge in cars or mechanics. You can do it while on the road, or when you visit a gas station. Here is everything you need to do to fix the low tire pressure.

Repercussions of Driving with Low Tire Pressure

Repercussions of Driving with Low Tire Pressure

There are a few reasons why car and tire manufacturers recommend drivers to keep the tires properly inflated. And, the primary reason for that is safety.

When the pressure in the tires is low, the overall stability will be worse than with properly inflated tires. That’s especially true if your tires are a lot of PSI (Bar) under the recommended tire pressure.

More accurately, because the tires are softer, the handling will be less responsive – your car will feel heavier. Also, the vehicle becomes unstable at very low speeds, which is only exaggerated on the highway.

Furthermore, underinflated tires worsen the performance and fuel economy of your car. While you probably won’t be able to feel the performance decrease, the “mpg” meter on your car will show much lower numbers.

On average, the fuel consumption of your car will increase by 0.2% for every PSI of pressure dropped. This means that if the pressure falls from 32 PSI to 20 PSI, you will experience around 1.5% worse fuel economy.

Finally, driving on low tire pressure can accelerate the tread wear of your tires. Accelerated wear can quickly render your tires useless, especially for driving on wet surfaces. Moreover, this means that you’ll replace the tires sooner, which might cost you in the long run.

How to Fill Your Tires with Air

Inflating the tires on your car is quick and straightforward. However, to do it properly, it’s best to prepare well.

First, make sure that your tires are cold when inflating and measuring the pressure. It would be best if you did it in the morning, or only after driving a few miles. Never measure the pressure after a long ride.

Then, prepare with some tools. To check the pressure on your tires, you’ll need a tire pressure gauge. Nowadays, gauges are very inexpensive, and they are also tiny so that you can keep it inside the area for the spare tire.

Then, you will also need an air pump to inflate the tire. Many types of air pumps exist, including hand-operated, foot-operated, and an automatic air pump.

The hand- and -foot-operated air pumps are less expensive, but they also require much more force and take more time.

Automatic air pumps usually connect to the 12V socket in your vehicle, which makes the whole job faster and much more convenient.

Now, let’s see what’s needed to inflate your tires properly.

Step 1. Remove the Valve Stem Cap

Remove the Valve Stem Cap

Unscrew the plastic cap that sits over the valve stem. On steel rims with wheel covers, you might also need to remove the cover. Place the plastic cap in a safe place – you’ll need to screw it in place later.

Otherwise, dirt and debris might get into the valve stem, which can get in the way the next time you want to inflate or measure the pressure in your tires.

Step 2. Use a Tire Pressure Gauge to Measure the Existing Pressure

Use a Tire Pressure Gauge to Measure the Existing Pressure

Place the end of the hose of the tire gauge on the valve stem. Push as hard as needed, so there is no hissing noise. Then, check the reading – on analog gauges, the needle should jump immediately. On digital gauges, though, you might need to push a button to activate it.

Step 3. Check the Recommended Tire Pressure for Your Car

Check the Recommended Tire Pressure for Your Car

Once you measured the pressure inside the tire, it’s best to compare it to the recommended pressure first. You can find the recommended tire pressure on a sticker on the sill of the driver’s or passenger’s door. If you can’t find it there, it’s best to refer to the owner’s manual.

Don’t inflate the tire if the tire pressure is equal to the recommended one.

Step 4. Inflate the Tires Using an Air Pump

Inflate the Tires Using an Air Pump

Place the end of the hose on the valve stem and make sure that it clamps in place. If you hear a hissing sound, you won’t be able to inflate the tire. On some air pumps, you might need to hold the tip of the hose firmly pressed against the valve stem.

Then, start pumping for a while. Check the tire pressure on every 15-30 seconds, as overinflated tires will also not perform well. And, even if you overinflate the tire, don’t worry. Press the core of the valve stem with a sharp object, and the tire will start deflating.

Once you reach the recommended pressure, place the plastic cap back over the valve stem.

Step 5. Inflate the Tires at the Nearest Gas Station (Optional)

Inflate the Tires at the Nearest Gas Station (Optional)

You can also fix low tire pressure at the nearest gas station. The air pumps at gas stations will automatically reach the desired pressure. Just enter the recommended pressure on the apparatus, put the hose on the valve stem, and wait until you hear the sound signal.

What to Do if the TPMS Light is Still Illuminated?

When one of your tires is underinflated, the TPMS (Tire Pressure Monitoring System) on your dashboard will illuminate. As soon as you inflate the tire, though, the light should go out. However, in many cases, the light might not go out immediately. Here is what you need to do to rectify that.

Drive for a While

Driving for around 5-10 miles at speeds of 40-50 mph should be enough for the TPMS light to go out. If it doesn’t go out, make sure to recheck the pressure.

Reset the TPMS Light

If you are sure that the tires are correctly inflated, you can reset the TPMS light. Most vehicles have a reset button on the lower part of the steering wheel column. If you can’t find it there, consult your user’s manual.

Then, turn the key to the “ON” position, push the button, and hold it until the TPMS light blinks three times. It should stop shining after.

Conclusion

In this day and age, fixing a low tire pressure is very easy and straightforward. Every gas station has an air pump, and you can even purchase an automatic one on the cheap and keep it in the trunk. There is simply no justification in driving with low tire pressure, precisely because it hurts safety.

And, even if this article didn’t help you find a solution for your underinflated tires, feel free to put a question down below. I’m sure we can find a solution to your issue. And, crucially, stay safe!

The post 5 Easy Steps to Fix Low Tire Pressure appeared first on Smart Motorist.


source https://www.smartmotorist.com/how-to-fix-low-tire-pressure

Sunday, July 5, 2020

19 Complete Steps to Patch a Tire

When a flat tire leaves you stranded, you have several options to shut down the puncture. Using a tire repair kit and plugging the tire is the easiest way, but also not the safest.

Patching the hole is a much safer solution, and it also lasts longer. The only issue with this method is that you can’t do it while on the road. Also, it takes more time and requires more considerable skill.

Still, if you’re most interested in safety, here is a detailed guide on how to patch a tire.

Things need to know before Patch a Tire

When is it Safe to Patch a Tire?

When is it Safe to Patch a Tire

Patching is a very safe way of closing a puncture. When done right, this method can make set up your tire for thousands of miles to come. Contrarily, plugging a tire isn’t the best solution in the long run.

However, as with every method, you can’t patch a tire with a very large puncture. If the hole is too big, the internal cords of the tire might be damaged.

Now, sure, you can still patch a large hole and stop it from leaking, but the structural rigidity of the tire will be reduced, which might result in unstable and unsafe handling. The steel cords on the inside are essential for a safe drive.

As a general rule of thumb, you shouldn’t patch a puncture larger than 1/4-inch (approximately 6mm) on passenger cars and 3/8-inch (around 10mm) in light-truck tires. A hole that big probably won’t tear up the internal cords and plies, which means that the tire will be completely safe to drive.

Moreover, you can only patch a puncture in the middle of the tread of the tire. If the hole is on the outside of the tread (outboard shoulders), or the sidewalls of the tire, you should immediately replace it with a new one.

Furthermore, tire manufacturers don’t recommend patching a tire many times. For maximum safety, you should repair your tire only 3-4 times, and even less if possible. If your tire is punctured more than 3-4 times, you should probably look for a new tire.

Finally, if you aren’t familiar with mechanics, tires, or car repair in general, you should probably avoid patching your tire. Instead, take the punctured tire to the nearest tire repair service shop for patching.

How Long Does It Take to Patch a Tire?

While other methods might be fast, like, for example, plugging the puncture, patching requires time and patience. A skilled technician will only need 30 minutes to plug a tire, and that’s with professional tools that make the job much more comfortable.

If you want to do it yourself, be sure to have at least two hours, or perhaps even more. That’s specifically true if you don’t have much experience in car repair, or it’s the first time you patch a tire.

What Tools do You Need to Patch a Tire?

What Tools do You Need to Patch a Tire

Professional vulcanizing tools can make the job much more comfortable, but sadly they are too expensive, huge, and require a lot of energy. For that reason, you should leave them only to the professionals.

However, you can use other tools to finish the job successfully. Obviously, you’ll need tools to remove and install the wheel on your car. These include a jack with enough lifting capacity for your vehicle and a lug wrench.

As for the patching, I recommend going for a mushroom plug cord patch for radial tires. This is a much better solution than a simple patch on the inside of the tire.

That’s because the stem protects the inside of the tire from water penetration, which might peel off the patch. Moreover, the stem has a metal clip on the top, which makes it easier to install the patch inside and over the puncture.

You will also need an air compressor to inflate the tire, tire spoon, valve stem core remover, reaming tool to widen the hole, a pair of pliers for removing the object, vulcanizing cement, and a stitching tool.

How to Patch a Tire

Here are the complete steps to patch a tire.

How to Remove the Wheel from Your Car

Before you even start patching the tire, you need to remove the whole wheel assembly from your vehicle. Here is how to do that:

Step 1. Loosen the Lug Nuts

Loosen the Lug Nuts

Loosen the lug nuts with a lug wrench before jacking the vehicle – it’s much easier this way.

Step 2. Jack Up Your Vehicle

Jack Up Your Vehicle

Use the jack provided in your car to jack up your vehicle. Make sure that you put the jack on the jack point that is close to the damaged tire. If you aren’t sure about the position, check your user’s manual.

Step 3. Remove the Wheel

Remove the Wheel

Unscrew the lug nuts completely using a lug wrench and then remove the wheel.

Step 4. Locate and Mark the Puncture

Locate and Mark the Puncture

Before you even start patching the tire, make sure that you locate the puncture. You can use a soap and water solution and spray it over the tread of the tire. The soap should start bubbling over the leak. Then, clean and dry the tire and mark the hole with white chalk.

How to Remove the Tire from the Wheel

Afterward, you must remove the tire from the wheel to patch the puncture on the inside. This process requires a bit of force, but don’t overdo it! Otherwise, you risk damaging both the tire and the wheel. Here is how to remove the tire:

Step 5. Remove the Valve Stem Core

Remove the Valve Stem Core

Use a valve stem core remover to take off the valve and completely deflate the tire. Otherwise, you won’t be able to remove the tire from the wheel.

Step 6. Remove the Tire from One Side

Remove the Tire from One Side

Put the tire spoon between the tire and the wheel. Then, use a hammer, so the spoon penetrates inside and breaks the bond between the rim and the tire.

Afterward, push the other side of the spoon – the edge of the tire should come out. Turn the wheel while using the spoon so that the whole tire comes out.

Step 7. Remove the Tire from the Opposite Side

Remove the Tire from the Opposite Side

You’ll need to use the tire spoon similarly on the other side of the tire to remove it altogether.

How to Patch the Puncture

Now, we’ve come to the fun part – patching the puncture itself. Ensure that you take your time here – rushing it might result in an improperly sealed leak. Got it? Then, follow the steps below:

Step 8. Remove the Object

Remove the Object

If there is any object left in the hole, make sure that you remove it with a set of pliers.

Step 9. Ream the Puncture

Ream the Puncture

Start by reaming the puncture. For this job, you can use a reaming tool or a drill. Reaming the hole will make it easier to install the mushroom patch.

Step 10. Use a Scraper to Roughen the Area

Use a Scraper to Roughen the Area

Scrape the inside of the tire and around the puncture. Doing this will create a rough surface, which makes it easier for the patch to stick correctly. You might also want to use a buffing tool or a grinding paper for even better results.

Step 11. Clean out the Hole and Surrounding Area

Clean out the Hole and Surrounding Area

Cleaning the area is perhaps the most critical process, but sadly one that is often overlooked. First, use your compressor to clean the puncture from any debris left inside. Then, use a clean brush to remove the debris surrounding the leak.

Step 12. Apply Vulcanizing or Tire Cement

Apply Vulcanizing or Tire Cement

After properly cleaning the area, apply a thin layer of vulcanizing cement. You can use a cheaper tire cement as well, but it doesn’t provide the best possible adhesion.

Leave the cement to set up for 30-60 seconds, or until it becomes tacky. Don’t leave it too long – dry glue won’t stick well.

Step 13. Prepare the Patch for Installation

Prepare the Patch for Installation

Give the mushroom plug cord patch a pinch to remove the plastic coating on the inside. Ensure that you don’t touch the surface under the plastic coating.

Then, put vulcanizing cement on the stem of the patch. The adhesive will lubricate the stem and make for an easier installation. Moreover, it will secure the stem in place.

Step 14. Install the Stem of the Patch Inside the Puncture

Install the Stem of the Patch Inside the Puncture

Push the stem of the patch inside the reamed hole carefully.

Step 15. Pull the Stem from the Other Side

Pull the Stem from the Other Side

Using a pair of pliers, pull the metal tip from the other side of the tire until the patch adheres well.

Step 16. Use a Stitching Tool on the Patch

Use a Stitching Tool on the Patch

To properly bond the patch on the inside of the tire, you will need a stitching tool. Run the device over the patch left to right, and then up and down. Repeat the step for several times in each direction. Make sure that each time you stop, it’s over the rubber and not the patch.

Step 17. Remove the Plastic Covering on the Patch

Remove the Plastic Covering on the Patch

The patch has a plastic covering on the upper side. Never try to remove the covering from the end – you risk peeling the patch off. Instead, gently cut the coating on the inside with a sharp blade and work your way from there. It should come out quickly.

Step 18. Trim the Stem

Trim the Stem

The stem of the patch will undoubtedly hang on the outside of the tire. Use the same sharp blade to trim the stem. Make sure that the stem is level with the tread of the tire.

Step 19. Installing the Tire on the Rim

Installing the Tire on the Rim

To install the tire back, start by putting a bit of soap and water solution around the bead of the tire for lubrication. Use two tire spoons to open the casing and slide it back into the rim. Repeat the procedure on the other side.

Then, inflate the tire to the value provided by the vehicle manufacturer, and you should be good to go!

Conclusion

Patching a tire is certainly not a straightforward process. For that reason, always make sure that you follow each step closely – each one is crucial. Otherwise, you risk an improperly sealed puncture and tire that loses pressure over time.

And, if something is unclear, please do not hesitate to ask in the comment section below. Also, if this article helped you patch a tire, share it with your friends – it might help them in the future, too!

The post 19 Complete Steps to Patch a Tire appeared first on Smart Motorist.


source https://www.smartmotorist.com/how-to-patch-a-tire