Tuesday, June 30, 2020

Low Tire Pressure Light, but Tires are Fine – What to Do?

The tire pressure monitoring system (TPMS) is one of the simplest, yet most effective solutions to combat improperly inflated tires.

The system can tell the driver when one of the tires is underinflated via a light on the dashboard. On some advanced systems, the driver can monitor the exact pressure.

However, in some rare situations, the TPMS light can illuminate, even though tires are inflated at the proper pressure. So, why does that happen and how to fix it? Let’s discuss down below.

The Connection Between Tire Pressure and Road Safety

The Connection Between Tire Pressure and Road Safety

Improperly inflated tires can lead to severely worsened handling, longer braking distances, and unstable ride on the highway. For that reason, it is recommended to check the tire pressure at least monthly.

To make things easier and safer for drivers, manufacturers equip modern cars with tire pressure monitoring sensors. And, they don’t do that just for convenience – the TPMS system is required by law from 2007.

At first, manufacturers implemented TPMS only on cars with run-flat tires, such as the 1986 Porsche 959. The engineers decided to use this system because the driver couldn’t tell if a tire is flat – run-flat tires can run without any pressure.

Unfortunately, the TPMS was implemented in all vehicles after the Ford Explorer and Firestone tires controversy. The OEM Firestone tires on Ford’s SUV were falling apart on the highway, which leads to 30 deaths.

Ford and Firestone blamed each other for the issue, but the bottom line was that the tires weren’t properly inflated, from the factory.

More accurately, Ford recommended a very low tire pressure of 26 psi to mitigate the stability issues of the car, instead of making changes on the suspension.

The low pressure lowered the tread life of the tire significantly to the point that they disintegrated at higher speeds.

And, while the Firestone tires were probably at blame as well, this fiasco teaches us that properly inflated tires are essential for road safety and saving lives.

For all those reasons, you should always take care of the tire pressure monitoring system in your car.

How does the TPMS System Work?

How does the TPMS System Work

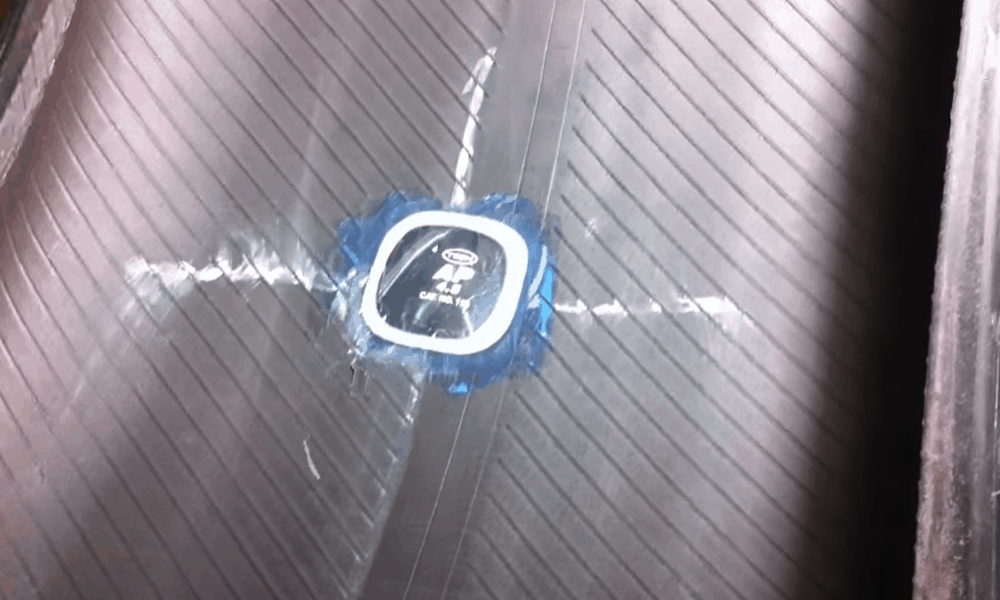
Modern TPMS systems use small sensors built into the circumference of the rim to measure the pressure inside the tire. The sensors then send the information to the vehicle’s computer, which then notifies the driver.

The system if very bulletproof and rarely makes wrong measurements. Moreover, it measures the pressure continuously, and on each tire of your vehicle.

However, there is no way to send power to TPMS sensors, which is why they are equipped with small batteries. The cells aren’t easily replaceable, at least not without damaging the sensor. Still, if your car is new, the batteries should last for up to ten years.

In the past, some manufacturers used indirect measuring of the tire’s pressure. The indirect TPMS system uses other data, such as the speed of the vehicle to measure the pressure inside the casing. This system requires no batteries and doesn’t require maintenance.

However, the indirect system can’t make exact measurements. Moreover, the system requires a reset each time the driver inflates the tires. And, if the owner forgets to do that, the system might provide wrong readings.

Why Does the Low-Pressure Light Illuminate if the Tires are Inflated Properly?

In some cases, the TPMS light (looks like a flat tire) on your dashboard will illuminate, even though the tires seem fine.

Whenever this happens, I strongly recommend checking the tire pressure first. A visual inspection won’t work – the tires might look fine, yet they can be underinflated.

Instead, use a tire pressure gauge – they are very cheap nowadays and very small, so you can always keep one in the trunk.

Make sure that the reading is similar to the one recommended by the vehicle’s manufacturer. You can find the recommended pressure on the sill of the driver’s door.

For most passenger cars, the correct pressure varies between 32 psi and 35 psi (2.2 bar to 2.4 bar) when the tires are cold. Once you start driving, the tires heat up, and the pressure rises. Because of that, always measure the pressure on cold tires.

Once you are sure that you properly inflated the tires, and the TPMS light is still illuminated, here are the main culprits behind the inconvenience.

Failed TPSM Sensor

Failed TPSM Sensor

Most often than not, the main reason behind the malfunctioning of the TPMS is a failed sensor. The TPMS light can illuminate even if only one sensor fails.

The bad thing is that you can’t really check if a sensor is faulty on conventional TPMS systems. To do that, you’ll need to take your car to an authorized service, or some independent premium tire service, depending on the vehicle manufacturer.

The reason? You’ll need expensive instruments to check the system, which often requires connecting your car to a certified laptop using an OBDII tool.

That said, if your vehicle shows you exact pressure measurements on each wheel, you can quickly check if a sensor is faulty. Simply measure the pressure on each wheel with a pressure gauge and compare the readings to the ones displayed on the dashboard.

External Changes in Temperature

External Changes in Temperature

The pressure inside each tire varies with temperature. The hotter it gets outside, the higher the pressure gets in your tires and vice versa.

On average, the pressure in each tire will rise or fall by one psi for every 10 °F (12 °C). For that reason, in harsh and freezing wintry weather, most vehicles have issues with illuminated TPMS light. This might also happen in very hot weather, but that occurs less often.

To combat this issue, first, drive your car for a few miles. This should warm up the tires and increase the pressure inside. If the problem persists, simply inflate the tires to the proper value, and the light should go out.

Tire Replacement

Tire Replacement

A recent tire replacement can also lead to improper TPMS measurement. Most of the time, this happens when you replace the whole wheels, like, for example, changing from summer tires to winter tires with winter rims.

Each TPMS sensor has its code, which should be recognized by the car’s computer. When you put new wheels on the vehicle, the technician should reset the system so that it recognizes the new sensors. If not, the TPMS light will light up.

In some rare situations, the tire technician might damage one of the sensors, which might also lead to the TPMS light illuminating.

New Rims Without TPMS

New Rims Without TPMS

Now, this is an issue that some people don’t think about, but new rims don’t come with TPMS sensors attached. Instead, you need to purchase the sensors separately and install them inside the wheel. If you don’t do that, the TPMS light on your dashboard will be continuously illuminated.

How to Reset the TPMS Light?

How to Reset the TPMS Light

Fortunately, you can easily reset the TPMS light on your dashboard, provided you make sure that you correctly inflated the tires.

Modern cars have TPMS reset buttons, which are usually positioned under the steering wheel. However, on some vehicles, you need to do that via the infotainment system. To be sure, check inside the owner’s manual.

After you found the button, turn the key to the “ON” position without starting the engine. Then, push the button and hold it until the TPMS light blinks three times. Release the button and start the engine.

An even easier way to reset the system is by disconnecting the car’s battery. However, this might also reset other electronics in your vehicle, such as the radio stations.

If you don’t care about resetting other electronics, disconnect the positive (red) battery cable. Then, turn on your car and turn the headlights on to discharge any remaining electricity. Reattach the wire, and the TPMS light should stop flashing.

Can You Replace the TPMS Sensors?

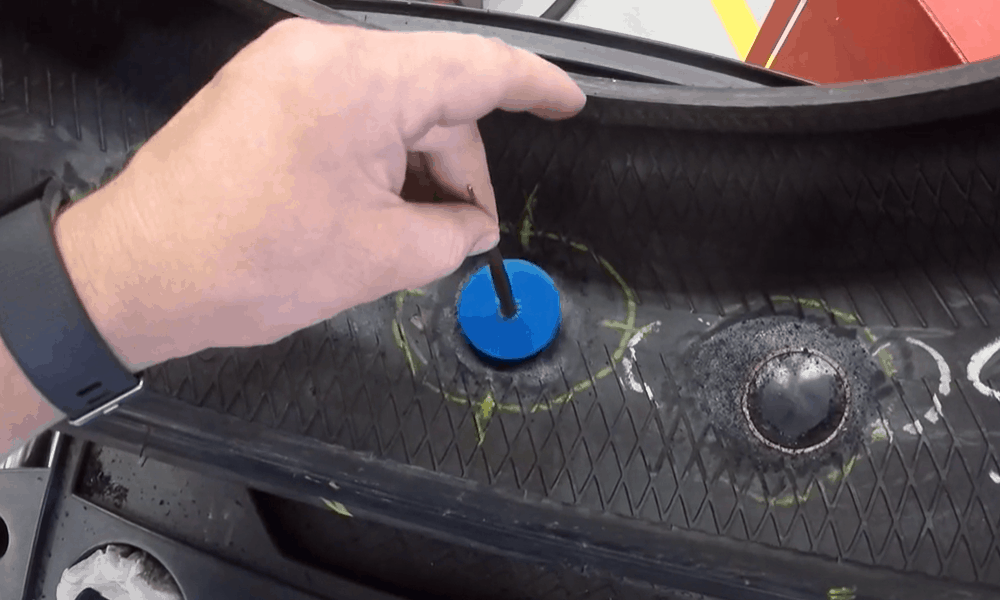
Of course, you can replace the TPMS sensors. However, to do that, you’ll need to detach the tire from the rim, something most people aren’t prepared to do.

Moreover, you need to be very gentle with the new sensor. For that reason, I recommend taking your car to a tire repair service and replace the sensor there.

Depending on the vehicle, new TPMS sensors cost from $50-$100. Some services offer a battery replacement, even though the batteries are usually molded onto the sensor. And, while this might work, you can’t get a warranty.

Conclusion

Finding the reason for an illuminated TPMS light might require time and patience, but fortunately, it’s easy and straightforward. Just make sure that you follow the steps that I pointed out in this article, and I’m sure you’ll find a solution.

Even if you didn’t find a solution to your problem, don’t panic! Leave a comment down below, and maybe we can find another explanation. On the other hand, if you found this article beneficial, share it with your friends – it will help us produce even more helpful articles in the future!

The post Low Tire Pressure Light, but Tires are Fine – What to Do? appeared first on Smart Motorist.


source https://www.smartmotorist.com/low-tire-pressure-light-but-tires-are-fine

How long Can You Drive On a Patched Tire?

Your car’s tires are the critical component that connects your car with the surface of the road you’re traveling. When you have a flat tire emergency, what is the solution for fixing it?

No matter when you have a flat tire, it will be one of the most inconvenient things that can happen while you’re driving. And, unfortunately, it always results in you losing time to fix the problem.

Your tire will lose air because of several reasons. Usually, you have run over an object in the road that caused a puncture and the air began to slowly leak out. Another major reason is driving with too low much or too low pressure.

The damage may not even be noticeable from outside the tire. Here’s a prime example of when a tire is run without enough pressure.

There are 3 common methods for repairing a punctured tire:

  • Patch-only,
  • A tire plug, or
  • A combination of the two

Both the patch-only and the combination repairs require a technician to dismount the tire and look at the inside wall to see if there is any damage. As long as there is no damage to the sidewall, a repair can be made.

Plug-Only repairs, however, are much easier and can be done from the outside of the tire with no need for the tire to be dismounted.

Patch Only Repair

Patch Only Repair

When tire rubber is punctured, the accepted procedure is to find the rupture and swab around it with a soapy solution of water, or he may hold it inside a tank of water and look for escaping bubbles of air.

The area is then prepared with a scraper or buffing tool and cleaning solution to make it suitable for bonding with the repair patch.

A vulcanizing cement is then applied under the patch and over the inner liner of the tire and the patch is applied over the puncture. The surrounding area is then stitched or rolled and covered with sealant before the tire is mounted back on the rim.

Once a tire is properly patched, you should be able to drive safely for a fairly long time. However, even though a patch is usually stronger than a plug, it will not work on or near to a sidewall.

The tire industry, however, warns against the patch only repair method. Air and moisture can seep into the tire from the outside tread and enter from around the edges of the patch.

Plug-Only Repair

Plug-Only Repair

Plug-only repair is much simpler. The technician finds the puncturing object and removes it. An insertion tool with a plug is inserted into the rupture from outside the tire. After it is removed, the plug remains inside the rupture.

Often, this type of repair will use a “string plug” consisting of a short woven cord covered with tacky sealant. String plugs will often be included with automobile repair kits. Both reaming and insertion tools are also included along with an assortment of string plugs.

Occasionally a kit can also contain a tube of rubber cement to add additional sealant to the string plug. These kits can be an alternative for drivers who want to save a little money or for emergencies when it’s not possible to dismount the tire and properly apply a patch.

However, even though tires repaired this way will continue to hold air for a few months, tire manufacturers also warn against its use. A string plug type of repair can allow moisture and air to enter the tire and get between the tire layers.

The steel in the belts can then degrade over time and the tire can corrode and deteriorate. With the belts and the bond between the rubber layers weakened, there is a greater risk the tread will separate while driving.

Another risk of a string plug type of tire repair is that even when a puncture is repaired, there can be additional damage to the tire that is not apparent. The tire must be removed and visually examined to be sure there is no unusual internal damage.

Combination Repair

Combination Repair

The National Highway Traffic Safety Administration advises that the proper method to repair a tire puncture is to use a combination repair. (Download the NHTSA guidelines here.) A combination repair, as the name implies, involves using a tire repair patch and a rubber plug (stem) attached to its center.

After finding the puncture, it should be reamed out so that a clean hole remains for insertion of the plug. The inside area surrounding the puncture should be then prepared for bonding with the patch with a vulcanizing cement.

Apply the cement to the tire surface area and the patch/plug. The plug should then be pulled through the reamed hole from outside the tire so it fills the hole completely and seals it with the tire’s rubber.

The patch will bond to the tire to prevent air loss. The plug seals the puncture and air cannot escape. The plug also will seal the hole and prevent air and moisture from leaking.

Once the process is completed, the remaining rubber stem on the outside of the tire is normally trimmed so that it is smooth and level. If you would like to see how an expert performs a combination type of repair, check out this YouTube video.

Sidewall Damage

One final note if you have a flat tire, don’t drive any further than necessary! Even driving a few hundred yards can damage the tire’s sidewall. Stop and examine the tire closely. If there’s a strip of wear around the tire that is soft to the touch, do not add air to the tire! It may explode or cause injury to you or someone nearby.

Have the tire patched professionally by a trusted mechanic? They will know how to stop the leak and will examine the tire for sidewall damage. If the tire can be patched safely, they’ll advise you how long you should be able to drive on your patched tire.

Thanks for Reading!

Thanks very much for checking out our article today, “How Long can you Drive on a Patched Tire“. We hope you have found our directions helpful and have answered any questions you may have about resetting the warning light properly in your vehicle.

There’s nothing worse than being stranded with a car that can’t take you where you need to go when you need to be there. If you have any questions or if you would like to leave some comments about this article, please let us know! We want to be your top source for ideas about anything you need related to your car!

The post How long Can You Drive On a Patched Tire? appeared first on Smart Motorist.


source https://www.smartmotorist.com/how-long-can-you-drive-on-a-patched-tire

Friday, June 26, 2020

How Often Should You Check Your Tire Pressure?

The tires on your car arguably considered the most important component of your vehicle. While tires often tend to be overlooked, they are the critical link between you and the vehicle you are nestled in and the road surface you travel on.

Your tires should always be kept at the correct air pressure. That amount depends on the car you drive, so check the label on your car. It’s usually located inside the driver’s door well and in the owner’s manual.

Measure the air pressure in each tire using an accurate gauge as often as seems reasonable before you begin to drive. On long trips, check it every couple of hours or every 100 miles. And be sure to use the “recommended” pressure listed on the side of the tire. Here’s more information from Michelin.

Your tires are permeable. Each one can naturally lose as much as 2 PSI each month. Even when you have a “perfectly” sealed tire, it can lose between 1 and 2 PSI each month through air escaping the tire.

Your Tires Essential Functions

Your Tires Essential Functions

Your tire’s essential functions are to:

  • Support your vehicle’s load
  • Transmit traction and braking forces from your vehicle to the road’s surface
  • Absorb as much of the road shocks as possible, and to
  • Change and maintain the direction of where your car travels

To ensure that each of these functions is adequately met, there are a few important things about your tires that you should inspect regularly. These include:

  • The air pressure
  • The tread dept
  • The tire wear, and
  • Deterioration or any damage

The most important of these and often the easiest to check is your car’s air pressure. All of your tires should be checked on average about once a month. This will ensure that the correct amount of air pressure in your tires is always present.

However, even though once a month is the average recommendation to check the air pressure in the tires on your car, numerous other factors should often be taken into consideration. These other factors can radically change how often you should be doing this activity.

Changes in Temperature

When the outside temperature changes, it can compound the effect and cause a direct change in your car’s tire pressures. In general, for every 10 degrees (Fahrenheit) of outside temperature change, your car’s tires will increase or decrease about 1 PSI.

As the weather gets warmer, the pressure in your tires will rise, and when it gets colder, the pressure will go lower. Check out this video for more about the cold weather effects.

However, when you think your tires might have cooled down, do not let some air out of the tires to lower the pressure. Always use a gauge to check your tires. You could be under inflating your tires, which is just as dangerous as over inflation.

When you consider that the average passenger vehicle’s tires are typically pressurized to about 30-35 PSI, a few extra pounds of air pressure will make a large difference. When combined with other factors, such as driving fast or over rough roads.

Reasons for Excessive Air Pressure

When heat causes higher air pressure, three things come into play:

Air Expansion

Air Expansion

When the air molecules get hotter, they begin to move about and vibrate more intensely. This vibration creates expansion. Therefore, the molecules of air in your tires expand with the heat of summer.

Friction

Friction

Heat is naturally generated by friction, and as you drive your car each day, your car’s tires rub against the asphalt or concrete of the road’s surface. This generates friction which creates heat. Slowly, over time, your car’s tires get warmer and warmer as you drive down the road.

Rubber

Rubber

The third and final part of the reason your tire’s air pressure rises is because of the rubber in your tires. Rubber is the primary component of tires, and rubber molecules are linked with each other in long, twisting chains (called polymers).

A Few Final Thoughts

Do not put all your faith in your car’s Tire Pressure Monitoring System (TPMS). Every new vehicle has a TPMS to send you an alert when your tire pressure is too low. But, unfortunately, your system is not designed to warn you when the pressure is too high.

When your tires have worn thin, they are more likely to have a blowout. Don’t take chances and replace any tire that looks suspiciously low on tread before it gives out and may cause an accident. See this video for more information about tire wear.

Keep your tires clean and treat them with an accepted wax-based automobile product that will keep them from drying out. By doing this, you will decrease the possibility of having a blowout.

Watch Your Speed!

In general, it’s best to keep your speed within the posted speed limit. Often this can be dangerous or difficult to do, but when possible, try to adhere to the recommended speeds and stay within the law. The slower you drive, the less friction and wear you will place on your tires and the less heat will be generated.

Also remember that the more weight you put in your car, the more pressure that will be on the tires. Be careful when loading down your vehicle as too much weight can increase the likelihood of having a blowout.

The road surfaces that you drive on can also affect the life of your tires. When you drive on a rough, unpaved road, the life of your tires can be cut in half. Tread life will also decline rapidly when you increase your speed, wearing around 35 percent faster at 70 mph than at 50 km/h.

Your tires can also wear out faster because of any number of mechanical conditions in your car. When your steering or suspension parts are loose or misaligned, or when your tires aren’t balanced properly, you will probably have excessive tire wear.

Thanks for Reading!

Thanks very much for checking out our article today, “How Often Should You Check Your Tire Pressure“. We hope you have found our directions helpful and have answered any questions you may have about resetting the warning light properly in your vehicle.

There’s nothing worse than being stranded with a car that can’t take you where you need to go when you need to be there. If you have any questions or if you would like to leave some comments about this article, please let us know! We want to be your top source for ideas about anything you need related to your car!

The post How Often Should You Check Your Tire Pressure? appeared first on Smart Motorist.


source https://www.smartmotorist.com/how-often-should-you-check-your-tire-pressure

Thursday, June 25, 2020

How to Reset the Tire Pressure Light

Your car’s tire pressure monitoring system is a key component of US regulations after a major recall of defective tires was ordered by the government in the late 1990s.

In today’s article, How to Reset the Tire Pressure Light, we will explain the proper procedure to reset this warning light and explain why the system is installed in every vehicle sold today.

The Firestone Tire Failures

The Firestone Tire Failures

In the late 1990s, there was a massive increase in the number of tire failures in the US. Most of these failures involved Firestone brand tires that were installed as original equipment on the Ford Explorer and other similar vehicles.

Over several years, these tire failures were found to have caused 271 fatalities and over eight hundred injuries in the United States alone. More injuries, due to the defective tires, were also related to fatalities in several other countries.

These failures led the tire manufacturer, Bridgestone/Firestone, and Ford Motor Company, to recall and replace over 23 million tires. Several high-ranking executives resigned or were fired and Firestone eventually closed the Decatur, Illinois factory where the tires were manufactured. See Wikipedia for more details.

The TREAD Act

In response to this massive recall of defective tires and the multiple driver fatalities, the US Congress passed legislation called The Tread Act.

The TREAD Act requires that a system must be included in all vehicles by September 1, 2007, to warn drivers about underinflated tires on their vehicles. The warning system, or tire pressure monitoring system (TPMS), needed to be placed in 100% of all passenger cars and light trucks under a gross vehicle weight of 10,000 lbs.

Automakers and their suppliers were also told to notify the National Highway Traffic Safety Administration (NHTSA) of all accidents that involved alleged tire defects.

The Tire Pressure Warning System

The Tire Pressure Warning System

When you are driving and you notice that the tire pressure light is blinking, you probably think, “What is going on?” Well, the reason that your tire pressure light is blinking is to let you know there is probably a problem with your tires.

The tire pressure monitoring system (TPMS) has become a safety feature of every motor vehicle made today. And, with any of the warning lights in your car, you should never ignore one. You also should know exactly what to do about it when the light comes on.

The TPMS is a warning that at least one of your tires is underinflated. It can:

  • Create unpredictable handling
  • Reduce tire lifespan by creating uneven tire wear
  • Reduce your fuel economy
  • Create unsafe driving conditions on the highway and even cause a blowout

If you see your warning light while you are driving, or if it is on constantly after starting your car, you should drive to a rest stop or gas station that has an air pump. Then, reinflate the tire(s) to the recommended pressure.

Tires normally will lose pressure for one or two reasons:

  • A quick change in temperature
  • A leak or puncture that allows air to escape

Often, when your tire pressure light comes on, the outside temperature has changed drastically, like when you experience a cold snap. What happens is that when the outside temperature drops, air gets denser and doesn’t require as much space inside the tire. When this happens, the air pressure in your tires is reduced. If the reduction is dramatic, it will activate the tire pressure warning light. Here’s a nice video demonstration on YouTube.

The TPMS warning light can also come on be when a driver a tire needs a repair following a puncture. If you top off the problem tire, it might give you enough time to get to a service center. However, if there are more than a few miles to cover, you should probably open the trunk and install your spare tire.

Sometimes, however, after you have topped off the air in your tires and don’t notice any leaks, your TPMS light may still be burning yellow on your dash. In this case, you should probably consider resetting your car’s tire pressure light. However, do this as a last resort since this is not a common maintenance issue.

Resetting the Tire Pressure Light

Resetting the Tire Pressure Light

When your tire pressure light remains on even after correcting the air pressure, it can be reset. In most cars, you will usually find the tire pressure monitor reset button beneath the steering wheel. Check your user manual if you have trouble locating it.

Follow these steps to reset the TPMS light:

  • Begin driving the car until you’re at about 50 mph. Travel for around 10 minutes. Normally, this will reset the sensor. When you start the car again, the TPMS light should not light up.
  • Don’t start the car but turn the ignition key to the “ON” position. Press and hold down the reset button and it should begin to blink 3 times. Then, release the button and start the car. Run the engine for 15-20 minutes and the sensor should reset itself. Watch below video to see a demonstration.

There are several other methods you can reset the TPMS light. However, they are somewhat more time-consuming but worth a try if the steps above don’t work.

  • Inflate all of your tires to about 3 PSI above the recommended pressure. Next, deflate all of them completely. (If your spare tire also has a sensor, make sure to include it as well.)
  • After deflating the tires, reinflate each one until it reaches the proper pressure.
  • Turn off the ignition switch and open the hood. Reach inside and remove the positive connection to the battery. Next, turn the ignition switch to “on” but don’t start the car. Press the horn for around 3 seconds so if any power is left in the circuit will discharge. Then, reconnect the positive connection to the battery.

If the TPMS warning light is flashing after you start your vehicle, it’s probably okay. However, it the light continues to flash or begins flashing after you start driving, there might be a problem.

When you notice that your tire pressure light is flashing, it may indicate there could be a problem with one of the tire sensors or possibly the sensor’s battery. When this occurs, you should take the car in for service soon so a technician can find the problem and resolve it properly.

Summary

Thanks very much for reading our article today, How to Reset the Tire Pressure Light. We hope you have found our directions helpful and have answered any questions you may have about resetting the warning light properly in your vehicle.

There’s nothing worse than being stranded with a car that can’t take you where you need to go when you need to be there. If you have any questions or if you would like to leave some comments about this article, please let us know! We want to be your top source for ideas about anything you need related to your car!

The post How to Reset the Tire Pressure Light appeared first on Smart Motorist.


source https://www.smartmotorist.com/tire-pressure-light-wont-go-off

Wednesday, June 24, 2020

How Long Does a Tire Plug Last?

Have you ever had a flat tire? Of course, you have. We all have, at one time or another, and in most cases, the mechanic will recommend a tire plug. This is a sticky expandable substance that is usually stuffed in a hole on the tire from the outside and must be wedged in real tight so it can stop the air from leaking out.

If you have just had this done to one of your tires and are wondering – how long does a tire plug last? Do not worry, I have compiled an exclusive review to answer this question. I often wonder sometimes, and I may end up driving my car with the plug until I have to change the tire.

So, to answer this question, I need to first explain a few things to you. But it can last quite a while, you shall be surprised. Keep reading, I shall tell how long it shall last.

What is a tire plug?

According to Txtire.com, this is a sticky and expandable substance that is usually stuffed in the hole on your tire. This should easily stay intact for a long time, until you get the opportunity to re-inflate the tire when you get to the nearest repair shop.

Most mechanics however feel that there is usually a better option of plugging your tire, rather than using a tire plug. They recommend a radical patch. This is because, the radical patch is designed specifically to repair tires that are mostly used on the roads today.

Using a radical patch will take around 30 minutes, and you may have to remove the tire, but a tire plug will take much less time, and it is done while the tire is still on the car.

A radical patch will often require you to vulcanize your tire patch, which is a process that will use heat and other types of curing agents in order to reinforce the rubber of the tire.

So, How Long Does a Tire Plug Last?

A radical patch or a tire plug will mostly last anywhere between 7 and 10 years.

A tire patch can last longer, but you must never patch the same tire more than once. This shall negatively affect the speed rating of the tire and potentially cause it to the blowout.

Okay, which one should you use?

Whenever your car has a puncture, ensure to consult your tire service expert and do let them determine the type of repair they shall use. This is what is best for your tire in the long-run.

But how much does tire plugging cost?

Tire plugging is almost always the go-to solution for most people, and it is usually because it is budget-friendly. You shall pay between $20 and $40 to have the plug put in. This is much better than having to spend hundreds of dollars to repair a medium-quality tire.

How does the plug work?

How does the plug work

Plugging a hole in your tire is simply an immediate solution that should not be made permanent, because there is a much bigger problem in your tire. If any of the tires on your car is struggling to hold the air in even after inflating it regularly, this means that it has a leak somewhere, and this must be covered.

Plugging is the most logical way of covering the leak.

The process will involve covering the leather of the tires with sticky and vulcanized rubber that is inserted in the holes. Each of the strips is usually enough to seal one chink of the slit.

This repair can actually last very many years, because what the plug does is to form a seal that is airtight in the inner lining of the tire. This fills the rapture and creates a very strong seal that prevents it from forcing the air out of the tire.

Can I use it as a permanent fix?

Plugging is always meant to be a temporary fix and you are likely to hear very many warnings against using the plugs to fix your tire. In fact, the truth is that it is illegal to use this method on commercial vehicles and most repair shops do not offer this service.

Most vehicle repairs will advise against this very strongly, as it is likely to cause more tire damage.

What should you be careful about when plugging?

Plugging a tire with a tire plug is usually a safe method, and you can drive the vehicle indefinitely, well, at least 7-10 years, with the plug in place, but as we have mentioned above, this is not always the best option to use on your tires.

But, if you are hell-bent on using this method to repair your tire’s leaking problem, then it is important that you understand the safety risks of plugging. I shall explain them below.

When the puncture is too big

if the puncture is too big, plugging will not work, because a tire plug can only seal small holes that are not larger than ¼ inches in size. Take your vehicle to a repair shop where they shall repair the puncture the right way.

If the hole is located near the sidewall

If the puncture is nearest to the sidewall, then you have some decisions to make. For example, if the tear is very close to the sidewall, like an inch of it, then simply just change the tire, it cannot be repaired with plugging.

This is because, the tire is responsible for flexing the tire when you are driving and if there is a plug it shall be pushed out eventually, as a result of too much flexing.

When the side walls are too damaged

This is very simple. If your sidewalls are way too damaged, it means that there is too much rubber dust on the tire. Simply discard this tire and get a new one. Install a new tire altogether.

Conclusion

As we have mentioned, this is meant to be a temporary solution, even if it shall last you almost 10 years. Driving a car with a tire plug is risky and almost all repair shops will warn you of this. In fact, as we have mentioned above, it is illegal to do this.

Here are some tips on how to take care of your tires;

  • Rotating them frequently.
  • Changing them when they are worn out.
  • Repairing any punctures using a radical patch instead of a tire plug.
  • Ensuring that your vehicles are not overloaded.
  • Inspect them regularly.

Finally, we hope that you shall reach out to us with any questions about tires that you may have. Drive safe and take care of your vehicles at all times.

The post How Long Does a Tire Plug Last? appeared first on Smart Motorist.


source https://www.smartmotorist.com/how-long-does-a-tire-plug-last

7 Types of Tires: Which is Right for You?

Have you ever wondered if you have the right tires on your car? I have. I often have a hard time choosing tires, because in most cases, I want the big ones, even though they cost more, but they just look so cool.

This is however wrong. You must buy the right tires for the right vehicle, and anyone out there wondering how to choose a tire type, I’ve got you covered. This review shall cover this topic and in the end, you shall be more informed.

What type of tire should I buy?

Good question. Most websites shall give you a good list of the different tires and their sizes, but in most cases, you shall need to have a deeper understanding of what it all means.

Tires are usually designed for the seasons, high performance, etc. I will explain what it all means below;

The All-Season tires

These are tires designed to function exactly as they have been named. For all seasons. They are engineered to be smooth, fuel-efficient, a quiet ride. Now, unfortunately, since they are designed for all seasons, they tend to falter when it comes to extreme weather.

You should only buy such tires if you live in places that have mild weather conditions since they cannot handle snow, ice, and sub-zero temperatures.

Snow/winger tires

If you tend to experience extreme winters where you live, these are perfect tires for you. They can actually handle all-seasons and are created from a special rubber that does not freeze or stiffen when the temperatures are below the normal levels.

Additionally, they provide traction during winter for the bad road conditions such as slush, snow, and ice. If your weather is brutal, consider these tires.

Performance tires

These are actually high-performance tires that are created for drivers who care more about performance and speed. They are able to harness the horsepower of the engine and they grip the road like race tires.

However, they tend to have reduced wear ratings, and typically, they do not last as long as other types of tires. You shall often find them on a sports card.

Summer tires

Summer tires

In most cases, these are the regular tires. Basically, a summer tire can only handle three seasons in a year, do not try to drive your summer tires during winter as they will not function at all. They can work on a damp road traction and summer thunderstorms are perfect for them.

All-Terrain Tires

All-Terrain Tires

If you are the kind of person who loves driving your vehicle on beaten paths, then an all-terrain tire would be perfect for you. These are tires that are created to handle the hard earth surfaces and can run well on sand, rocks, and mud. They actually even look heavy-duty as well.

They can handle beaten paths as well. Taken then on normal roads and you shall experience a very high level of comfort, because this is an easy area for them.

Touring tires

These are the premium tires and are designed for drivers who are interested in having a smooth experience that is both comfortable and has superior handling. These tires will offer you a long tread life, reliability, and minimum noise.

If you love traveling long distances, then these are the tires you should choose. They work in all-seasons and can handle wet and dry weather pretty well. However, they may have some trouble with frozen and snow conditions.

Mud-terrain tires

These tires can handle soft surfaces such as sand and deep mud better than other tires on our list. Mud-terrain is considered to be extremely aggressive and you may actually have trouble maneuvering. But, with this type of tire, you can do it.

These tires have some intense design that is perfect for off-road as well, it however will not be as silent, smooth, or comfortable as the normal roads.

What’s the fuzz with car tires?

Now, buying car tires seems so easy, but finding the right ones for your car can be a little bit difficult.

If you get this wrong, you will end up hobbling your car’s performance and also affecting its ability to tackle all types of weather.

Car tires need to be replaced at least every four years and having a refresher course on how to choose the right one may be just what you needed so you can get it right, at least this time around.

Most car tires actually fall into different categories, which I shall explain next. From the list below, you shall be able to identify what you need, according to your needs. But first;

What size does your car need?

Before we even look at the type of tire you shall need, let us understand the size. It starts with the size, then you trickle down to the right type.

To find out the size, you shall need to consult with your owner’s manual, or you can check the placard that is found on the side of the driver’s door jab. This shall give you the recommended tire measurements for the car you are driving.

It will look like this – P215/60R16 94T. In my previous post – what does tire size numbers mean, I have explained all of this.

So, the number that you find there, is what you should be looking for. This is the right tire to fit the wheels on your car.

Conclusion

Once you have identified the right tire size for your car, you should then think about the type of weather conditions you are living under, so you can choose the right type of tire to fit your everyday life.

Most drives, however, tend to stick to the same old tires they had before. All you do is go to the tire shop and choose the right size and then just pick out what you had, without realizing that there is a whole world of tires out there that would make your life so much easier.

When I discovered this, my life finally started. Now, I driver the best tires and my car is able to navigate whichever terrain I find myself.

You should, however, ensure that you consider the following when buying a tire;

  • The cost – choose one that is affordable.
  • The brand – the top brands tend to be longer-lasting, so stick with the best.
  • Comfort – if you want comfort, choose a tire to fit your life.
  • Wear – sometimes, it is important to buy a quality and expensive tire, as it is likely to last longer.
  • Noise level – choose a tire that has minimal noise levels so you can enjoy yourself on the road.

Finally, we are always here to help you with your tire and car related queries. Please reach out to us if you experience any trouble on the road. Stay safe and drive safe always.

The post 7 Types of Tires: Which is Right for You? appeared first on Smart Motorist.


source https://www.smartmotorist.com/types-of-tires

Tuesday, June 23, 2020

What Do Tire Size Numbers Mean? Understanding Your Tire Sizes

how to read tire size

Have you ever wondered what the numbers on your car tires actually mean? This has got to be one of the most misunderstood part of a vehicle. Sometimes we just driver our card and never care to know what is on the tires.

I, however, have always been curious about these numbers, and I sought out to answer this question – what do the tire size numbers mean? I put this review together to help anyone who has ever wondered about this.

With a step to step explanation, I shall explain to you what I found out about the numbers and the letters. They are usually found on the sidewall of your tires. They indicate the type of tire, the size, and the performance of the tire.

Let’s get started;

Tire Type

What Do Tire Dize Numbers Mean
Image: goodyearautoservice

The first letter at the beginning of most tires represents the tire type. This particular tire with a P stands for the P – Metric tire and refers to the tiers that are made following certain standards in the US. It is intended for Passenger vehicles.

But, if your tire has no letter at the beginning, do not worry, this indicates that it is a Euro Metric tier. Both P-Metric, as well as the Euro Metric, are made of different vehicle capacities.

A tire that comes with “LT” at the end or beginning of the tire shows that it is designed for lighter trucks. Manufacturers of motor vehicles usually equip some light trucks with the letters LT. This shall also mean that you will need to put more pressure on inflation compares to the normal tires.

Here’s a video with all the information you need.

Tire Width

tire size explained

This is basically the number that tells you the width of the tires. This is usually measured in terms of millimeters and it usually a measurement from one side to the other. These first three letters will refer to the width of the tire. For example in the sample above, the tire width is 215.

Find out more here.

Aspect Ratio

how to read tire size

The aspect ratio refers to the height of the cross-section of the tire to its width. This is a two-digit number that is usually slashed after the width of the tire. For example, you can say that the size of the tire is P215/65, which means its width is 215 and has a 65 aspect ratio.

The 65 means that the tires aspect ratio is 65% of the width of the tire. Now, when you have a very big aspect ratio, it means that your sidewalls are very big as well.

Construction

tire size

For the tire above, it is represented by the letter R. This means Radial and it means that the layers of the tire run radically across it.

Find out more here.

Wheel Diameter

what do tire sizes mean

The wheel diameter is the measurement of the wheel from one side to the other. This is a measurement that helps you understand the wheel size that the tire shall fit. A tire with a width of 15 means that the tire should feet into a wheel of 15” in diameter.

This video tells you more about it.

Load Index and speed rating

understanding tire sizes
Image: thevehiclelab

The main function of this measurement is to tell you the amount of load the tire is able to hold when it is at maximum inflation. This is available on the sidewall of the tire and it is available in both kilograms and pounds.

The speed rating on the other hand represents the maximum speed capacity for the tire. In most cases, the ratings are usually matched with the maximum capacity of the tire. So, for example, care with an H- speed rating, shall have a maximum speed capacity of around 130 mph, or 210 km/h.

Have a look at this video that explains how to understand the load index much better.

Traction grades

  • AA
  • A
  • B
  • C

These are the temperature grades and they are used to indicate the ability of your tire to withstand the heat that is destructive. A tire has the highest temperature grade and can be able to operate at very high speeds.

Temperature Grades

The speed

A

More than 115
B

Can only manage between 100 and 115

C

Can only manage between  85 and 100

Most manufacturers will base this on standardized government tests that can best help to predict the expected wear of the tire.

Additional Parameters

There are usually additional parameters for the bigger vehicles such as the 2 or 3 wheeled busses and agricultural vehicles. These ones usually indicate different purposes. For example, you may find the letters M/C on the tires which means motorcycles only.

So, a tire number like this one. P185 / 60 R14 M/C 82H, has all the parameters we have outlined above, but additionally, this is meant for a Motorcycle.

Other letters you may find would represent;

  • The brand name of the tire
  • The performance criteria for the tire
  • The winter tire symbol
  • The UTQG ratings.
  • The Dot tire identification
  • The Maximum inflation limit for cold.

Conclusion

I sure do hope that you can now accurately identify what each letter on your tire means, and that you are no longer curious and wondering what all the letters represent. Now, additionally, you must take good care of your tires by exercising the following safety precautions;

  • Rotate them regularly – rotating the tires by putting the front in the back will ensure that the front tires do not wear out faster than those in the back, as the front ones are used mostly when you are turning.
  • Constantly check on the pressure – every vehicle comes with specifications on the amount of pressure it should hold on each tire. This is usually based on the suspension, the weight, and the steering design. Always ensure that your tires have the right amount of pressure.
  • Check on the treads of the tires – the treads are essential for ensuring that you maintain the right traction on the road, especially when its wet weather and the roads are slippery. With time, the treads of your tires will wear out, so keep checking on them.
  • Align your wheels each year – when you hit potholes and bumps on the roads, the wheels usually get out of alignment. This is pretty common, and when they are not aligned, this reduces their lifespan. Make a point of aligning them each year.

Please feel free to contact us if you happen to have any other questions regarding your car’s wheels. We are here to help you with all of your problems. All the best and make sure you drive safe.

The post What Do Tire Size Numbers Mean? Understanding Your Tire Sizes appeared first on Smart Motorist.


source https://www.smartmotorist.com/how-to-read-tire-size

Monday, June 22, 2020

13 Easy Steps to Plug a Tire

Having a flat tire can make any road trip a horrible experience, especially if there is no tire repair service around. Sure, you can use the spare tire in a pinch, but there is always a risk of a second puncture.

And, this often happens – in the U.S. alone, approximately seven punctures happen each second, or 220 million a year.

Fortunately, there is a way to plug the puncture on the tubeless tires on your vehicle. Moreover, with the right instructions, you can do that while stranded.

To assist you, I prepared these 13 easy steps on how to plug a tire and hit the road in no time!

Will Plugging Help to Eliminate the Leak?

Will Plugging Help to Eliminate the Leak

Before you even start working on your tires, you first need to evaluate the puncture. Most punctures can be plugged, specifically those from stones, nails, and screws.

Nevertheless, larger punctures and blowouts are much harder to plug. In some cases, even an experienced tire technician won’t be able to save the tire. Well, at least not without consequences.

As a general rule of thumb, you can safely plug a passenger-car tire with a puncture that’s up to 1/4-inch (6mm) in diameter. Repairing more massive leaks should be avoided.

Additionally, you can only plug a puncture in the middle of the tread of the tire. If the tire is punctured on the sidewall, or the outboard shoulders, you should avoid plugging it.

Otherwise, you risk damaging the tire even further and risk your safety, the safety of the passengers, and other traffic participants. Moreover, an improperly plugged sidewall can result in a blowout.

You should also know that a plug will weaken the tread of the tire. This means that you can’t plug the tire to eternity – 4-5 plugs should be the maximum amount.

How Long Does It Take to Plug a Tire?

It depends on how crafty you are with tools and the knowledge of cars you have. I can do that in 15 minutes, and I’ve seen people do it even faster. However, it shouldn’t take more than 45 minutes – that’s the worst-case scenario.

The Tools and Supplies You’ll Need

The Tools and Supplies You’ll Need

Obviously, you can’t plug a tire without the proper tools and supplies. For most of the work, you can use the tools provided in your car. However, you’ll need specialized equipment to plug the puncture.

Thankfully, you can easily find tire repair kits online or at the nearest gas station. They are very cheap nowadays, even the high-quality ones. For that reason, it’s best always to keep a kit in your trunk – they don’t take up too much space.

Most tire repair kits will have everything you need to plug the tire. These include a set of pliers, a razor blade, spiral reaming tool, lubricant, repair cords, insertion tool, and valve stem tool. If the kit only includes repair cords and valves, make sure that you purchase the other tools separately.

You’ll also need tools to remove and place the wheel back again. These include a jack for lifting the vehicle and lug wrench to remove and place the tire. Your vehicle should already have these tools in the trunk.

To locate the puncture more quickly, you might also want to keep water and some sort of soap. Applying the solution to the tire will immediately show you where the hole is.

Finally, you might want to keep an air compressor around. That way, you can inflate the tire even when you’re stranded somewhere.

Got it? Then, follow all the steps below, and you should be driving again in a flash.

Step by Step Guide on How to Plug a Tire

Step 1. Jack Up Your Vehicle

Jack Up Your Vehicle

Before jacking, make sure that you loosen the lug nuts – it’s much easier that way. Then, use the jack provided by the car manufacturer and jack up the vehicle.

Make sure that you position the jack on the jack point that’s closest to the damaged tire. If you’re not sure, you can find the jack point in the user manual.

Please ensure that you don’t crawl under the vehicle. The jack isn’t very secure for you to do that. Also, use protective gloves as a safeguard.

Step 2. Remove the Wheel with the Flat Tire

Remove the Wheel with the Flat Tire

Unscrew the lug nuts on the wheel using a lug wrench and remove them altogether. Place them in a safe place. Then, remove the wheel with your hands carefully.

Step 3. Locate the Puncture

Locate the Puncture

After you removed the wheel, take it to a safe place, and locate the puncture. The easiest way to do this is by spraying a water-soap solution on the tread of the tire. You should be able to see bubbles forming on the location of the puncture.

After you spotted the hole, clean the area from the remaining liquid. Then, mark the hole so you can easily spot it later.

Step 4. Remove the Sharp Object (If Any)

If there is any sharp object left on in the opening, use the pliers to remove it completely. Be sure that you remove even the smallest item. Otherwise, there is a risk of another puncture when you start driving again.

Step 5. Remove the Valve Stem Core

You can deflate the tire using a small object by inserting it into the valve stem core. However, I recommend removing the valve stem core completely using the valve stem tool.

That way, the tire will deflate fully, and it will be much easier to insert the plug. Ensure that you keep the valve stem in a safe place, or install a new valve stem.

Step 6. Ream the Puncture Opening

Ream the Puncture Opening

This is where the fun part begins. Use the reaming tool that comes in the tire repair kit and ream the hole. This will expand the opening and make it easier to apply the plug cord.

The hole is big enough when the reaming tool moves freely up and down. Don’t overdo it, though – the inside of the opening should be rough, so the plug sticks to it.

Step 7. Apply Lubricant or Contact Cement on the Hole (Optional)

Apply Lubricant or Contact Cement on the Hole (Optional)

For a smoother application of the repair cord, most tire repair kits provide a lubricant or contact cement. Apply the lubricant over the opening and on the repair cord itself.

Step 8. Thread the Repair Cord Inside the Puncture

Thread the Repair Cord Inside the Puncture

Now it’s time to apply the plug repair cord and close the puncture. Use the insertion tool provided in the tire repair kit. This tool has an “eye” at the top, where you should put the repair cord. Ensure that the cord is symmetrical on both sides.

Then, using the insertion tool, start inserting the cord inside the hole. It might need a strong force, but you should also be careful not to overdo it. You don’t want the whole repair cord entering the hole – leave about 1/2 inch visible over the puncture.

Step 9. Remove the Reaming Tool

Remove the Reaming Tool

The next step is to remove the reaming tool without removing the plug. Do this with a quick upward vertical motion, while you hold the platform against the tire. If the tool doesn’t have a platform to hold onto, a sharp vertical pull should be enough.

Step 10. Cut the Remaining Plug Cord

Cut the Remaining Plug Cord

You surely don’t want to drive with plug cords hanging from the tread of the tire, do you? Use a sharp knife or a razor blade to trim the remaining plug cord. Of course, make sure that you don’t damage the tread of the tire – a small cut can start to expand as you’re driving.

Step 11. Inflate the Tire

Inflate the Tire

Put the valve stem core back and then inflate the tires. Ensure that you use a tire pressure gauge and inflate the tire to the value provided by the vehicle manufacturer. Otherwise, you risk premature tread wear, reduced overall performance, and worse comfort.

Step 12. Make Sure that the Hole is Properly Sealed

Make Sure that the Hole is Properly Sealed

Spray the water-soap solution over the freshly-plugged hole. If no bubbles appear after a minute, then it means that the gap is sealed correctly. If the hole isn’t sealed correctly, you might need to start over again. Never drive with a tire that loses pressure!

Step 13. Put the Wheel Back on Your Vehicle

Put the Wheel Back on Your Vehicle

Install the wheel back on the car. Tighten the lug nuts using the lug wrench. Then, lower your vehicle carefully and remove the jack. Retighten the lug nuts again in a cross pattern for maximum safety.

Safety Precautions

Each time you work on your car, I recommend doing some safety precautions. To avoid injury, use working gloves and sturdy footwear. For better comfort, you might want to put a tire changing mat on the ground.

If you plug the tires while on the road, make sure to park your vehicle in a safe place. Then, put a reflective triangle at least 150 feet behind the car and turn on the hazard lights.

Conclusion

Plugging a tire requires many steps, but once you get the hang of it, you’ll do it in a heartbeat. Just make sure that you always follow the steps closely – skipping an action might result in an improperly sealed puncture.

Moreover, if you have other questions or something from this article is unclear, please do not hesitate to ask a question in the comment section below. And, if you found this article helpful, share it with the world – it will help us produce more quality articles in the future. Good luck!

The post 13 Easy Steps to Plug a Tire appeared first on Smart Motorist.


source https://www.smartmotorist.com/how-to-plug-a-tire